ZSNES Tutorial
⚠️ This tutorial is archived and no longer included in the main navigation. This emulator is too old and I do not recommend it for modern devices.
- About ZSNES
- Should you use ZSNES?
- Installation
- Possible errors
- Setting up the keyboard or gamepad
- Loading a game
- Q: IDirectDraw7 CreateSurface failed?
- Bringing back the ZSNES menu (ESC)
- Moving around the ZSNES window
- Full screen
- Video modes
- Screen renders
- Save states
- Capturing screen shots & sprites
- Extracting SPCs
- Recently played games list
- Faster!! ZSNES' fast forward
- Enabling SNES Mouse, Super Scope & LE Gun
- Using Game Genie & Pro Action Replay
- Finding cheats on the web
- In-game cheat search
- Netplay
- GUI Options
- Game Keys
- Q: The graphics are refreshing so slow!
- Q: Upon load I get a 'bad checksum' error!
- Q: My game freezes at a specific spot!
- Q: Can I transfer my saves to another SNES emulator?
- Q: ZSNES isn't saving anything!
View this guide on Google Docs to:
- Save as PDF or any common doc format
Share
About ZSNES
ZSNES has been around since the 90s! It was the first popular SNES emulator. Hence, ZSNES was the first emulator for many. It holds a precious spot in the hearts of all classic gamers. It's a good, easy-to-use emulator with lots of neat features. Unfortunately, ZSNES hasn't been updated since 2007.
Note: ZSNES has a known security exploit. It's possible for a ROM to redirect you to a web page. Let me be clear: this only means a security exploit has been found. This does not mean that there are now ROMs out there in popular ROM sites waiting to infect your PC with viruses via ZSNES. There is no evidence of any victims of malicious intent with this exploit. Besides, ZSNES is a dead emulator. I highly doubt hackers would ever bother using it as a vessel to spread viruses.
*If you would like to download ZSNES, I have it on my emulators page.
Should you use ZSNES?
With all the emulator offerings as of 2026, should you use ZSNES? Haha well, probably not? ZSNES is old. There are lots of options for Super Nintendo emulation. If your computer can handle a CPU heavy emulator, BSNES is the #1 SNES emulator for its cycle-accurate emulation. RetroArch is a popular multi-system emulator that supports multiple cores (emulators) for SNES emulation. Snes9x isn't bad if you want a standalone emulator that 'just works out of the box'.
ZSNES does have something that all these other fancy emulators don't have: nostalgia! ZSNES is still the king that started it all. If perfect cycle-accurate emulation doesn't matter to you, then ZSNES is still fine to use. If it's just ZSNES's GUI that you're in love with, you may want to try ZMZ. It's a version of Snes9x but with the same exact look and feel of ZSNES. It also doesn't have the security exploit (mentioned above).
Installation
ZSNES is a standalone program, so it does not have an install wizard. Installation is simple: just extract ZSNES from its zip file. Not sure how to extract zip files? Here's a video tutorial showing you how: how to unzip files on Windows.
IMPORTANT! ZSNES must be placed in a common folder on your computer. I recommend Documents, Downloads, or create a folder on your desktop. If you place ZSNES somewhere else on your main C drive, then you may be restricting it to read-only access. Doing so prevents ZSNES from saving anything.
To open ZSNES, double-click on ![]()
Possible errors
- It doesn't support my color! The error message: “ZSNESw does not support 24bit color. Please change your resolution to either 16bit or 32bit color”. To correct this, right-click on the ZSNES exe and left-click on Properties. Click on the Compatibility tab. You will arrive here . Put a check in Reduced color mode, then select 16-bit color. When you're done click Apply then OK.
- DirectX?! If you get an error that says something about you need a higher version of DirectX then just install the full DirectX package (don't forget to restart your computer after installation).
- Just a black square! If you get nothing but a black square then just press Alt+Enter to bring ZSNES to full screen.
- The screen is purple and distorted! Your screen may look like this in window mode. Just press Alt+Enter to bring ZSNES to full screen and it'll look fine.
Setting up the keyboard or gamepad
-
Click on the Config menu then Input.
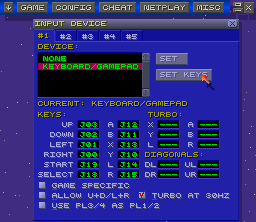
- You'll arrive at the screen as shown in the screen shot to the left. Click on KEYB/JOYSTICK then click on the SET KEYS button.
- A tiny window will pop up asking you to press the button for the corresponding SNES button. You can press any button you want. If you have a gamepad then press the buttons on the gamepad. Gamepad buttons have a “J“ then a number (as shown in the screen shot).
- You could also set up turbo buttons. Click on the “---” then click on the button you want to be turbo.
- If your gamepad has extra buttons, I recommend making use of them as turbo buttons.
- If you want to set up the buttons for Player 2 then just go Input #2.
Loading a game
Note that you can place your games wherever you want. Typically, people place them in the same folder as ZSNES.
To load a game:
-
Click on the Game menu, then Load.
- If you placed your games in the same folder as ZSNES then you will see them now. If you placed your games in another folder then you will have to search for it manually with ZSNES's DOS-like file browser. To do so, just click on the folder names; “..” brings you back one directory.
- Double-click on a game to play it, or highlight it (using the arrow keys) and press Enter.
Q: IDirectDraw7 CreateSurface failed?
Upon loading a game with ZSNES, you might receive the following error:
IDirectDraw7::CreateSurface failed
Make sure the game you're trying to load is actually a SNES ROM. SNES ROMs are in “smc” or “fig” format. If your ROM is in a zip file, open it and make sure it's smc or fig.
The only thing you can try to resolve this is to install DirectX (don't forget to restart your computer after installation).
If installing DirectX does not make the error go away then you're out of luck. There's no way to fix this. This is an issue with your computer, not ZSNES. Maybe your computer is too old or you have a cheap, generic video card.
Bringing back the ZSNES menu (ESC)
Pressing the ESC key during gameplay pauses the game and brings back the ZSNES main screen with the menus. Press ESC again if you wish to return to the game.
Moving around the ZSNES Window
Click & hold on the following red areas to move ZSNES when it is in Window mode.
![]()
Full screen
Simply press Alt+Enter to bring ZSNES to full screen mode. Press it again if you wish to return to window mode.
Video modes
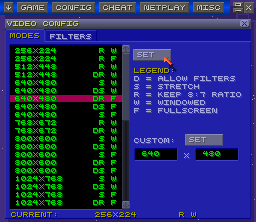
Go to the Config menu then Video. Notice the list in the “Video Modes“ box. These are all the resolutions ZSNES can enlarge to. Here's what each stands for what:
- 640x480, 768x672, 800x600, 1024x768: These are desktop resolutions.
- WIN or W: Windowed.
- FULL or F: Full screen.
- S: If you choose a resolution with “S“, games will stretch to fill the screen.
- R: If you choose a resolution with “R“, games will not stretch to fill the screen. They will appear in their true screen size.
- D: If you choose a resolution with “D“, you'll be able to use screen renders.
So if you're new to ZSNES, I bet you're thinking “Well what the heck does all this mean to me? Get to the point!” Okay okay. First, I need to point out that ZSNES comes out of the box (or zip file, rather) set to “640x480 DR FULL” when you enter full screen mode. To enjoy the full potential of ZSNES, set it to “800x600 DS F“. Just click on it and click on Set. What this does is stretch ZSNES to fill the screen and allows you to use screen renders.
If you're wondering “Why is 800x600 DS F the best?? There are so many other resolutions!” Well, ZSNES doesn't do anything else special on resolutions higher than 800x600. Besides, setting it to higher resolutions may cause ZSNES to run slower.
Screen renders
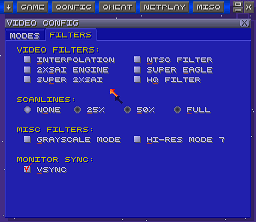
- Bring ZSNES to full screen if you haven't already. And beforehand you need ZSNES set to “800x600 DS F”.
- Click on the FILTERS tab. You'll see an option for 2xSai Engine, Super Eagle Engine, Super 2xSai Engine (Eagle and 2xSai), Interpolation, Scale2x, and Hq2x. Put a check next to one and play a game for a while; see which screen render you like the best.
The filters
Here is some explanation and samples for these filters:
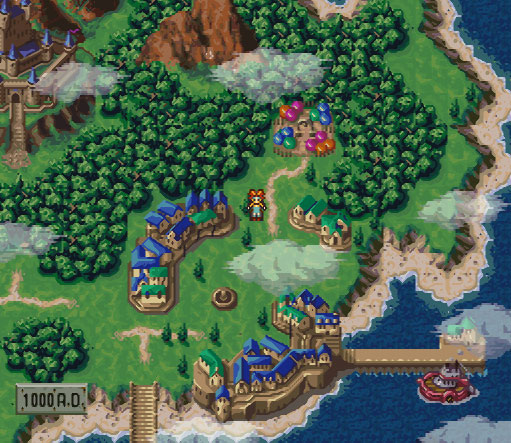
- 2xSai Engine: smears pixels together with a slight blur, and does so diagonally in attempt to round every edge. Sample:
- Super Eagle: same as 2xSai, but the screen is less blurred and not all the edges are rounded off. Sample:
- Super 2xSai: combines 2xSai and Eagle.
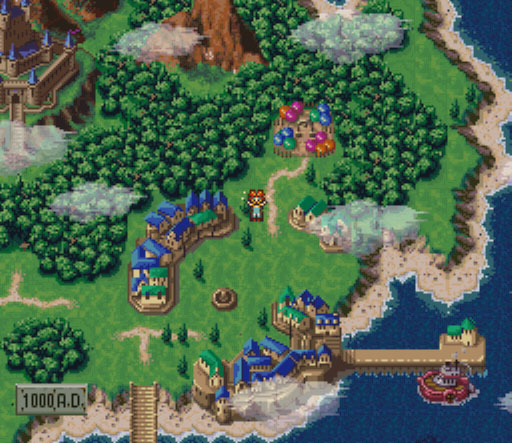
- Interpolation: a basic blur filter. Sample:
- HQ Filter: sharpens blacks & whites (which are normally outlines) and smears together gradients (like Photoshop's “Smart Blur” filter). An advanced filter!
- NTSC Filter: this filter simulates a poor quality television! It's neat! It even flickers like a TV. You can't get more nostalgic than this!

Save states
Save states is a feature that saves the exact spot you are in a game.
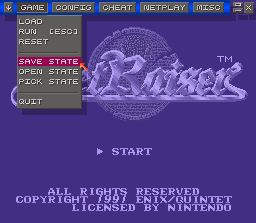
- Once a game is open, go to the Game menu then SAVE STATE.
- To recall your saved state, click on Open State within the Game menu.
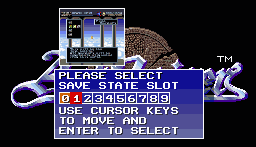
- ZSNES allows you to save up to 10 different save states for a single game. To choose a save state slot, click on PICK STATE within the Game menu, then choose the slot #1 you want to use.
- To make things easier for you, you can set a keyboard button to save and load your states within the Game Keys menu.
Side Note: All the RPG shrines in my FantasyAnime.com offer complete collections of periodical game saves. With them, you can continue at any significant point in the game. I offer a Game Saves Tutorial where you can learn more about how to use somebody else's saves. You can also learn about how to transfer saves between other emulators.
Save states with the F3 key
Pressing F3 during gameplay opens up a the Save State Slot thumbnail viewer. Just press the left & right arrow keys to move along the track, then press Enter on the save state slot you want to use.
And I need to point out this important note:
Save states are different from internal saves
If you're new to emulation, I might be leading you to think that save states are what you're supposed to be using with ZSNES to save your progress. All video game emulators (not just ZSNES) offer two ways to save your progress: internal saving and save states. Internal saving is when you arrive at a save point within the game, to save your progress as if you're using a real SNES. You can use either internal saving or save states to save your progress. I recommend using both methods so that you always have a backup.
If you opted to use internal saving, remember that you load that save from within the game when you arrive at the title screen (like on a real SNES). You don't load an internal save from the File menu. Only save states can be saved & loaded from the File menu.
Capturing screen shots & sprites
- If your intention is to capture only sprites, disable layers first (look further down for directions).
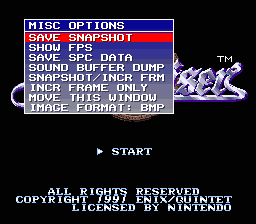
- The first step is to press F1 to bring up the “Misc Options”.
- By default, the red highlighting is on SAVE SNAPSHOT so just press Enter. By default, ZSNES will save the screen shot as BMP (bitmap). You also have the option to save it as PNG. PNG is a file format like GIF, but it can hold a lot more colors, though this makes the memory size a bit larger.
- To save as PNG, move the red highlight to IMAGE FORMAT: BMP then press Enter. It will change to “IMAGE FORMAT: PNG”. If you want to change it back to BMP then just press enter on it again. FYI, PNG causes a slight color distortion. If you're just capturing screen shots to have screen shots, then use PNG. If you plan on editing game graphics and such, then use BMP to ensure you're getting the best quality graphics.
Disabling layers (essential for sprites)
The graphics of all Super Nintendo games are made up of five layers: four graphics layers and the sprite layer. You can turn any of these layers on an off. Keyboard keys 1, 2, 3, and 4 turn the graphics layers on/off. Keyboard key 5 turns the sprites layer on/off.
How is this useful for capturing sprites? It's much easier to erase the background in a graphics editor (such as Photoshop) when it's solid black.
Extracting SPCs
Don't know what SPC's are? Then check out my Extracted Music tutorial. Anyway, when the game you're playing is playing a song that you like, press F1, move the highlight to SAVE SPC DATA, then press Enter. The SPC will save into the directory where ZSNES is in.
Recently played games list

See the down arrow in the shot toward the right? ZSNES keeps track of all the 10 games you've played before. Clicking on a game in this list automatically loads it. If you deleted the game or moved it to another folder then nothing will happen.
Faster!! ZSNES' fast forward
Impatient? Hold down the “~” key to fast forward. Optionally, in the Game Keys screen you can configure the buttons that increase and decrease the fast forward speed. It's “+FRAME RATE” and “-FRAME RATE”.
Enabling SNES Mouse, Super Scope & LE Gun

- Click on the Config menu then Devices.
- Click on the bullet next to the option you want, then click on the X. “Port 1” means player 1 and “Port 2” means player 2. You could also press the 6 key to switch between them.
Using Game Genie & Pro Action Replay
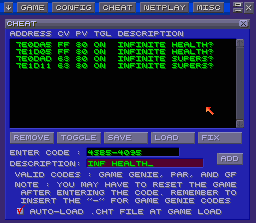
- First, open the game you want to enter cheats for.
- Click the CHEAT menu then ADD CODE.
- The cursor will automatically be blinking in the “Enter Code” box. Type in the code with no spaces. Press the Tab key when you're done.
- Type in a short description for the code. Now click the ADD button, the code is now added.
- Click on the X. Now you must reset or reload the game for the code(s) to take effect.
- If your cheat doesn't work then either you typed it wrong or it's a bad code. Don't expect every cheat code on the net to be a working code. If you want to disable the code then just go back to the Cheat window and double-click on ON, it will change to OFF. If you want to delete the code then just click on it then click on the Remove button.
Note: You can use cheats with multiple lines. You need to enter each line one at a time. I suggest you name each line like “INF WEAPONS 1”, “INF WEAPONS 2”, “INF WEAPONS 3” so it can be easier to keep track of the cheat. Again, if the cheat doesn't work then that means you either typed it wrong or it's a bad code.
Finding cheats on the web
You have a few options.
- There are websites that contain complete archives of Game Genie and Pro Action Replay codes. GameGenie.com seems to be the best resource for that.
- You can download a ZSNES CHT file that already contains a whole bunch cheat codes. A CHT file is where ZSNES stores your cheats for a single game. Zophar's Domain has the largest CHT file archive. To use a CHT file, simply rename it to the name of your ROM (the same process as patching a ROM with an English patch).
- The next best source is Google. The best search keywords to use is to type the name of the game then “game genie”. Like so: “super mario world game genie”.
In-game cheat search
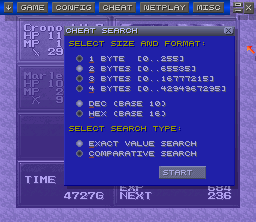
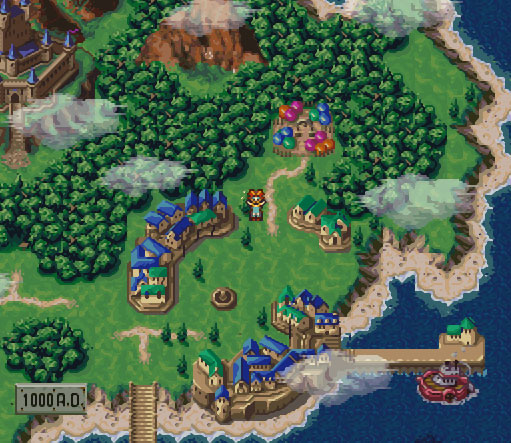
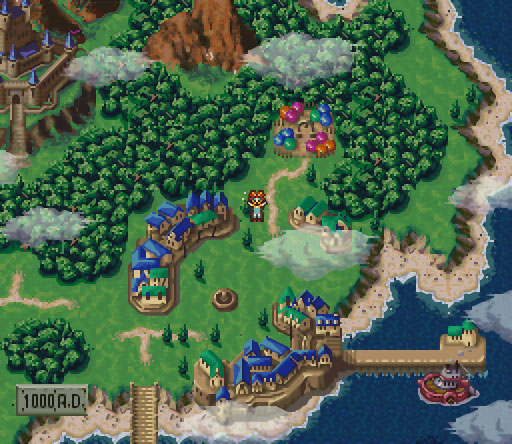
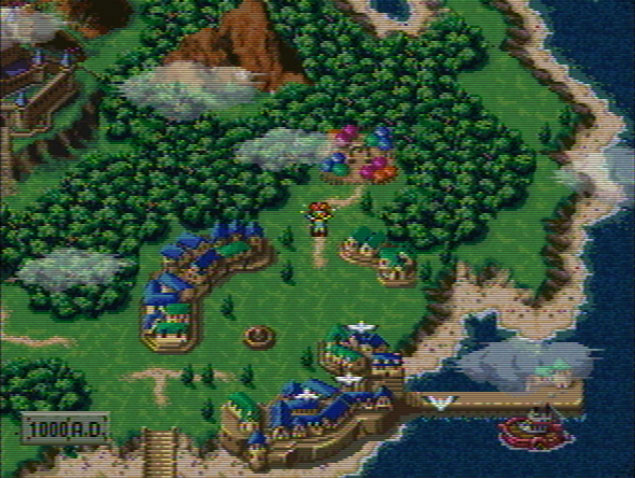
ZSNES has the ability to find numbers in a current game and replace it with whatever number you want. Due to the vast amount of numbers games have, this feature pretty much can only be used in RPGs to change your money. For the walkthrough of this cheat search feature, I will be hacking into Chrono Trigger, changing 4727G to 9999G.
- First, open the game you want to hack.
- Click the CHEAT menu then SEARCH.
- You'll arrive at the screen shot you see toward the left. If the money you want to hack is under 65,535 then put the bullet next to the “2 bytes” option. If it's larger than that then put the bullet next to the “3 bytes” option. In my case, I chose “2 bytes” since I currently have 4727G. Click START to continue.
- Next, you'll arrive at this screen . Under “ENTER VALUE” put the amount of money you currently have. In my case, I entered 4727 for my 4727G. Click SEARCH to continue.
- Next, you'll arrive at this screen . This screen tells you how many of the numbered you entered was found. In my case the search found 2 variables of “4727” within my current game in Chrono Trigger. If the search found more than, oh, maybe 2-3 variables of the numbered you entered, then the number you're looking for isn't large enough. The more money you have, the greater the chance you can easily change it using this cheat search feature. Anyway, click VIEW to continue.
- Next, you'll arrive at this screen . This screen lists the variables the search found. In my case, those two variables of “4727” are listed. The next step is to choose a variable and change it on the next screen to 9999 or whatever else you want. Ah, but which one changes gold? Games only have one variable for money; ZSNES won't be able to tell you what it is. Through trial and error, you have to try each variable. But usually, the first variable is the correct one. Once the variable you want to change is highlighted (by default the first one is highlighted) click ADD to continue.
- Next, you'll arrive at this screen . This is the sexy screen is where you change the variable to whatever you want. Under “ENTER NEW VALUE” go ahead and type whatever new number you want. In my case I put 9999. Ah, but note that the new number you put can't exceed the “MAX VALUE”, which is listed further down. Enter a short description in “CHEAT DESCRIPTION” if you wish, but you don't have to. Click ADD to continue.
- Next, you'll arrive at this screen - the cheat codes screen. Your modified variable will be there as an automatically-generated ProAction Replay code.
- Close the screen and go back to your game to see if the variable has changed. If you paused the game at the status screen, you need to refresh it. Close and re-enter the game's status screen so that the modified variable will show. Click here to see my 4727G replaced to 9999G. Ah, but even after these steps your money variable has not changed, then that means you need to go back to Step 7 and choose a different variable.
Netplay
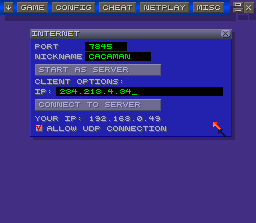
Netplay allows you to play against a friend over the Internet.
- First, you both must be connected to the Internet.
- Both of you need to go to the Netplay menu then Connect and tell each other your IP. Punch in your friend's IP into the IP box.
- Type in a nickname for yourself in the “Nickname” box, then click on Connect to Server. Your friend must also click to Connect to Server once he/she enters a nickname. ZSNES will tell you if the connection was successful. If it doesn't work then one of you has a firewall and that person won't be able to use the Netplay feature.
GUI options

Within the MISC menu, you will find GUI OPTIONS. Here you can alter the appearance and attributes of the ZSNES GUI.
I recommend playing around with these options because there might be something here that'll improve your ZSNES experience. I suggest you enable SNOW EFFECT because it's nifty!
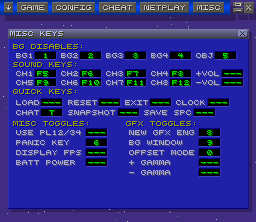
Misc keys
Within the MISC menu, you will find MISC KEYS. Here you can alter the key command of most of ZSNES's features. To do so, all you need to do is click the black rectangle next to the game key, then press the new keyboard key (or gamepad button). See it below:
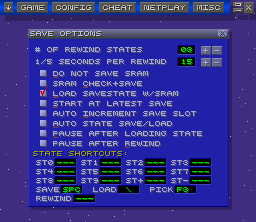
Oh, there's more you can customize! The Misc Keys screen got crowded, so in the latest version of ZSNES they moved certain GUI Options to other areas. If you go to CONFIG then SAVES, here you can customize the game keys for ZSNES's sexy save features. See it below:
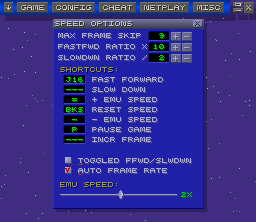
If you go to CONFIG then SPEED, here you can customize the game keys for ZSNES's sexy speed features. See it below:
Q: The graphics are refreshing so slow!
Are you finding that the graphics aren't scrolling smoothly? It could simply mean ZSNES isn't refreshing the screen according to your monitor. To resolve this, go to the Config menu then Video. Put a check in VSYNC (short for vertical sync).
Q: Upon load I get a 'bad checksum' error!

This comes up when you play a ROM hack or fan translation. It's normal; everything's fine. It comes up because the size of the ROM increased due to the ROM hacking. It's a misleading error message because that's not a big deal. If you're having problems with your game right now - the bad checksum error has nothing to do with it.
Q: My game freezes at a specific spot!
If your game keeps freezing at a specific point, then you are a victim of the infamous game freeze. It's rare! I hate to be the bearer of bad news, but there's nothing you can do to fix this problem. Restarting the game from the beginning won't help either. Why does this happen? Well, you can't expect every game to work 100% perfectly with every version of every SNES emulator.
There's hope if the game you're playing is an RPG. If you've been using in-game saving you could copy over the SRM file to another SNES emulator to continue where you left off.
Q: Can I transfer my save to another SNES emulator?
ZSNES lets you save your game in two ways:
- State States: ZSNES's save states can be transferred Snes9X. That's it; they can't be transferred to other emulators.
- Saved RAM: This is the internal save in RPGs. They have an SRM file extension. View this for a clearer picture . SRM files are what can be transferred to other SNES emulators. You can literally just copy & paste the ROM and the SRM file over to the other SNES emulator and it'll pick it up. Although some SNES emulators want to be organized. They require you to dump the SRM file in a designated saves folder. I have a Game Saves Tutorial where you can learn more about transferring saves. You could also learn about using somebody else's saves.
Q: ZSNES isn't saving anything!
If you're using ZSNES for the first time and you're finding that you have all these problems:
- Save states aren't working. You save a state, then when you try to reload it nothing happens.
- In an RPG when you save your game at a save point and close/re-open ZSNES, you find that the save is lost.
- Emulator configurations that you changed such as adding a screen render aren't saved. When you close/re-open ZSNES, you have to make those configuration changes again.
Then your problem is that you currently have ZSNES in a read-only location on your computer. You must move ZSNES to a more common location such as Documents, Downloads, or a folder on your desktop.