
 Back
Back

How to Play ROMs on Your TV
Want an authentic experience?
We've all played video game ROMs on a computer at some point. You may have even played ROMs on your phone. But yet, have you tried a more authentic experience and played ROMs on your TV? There are many ways to accomplish this with such solutions as using computers, minicomputers, set-top boxes, and other devices. I'd like to review with you all the different ways I know of to play ROMs on your TV :)
New to emulation?
This article was written for people who know what video game emulation is and have used emulators before. If you're completely new to this, I have written other articles that introduce emulation and explain what it is. Check out my emulation help site: Video Game Emulation for Newbies.
Pro Tip: I also want to highlight that several options listed on this page support RetroArch. Currently, it's the #1 multi-system emulator, supporting well over 40 video game systems. RetroArch is available on every operating system, including TV-based OS's. It has a bit of a learning curve. Fortunately, I have tutorials to help: RetroArch on Windows & RetroArch on Android. Its interface is the same on every OS, so master one and you master them all!
Option #1 - Using a Laptop Computer

I think this is the easiest option - simply connecting a laptop to your TV to play ROMs. Any modern laptop is equipped to do it.  You only need a long HDMI cable for this (probably 10-25 feet). Or a normal length HDMI cable along with a Bluetooth keyboard and mouse.
Output connection types for connecting a laptop to a TV vary. Newer laptops use USB-C (or USB 3.0), so you'd need to purchase a USB-C to HDMI cable. Other laptops already come with an HDMI port, so you'd need a normal HDMI cable.
On the subject of laptops, I highly recommend Chromebooks. Chromebooks are cheap $200-400 US laptops that perform as good as a Windows or Mac laptop of double the price. They don't heat up like a normal laptop so you can keep them on your bed and not worry about heat buildup. The trade-off for this performance on the cheap is due to having a watered-down OS that only runs Google Chrome.

What's awesome about newer Chromebooks is that they added support for Android apps from the Play Store. That means all of Android's video game emulators are available to you. You could install RetroArch, giving you the ability to emulate any video game system. If you want a visual organization for all of your emulators and ROMs (like how games are selected on the SNES Mini), you could install the Dig Front-End.
In terms of speed, I would say a standard Chromebook can handle from NES up to PlayStation 1, N64, NDS, and PSP. Beefier Chromebooks could possibly handle up to PlayStation 2, Dreamcast, GameCube, and Sega Saturn.
Any model Chromebook should be fine. Just make sure it has the Play Store (it'll mention it in the description). Here's a good collection of recommended models: Cnet - Best Chromebooks. Or poke around Amazon for cheaper ones. I don't recommend the ones below $100.
Are there any drawbacks with using a laptop? Well, there's a couple. You need to configure your gamepad with every emulator you install (just like on Windows). Navigating the emulators needs to be done manually with the laptop in front of you or with a Bluetooth keyboard/mouse. It's not like an Android box or RetroPie (explained below) where you can navigate a single interface with ease using only your gamepad.
Also, Chromebooks (and other budget laptops) typically only come with 32 GB. That's not enough space for hundreds of ROMs plus storing your normal files. The upside is that you can easily solve that problem by using external storage such as USB thumb drives or external HDDs.
Final thoughts: A laptop is great if you want to invest in a productivity oriented multi-purpose device. Given the steps involved to set up emulators and (possibly) be dealing with limited space, laptops are good for casual gamers who only intend on playing a handful of games.
Option #2 - Using an Android set-top box

The most convenient option for emulation is to use an Android set-top box. The best model is the Nvidia Shield TV Pro. Like with using a Chromebook, you're blessed with full access to Android's video game emulators.
The Nvidia Shield TV Pro goes for $200 US. The official gamepad is sold separately, but you don't need to get it because any other Bluetooth Android gamepad is supported (8BitDo's are the best).
Setting everything up on a Shield TV is the same way you'd set up emulators on an Android phone or tablet. Simply go into the Shield TV's app store and download the video game emulators you want. All of the popular video game emulators in the Play Store are present in the Shield TV's app store. All of the menus and emulators can be navigated with your Bluetooth gamepad. The “X-plore” app is recommended for moving roms around; it can extract zip files too.
The Shield TV Pro is a beast with its Tegra X1 processor. Not only can it handle up to PlayStation 1, N64, and PSP, but it can handle them with high-resolution 3D. Thanks to the Yaba Sanshiro emulator, Shield TV can even handle Sega Saturn emulation (Saturn emulation has a reputation for being CPU-heavy). And don't forget about RetroArch - install that and you'll have over 40 video game systems under one roof.
The drawback is with capacity. There's only 16 GB of space, which doesn't hold a lot of ROMs. You can, however, connect an external harddrive for extra storage. Even just a small $20 128 GB flash drive is enough to hold hundreds, possibly thousands of ROMs.

Need something cheaper? There's two I recommend. The Google TV Streamer 4K is half the price as the Shield TV. And the Onn 4K goes for even cheaper. Granted, they're not as fast as the Shield TV, but they get the job done. Like the Shield TV, they support any Bluetooth Android gamepad. In the app store you'd need RetroArch, “Downloader” (to download roms), and “X-plore” (to move them). Expanding memory on the Google TV Streamer is possible if you get a USB‑C hub with power passthrough.
Here's a rundown on these Android TV devices:
| Name | Cost | CPU | RAM | Bit | Capacity |
| Nvidia Shield TV Pro | $199 US | NVIDIA Tegra X1+ (quad-core ARM CPU) | 3 GB | 64-bit | 16 GB. Storage can be expanded via USB-C. |
| Google TV Streamer 4K | $75 US |
MediaTek MT8696 — quad‑core ARM processor with Cortex‑A55 cores (up to ~1.8–2.0 GHz) | 4 GB | 32-bit | 32 GB. Can be expanded but it's tricky. |
| Onn 4K | $51 US |
Amlogic S905Y2 Quad-core Cortex-A53 (up to 1.8 GHz) | 2 GB | 32-bit | 8 GB. Can be expanded via USB. |
Whichever device you might select, it's extremely beneficial to wrap your head around RetroArch. Once you get comfortable with that emulator and know how to set everything up, you'd be able to emulate any video game system with ease. For help, you can follow my tutorials either for RetroArch for Android or RetroArch on Windows (the interface is the same for both).
The Google TV and Onn are 32-bit. That means you're limited to using 32-bit RetroArch, not 64-bit RetroArch (called “RetroArch Plus”). This gives you less options for cores (a 'core' is an emulator within a multi-system emulator). That doesn't mean 32-bit RetroArch is a poor emulator. It still supports 40+ video game systems. For example, if 64-bit RetroArch offers 15 cores for Super Nintendo, 32-bit RetroArch only offers a few. Those few SNES cores still emulate SNES perfectly. Unless you're an emulation purist, you're not missing out on anything important.
Final thoughts: The Shield TV Pro offers power at a great value. Or, you can settle for a Google TV Streamer which is half the price and not as beefy. Android set-top boxes are very convenient. You can easily swap between watching TV or playing games. Plus they offer support for 4K streaming.
Option #3 - Using an Apple TV

If you're an avid Apple user, and you read the above and thought, “Ew gross, I wouldn't touch an Android set-top box with a 10-foot stick!” Well, you're in luck! As of April 2024, Apple decided to allow video game emulators in the iOS App Store and in the Apple TV App Store. If you already own an Apple TV, you now own a powerhouse gaming system that can emulate any classic gaming system.
The Apple TV 4K goes for around $199 US. You can buy it from Apple.com or from local retailers. You'd also need to purchase a Bluetooth gamepad (8BitDo's are the best).
In terms of processing strength, the Apple TV is slighter faster than the Google TV Streamer. Hence, it can handle emulating up to PlayStation 1 and N64 with beautifully upscaled 3D graphics. Although I'm not entirely sure if it can handle CPU-heavier systems, such as Sega Saturn and PSP. For internal storage, Apple TV comes with 64 GB - that can hold hundreds of ROMs!
At the time I'm writing this, there are two emulators available for Apple TV: RetroArch and Delta. RetroArch is a superb multi-system emulator that supports over 40 video game systems. Delta only supports 6 video game systems. RetroArch is clearly the better option. RetroArch, though, has a bit of a learning curve due to all the features it offers. You need to have some patience and take the time to learn how to use it. Apple TV uses 64-bit architecture, so you have the benefit of using the 64-bit version of RetroArch (offers more and better cores).
I don't specifically have a tutorial for RetroArch on Apple TV, but you can refer to my RetroArch for Android tutorial. They work the same and have the same inferface. My iOS emulators tutorial has some directions on how you can transfer ROMs to Apple TV.
Final thoughts: The Apple TV offers power at a great value! It even offers 4K streaming. However, you need to be patient and take the time to wrap your head around how RetroArch works.
Option #4 - Using a RetroPie

The history of the Retropie started years ago when the Raspberry Pi was released. It's the famous $35 Linux computer for tech enthusiasts. It should come to no surprise that people wanted to put video game emulators on the Pi. Hence, “RetroPie” was born. RetroPie is an easy software installation that turns the Pi into a video game system that can emulate anything! It organizes all your ROMs into categories by system in a graphical interface that you can control with a gamepad.
In terms of speed, the $35 Pi hardware is impressive. RetroPie can handle emulating all classic video game systems from NES up to PlayStation 1 and N64. N64 games are hit or miss; certain games run great (Mario 64, Mario Kart), but others lag (Golden Eye, Donkey Kong). Sega Saturn games don't run; they barely run on desktop computers so don't expect them to run on $35 hardware.
As for arcade, I believe any game up to 2005 should run fine (excluding 'CHD' games such as Killer Instinct). RetroPie lets you install multiple versions of MAME and FinalBurn (these are the best and most popular arcade emulators). Best of all, you can set a ROM to load with a specific version of MAME or FinalBurn. If you've fussed with arcade games on a computer, this is a familiar territory having to deal with different arcade emulators/versions to emulate different games.
So how do you obtain a RetroPie? Even though the Pi itself costs $35, that doesn't include the AC adapter, case, and HDMI cable. Hence, you'd need to purchase a bundle that includes all that. If you don't already own gamepads (USB or Bluetooth for PCs), you'd need to purchase those as well.
The cheapest route is to set up a RetroPie yourself. However, you could purchase a pre-setup RetroPie bundle that even includes ROMs (this could cost nearly double):

- The cheapest method: Purchase a Raspberry Pi 5 kit (around $200-$300 US) and set up RetroPie yourself following instruction videos on YouTube.
- The easiest method: People sell RetroPie SD cards already setup and pre-loaded with ROMs. They go for around $40-80 US. Make sure to buy a Pi 5 card for the Pi 5. If you have a Pi 4, get the Pi 4 card. After buying a Raspberry Pi kit, simply plug this SD card in and you're ready to go! You don't have to set anything up or download games (and you can skip reading the bullet points below).
Other notes to keep in mind when setting up a RetroPie yourself:
- Setup time: Setting up a RetroPie yourself for the first time could take around 20-60 minutes depending on how computer-savvy you are. Please don't let that intimidate you. YouTube has a plethora of videos walking you through the setup process.
- Your Wi-Fi password: The first-time setup does require a USB keyboard so you can enter your Wi-Fi password. If you don't have a USB keyboard, there are ways around this using a PC. The Wi-Fi step is important because that's how you transfer ROMs to your Retropie.
- Capacity: The Pi's (RetroPie's) capacity depends on the SD card you get. Typically, these cheap Pi bundles on Amazon come with a 32 GB SD card. That's a good enough size to hold a few hundred ROMs. If you really want a monster RetroPie that can hold every ROM in existence, you may want a 512 GB or 1 TB SD card. When purchasing SD cards, you should only purchase SanDisk or Samsung SD cards. Obscure brands are not reliable and may not work.
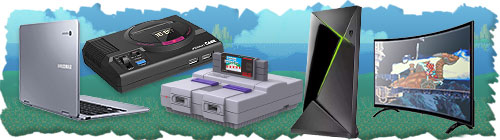
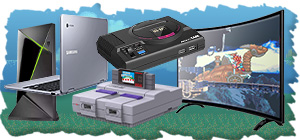
- Nostalgic cases:
 Those SNES and Genesis Pi cases I showed earlier are Retroflag brand cases. They also have a PlayStation 1 and NES cases. They go for around $15-20 US.
Final thoughts: RetroPie is the most affordable and most customizable option. RetroPie is especially strong when it comes to emulating arcade games. This is a good option for classic gaming enthusiasts who are serious about reliving the classics and want to play all games in one box. It may take some time to set up, but in the end, you get a completely customized experience with all of your favorite games.
Option #5 - Streaming from your computer

Maybe you're reading this guide and thinking, “Meh, I don't want to buy a mini system or Chromebook just to play ROMs on my TV. I like using ePSXe, Kega Fusion, ZSNES... why can't I use those on my TV?“ - you can! You can play all of your favorite desktop emulators on your TV without physically moving your computer out of your office. You can stream your computer to your TV. There are a few ways to accomplish this. I'm going to focus on the most popular method: using Steam Link.
Steam Link is an app from Steam that streams your PC or Mac to a device that has the Steam Link app. Many devices have Steam Link: any Android set-top box, Chromebooks, Rokus, Apple TV, Samsung TVs, and more. All of this is free.
Setting everything up is easy:
- Sign up for Steam and install the Steam app on your PC or Mac (a credit card isn't required for signing up).
- In the Steam app, under the “Games” tab look for “Add a non-Steam game to my library”. That's where you can add custom shortcuts to your favorite emulators.
- In the device connected to your TV (Chromebook, Roku, Apple TV, etc.), look in the app store for Steam Link. Install it.
- Next, you need to connect a Bluetooth mouse and gamepad to the device connected to your TV. That detail can be a little tricky. If you have an Android-based device, your Bluetooth mouse and gamepad needs to be supported by Android. If you have an Apple TV, your Bluetooth mouse and gamepad needs to be supported by iOS. And so on and so forth.
Steam Link does have its drawbacks. Streaming from your PC relies on your Wi-Fi's network bandwidth. Hence, there can be moments when there's a delay in button presses or experiencing sluggish video framerates. You may be stuck in a scenario where your Wi-Fi network delay makes action/adventure games impossible to play. This would result in turn-based RPGs being the only games you can play (since delays in button presses aren't detrimental to gameplay).
If you try Steam Link, and you find that your Wi-Fi network delay is very slow, it may be a sign that it's time to buy a new router. Allegedly, we need to buy a new router every five years. And by doing so, you ensure you're making use of the latest Wi-Fi technologies and the fastest speeds allowed by the Internet package with your ISP. A configuration issue is another possibility for slow Wi-Fi. Poke around YouTube or Reddit if you want help with troubleshooting slow Wi-Fi.
Final thoughts: Streaming your computer to your TV is a great option if you want to use the same desktop video game emulators you're comfortable with on your TV. This is especially useful if your computer can handle CPU-heavy emulators such as for PlayStation 2, Gamecube, Wii, and Sega Saturn.
Option #6 - Using a Steam Deck
 Steam Deck is Steam's answer to the Nintendo Switch. It's a portable Linux computer, designed to make it easy to play Steam games on the go. Being a computer means it's relatively easy to customize and set up with video game emulators.
What systems can it emulate? A lot! Steam Deck's beefy hardware can handle up to Saturn, PSP, PlayStation 2, GameCube, and Wii. Allegedly, it can even handle emulating Nintendo Switch. Now, don't get too excited. Successfully running games for these higher-end systems requires taking time to tweak configurations and lower the resolution. Don't expect everything to work out of the box and display in high-quality sharp HD.
") Steam Deck can be connected to your TV. It's easy to do, too! You have a couple of options. The recommended option is to buy a Steam Deck docking station. This also requires the purchase of Bluetooth peripherals: a gamepad, keyboard, and mouse. The cheapest option is to simply buy a USB-C to HDMI cable. And you'd need a long one that can comfortably extend from your TV to your sofa.
Steam Deck can be connected to your TV. It's easy to do, too! You have a couple of options. The recommended option is to buy a Steam Deck docking station. This also requires the purchase of Bluetooth peripherals: a gamepad, keyboard, and mouse. The cheapest option is to simply buy a USB-C to HDMI cable. And you'd need a long one that can comfortably extend from your TV to your sofa.
There are a few drawbacks with using a Steam Deck. Firstly, it doesn't come cheap. Its cost ranges from $790-$950 US (depending on the storage capacity you want). Getting a docking station and Bluetooth peripherals could hike up the total cost over $1,000! Secondly, installing video game emulators isn't a quick, straightforward process. Expect having to download files on your PC, connect your Steam Deck to it, and run a few install wizards that'll set everything up on your Steam Deck. YouTube offers lots of help with this process.
Final thoughts: Steam Deck is probably the best option offered on this page. It's a hybrid portable system with beefy hardware that can handle emulating higher-end gaming systems. However, its high cost keeps me from pushing it as a top recommendation.
Option #7 - Using an Anbernic handheld
 Anbernic is a company that makes portable handheld gaming systems that run ROMs. They've made several models so far, and they've grown quite popular. They're so popular that I might go as far as to say they're #1 in portable gaming. Standard Anbernic handhelds have similar hardware as the Raspberry Pi, so they smoothly run all the classics up to PlayStation 1 and N64. There are newer, beefier Anbernic handhelds with hardware that isn't far from that of the Steam Deck. The best Anbernic setup guides can be found at Retro Game Corps.

Connecting an Anbernic handheld to your TV may be tricky. There are videos on YouTube that walk you through connecting an Anbernic to a TV. This process requires you to update the Anbernic's firmware. Then, you need to purchase a mini-HDMI to HDMI cable. You'd also need a 10-25 feet HDMI extension cable so you can comfortably play games from your sofa. It's not the most elegant setup. It's more awkward if you want a second player. The second player's controller needs to be USB to plug into the Anbernic.
There are two ways to purchase an Anbernic handheld. You can purchase a customized device from the Anbernic website, which can cost up to $300 US. Or you can purchase a pre-made Anbernic on Amazon - they go for around $100-$200 US. The amount of space varies per model and can range from 16-128 GB (64 GB being the average).
So which Anbernic model is the best? It depends. On YouTube you can find lots of videos reviewing them: Anbernic handheld reviews
Final thoughts: If you see yourself playing games more so on the go than on your TV, then an Anbernic handheld is for you. Just keep note that connecting it to your TV can be tricky.
Option #8 - Using a Retron 5

The Retron 5 is a handy video game system that can load games from real carts! It supports NES, SNES, Genesis, Game Boy, Game Boy Color, and Game Boy Advance. Best of all, the Retron 5 supports loading ROMs for those systems through an SD card. There are videos on YouTube that walk you through the process of loading ROMs onto the Retron 5.
Another neat feature is that it can convert any of your physical carts for NES, SNES, Genesis, Game Boy, Game Boy Color, and Game Boy Advance into ROMs. Pretty cool, huh? The Retron 5 goes for around $180 US.
I want to point out that I'm only saying Retron 5 is a good option for playing ROMs. It's not the best option for playing real carts. The Retron systems are emulation-based and don't use native hardware. There are other systems that use native hardware (but don't support ROMs) such as the Super RetroTRIO.
I also need to point out that the Retron 5 is not very friendly with ROM hacks and translations. They're hit or miss and may not always work.
Final thoughts: The Retron 5 is the easiest option - you can be up and running within minutes! Plus if you still own all your old games, you could play them again with this all-in-one system!
Other Options
There are a few other 'honorable mentions' that are worth running by you.
 Using a computer (instead of a laptop)
I know I kept pushing that you get a laptop rather than a computer. I'm certainly not opposed to computers. If grandma doesn't use her old PC anymore, by all means, take it and turn it into your personal emulation machine for your TV. You could even buy a cute little mini tower PC - they go for $200-$400 US. However, I still think a laptop or an Android set-top box are better investments for the advantages they offer.
Using older video game systems
You can breathe new life into an old video game system by hacking it. Once hacked, you can install a variety of different video game emulators. And systems that have USB ports can load emulators from a thumb drive - no hacking required! The PlayStation 2, PlayStation 3, Dreamcast, and Wii are popular systems for this. YouTube has videos that walk you through the process. RetroArch is a popular emulator for loading onto retro systems; their site supplies installation directions, too. I don't push using older video game systems because it may not be easy for everyone. But yet, this is a good option if you want something 'free' (well, to use something you already own) to play ROMs on your TV.
 Using a NES/SNES/Genesis Mini
I used to promote this as one of the top options, but the NES Mini, SNES Mini, and Genesis Mini have become scarce. They're several years old now and have become pricey (up to $400 US). Anyway, it's popular to hack these Mini systems to allow for loading any ROM you want. You could even install multi-system emulators such as RetroArch and Hakchi. But, take note that hacked Mini systems are not very friendly with ROM hacks and translations. They're hit or miss and may not always work. Here are YouTube tutorials showing how to set this up:
Using MiSTer
MiSTer is a competitor to RetroPie. Just like RetroPie, it lets you set up and configure your own emulation system. The difference is that it's designed to let you customize the hardware, so it's a modular system. It also supports native hardware (which is a big deal!). MiSTer's drawback is that it's far less user-friendly than RetroPie. It's for advanced users and hardware enthusiasts. So it's not something I can recommend to everyone. If you want to learn more about MiSTer, check out this article: MiSTer 101: A classic gaming device to rule them all.
Final thoughts:
- A computer is great if you can get a hand-me-down from someone.
- If you're okay with hacking a video game system of yours, using that for emulators is handy.
- Using a NES/SNES/Genesis Mini is great - if you can manage to obtain one.
- If you're an advanced user or hardware enthusiast, MiSTer is perfect for you.
Tip: Obtaining ROMs in Bulk
At this point you might be wondering, “Ok, you've sold me. Now I have 32 GB I need to fill up with ROMs. But downloading ROMs is a pain because I have to download them one at a time! Can't I just download all ROMs for a system with a single click?“ - Yes, you certainly can!
The best site I know of that offers bulk downloads of ROMs is Archive.org. The tricky part is that the site is horrible to navigate; it's not easy to find the ROM collections. Fortunately, you can 'hack' this UX problem by using Google to find what you're looking for.
On Google, search for “archive.org [system] collection”. You can download all ROMs for every classic system in a zip file or torrent.
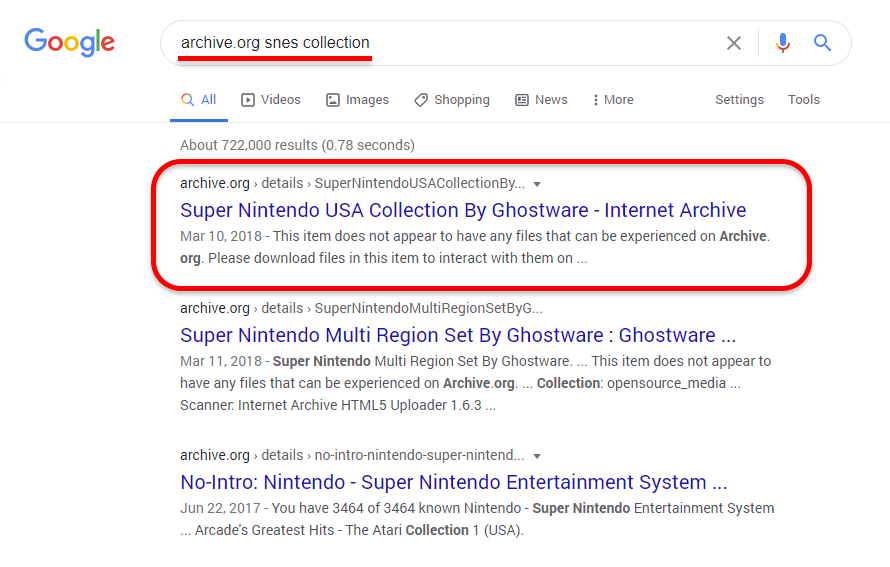
For example, let's say you want to download every SNES game:
- On Google, search for: “archive.org snes collection”.
- Click the first link in the search results, as shown here
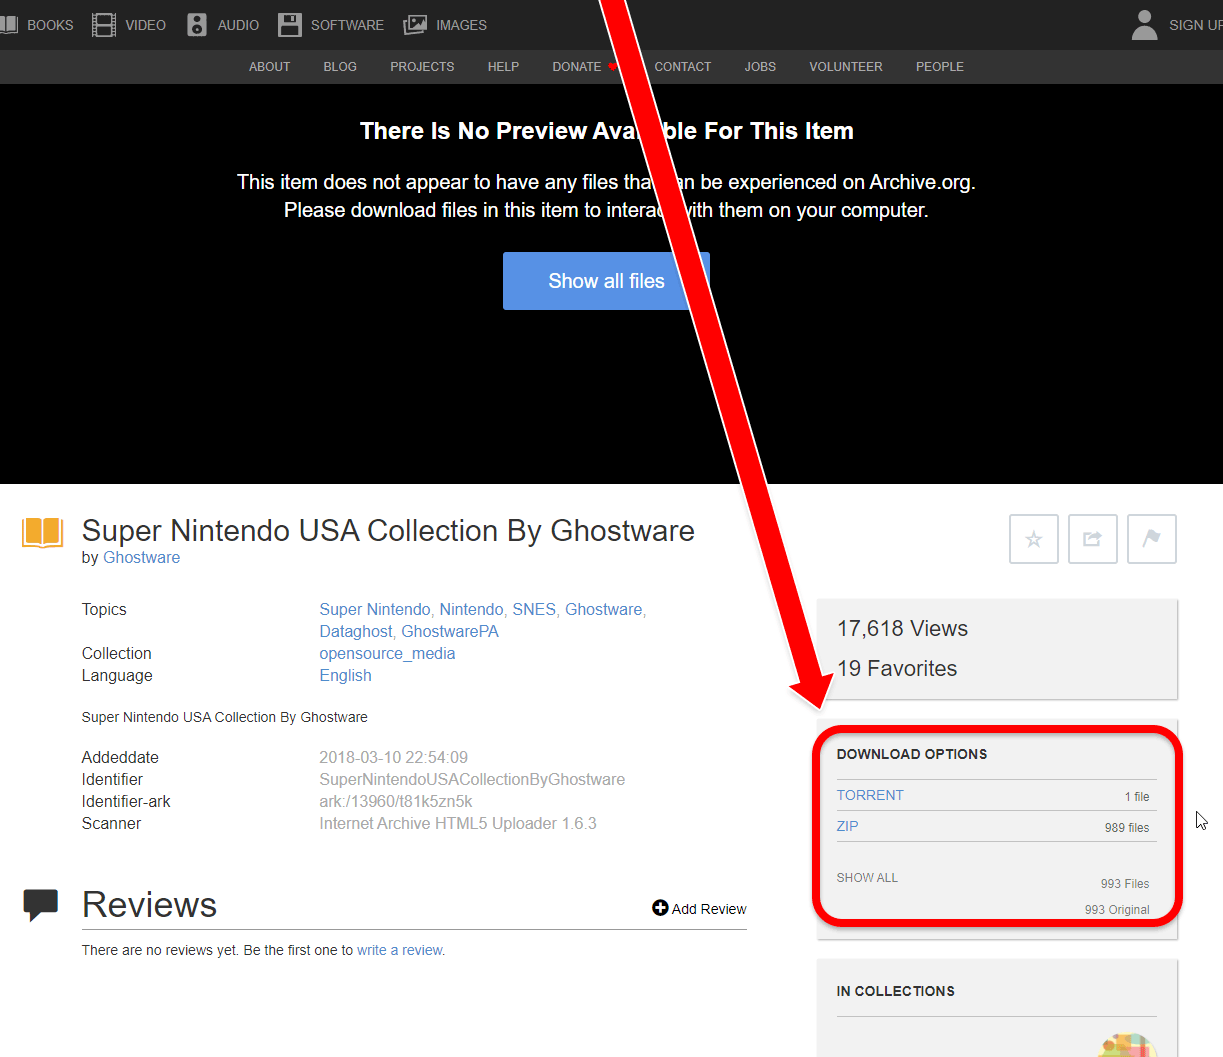
- In the right column, you'll see a box with “Download options” and “ZIP” or “TORRENT”, as shown here . Click on the option you want.
Note
Bulk download only works with systems up to the 16-bit era. The games for 32-bit era systems (PlayStation 1, N64) and beyond are too large to download in a single zip file. But yet, Archive.org does offer games for 32-bit/64-bit systems for individual download (one game at a time). Or you can check out my links page for some more good ROM sites.
Total memory sizes per video game system
So at this point you might be wondering, “What can I fit onto a 32 GB Chromebook? Or a 1 TB SD card for a RetroPie? Can I load every single SNES ROM, and more?“ To put memory size totals in perspective, here's a list. This would be the total memory size if you were to download all the ROMs/ISOs for the given system.
- NES - around 240 MB
- Super Nintendo - around 2 GB
- Nintendo 64 - around 5.5 GB
- Game Boy & Game Boy Color - around 600 MB
- Game Boy Advance - around 8.5 GB
- Nintendo DS - around 85 GB
- GameCube - around 870 GB
- Nintendo Wii - around 6.5 TB
- PlayStation 1 - around 4 TB
- PlayStation 2 - around 20 TB
- PlayStation 3 - around 20 TB
Keep in mind these totals are based on the games compressed in a ZIP, RAR, or 7Z file. SNES games, for example, can be played from their zip file. PlayStation games, though, need to be extracted to be played. So expect their size totals listed above to double or even triple when all the games are extracted.
Tip: Finding the Best Games
As you've read, many of the options mentioned in this article don't offer a lot of space. You might be forced to work with around 16-32 GB. And then you look at the totals above and see how massive all the ROM collections are. While it's tempting to load all ROMs for every system onto your device, it simply isn't possible (or expensive to do).
So why not load only the very best games on your device? Instead of loading every single PlayStation 1 ISO, you could load 10 or 20 of the top games. Sure, we all have our favorites, but aren't you curious to know about every single top game? Part of the reason for getting into emulation is to discover new games, after all.
Search Google with this phrase: “best [system] games”. For example, here's best playstation 1 games. This will return numerous articles where people list their top games.
What about emulating Switch or PS4?
This article focused on giving you affordable options for playing ROMs on your TV. Aside from the Steam Deck, the most you can hope to emulate with my affordable recommended options is up to PlayStation 1, N64, and PSP.
So what about emulating GameCube, Wii, Dreamcast, Xbox, and PlayStation 3 on your TV? Or even current-generation systems such as Nintendo Switch and PlayStation 4? Well, I can tell you there's no affordable option for this. You're going to need a fast PC (not a Mac or Linux box). Expect to pay $1,000-$2,000 for a machine that's fast enough to emulate these new gaming systems. As for how fast a computer should be, it depends. Research the technical requirements for the gaming system(s) you're targeting to emulate. Once you have that beefy computer, you can easily hook it up to your TV.
You can refer to my article, Recommended Video Game Emulators for Windows, for some of the best emulators for newer gaming systems. The top resource for this is The Emulation Wiki, which lists the best emulators for all gaming systems. Let's say, for example, you really want to play PlayStation 3 games so you're targeting to use RPCS3 (the top PS3 emulator) on your new computer. On Google, search for “RPCS3 technical specs” to find out the hardware needed for it.
Recommended Gamepads
 I have an article which recommends the best gamepads. But I can tell you right now: the #1 gamepad at this time is the 8BitDo Pro. The newest model, the Pro 3, goes for $69.99 US while the older model, the Pro 2, goes for $43 US. It's a bit pricey, but it's a high-quality gamepad that's so worth it. Its large side grips make it comfortable for adult hands. It works on pretty much everything - every device and OS. It'll work on every option I recommended in this article (except the Retron 5).
Novelty Safe Options
I left this subject for last because it contradicts this entire article. I'll explain what I mean by 'novelty safe'. I know that most people who purchased a NES or SNES Mini used them for a while and then never touched them again. The 'high' from reliving the classics doesn't last long for everyone. On the other hand, some people genuinely do enjoy reliving the classics and played the heck out of their NES and SNES Minis.
The point I'm trying to get to is that I'd hate for you to spend $200 to buy one of the options I recommended in this article, only to get tired of it after its novelty wears off. We work hard for our money. So I wanted to highlight which options are 'novelty safe' - the options that still have value if the novelty for its video game emulation wears off.
- If I convinced you to get a laptop, it still has many uses if you get tired of using it for video game emulation. Laptops (or better, a hybrid laptop/tablet) are still great for reading books/comics, watching movies during trips, and doing work that is easier with a physical keyboard & mouse.
- If I convinced you to get the Nvidia Shield TV Pro or Apple TV, they still have use if you get tired of using them for video game emulation. They're the fastest streaming devices you could buy that support 4K streaming! Same thing goes for if you opted for the cheaper option, a Google TV Streamer.
- If I convinced you to get the Steam Deck, aside from video game emulation, the system was built for playing modern PC games. Through its “desktop mode” you can use Steam Deck as a fully-fledged computer. From there, you can use streaming services such as Netflix through Firefox.
For any device recommended in this article, I hope you explore new games as I suggested in “Tip: Finding the Best Games”. Finding ways to keep these devices interesting will keep their novelty fresh and alive longer. I want your money well spent!
Conclusion
I've reviewed lots of ways you can turn a common device into a robust multi-system video game console. The order I presented these options is the ranked order I recommend them. Although it's hard for me to decide whether to give the crown of '#1 recommended option' to laptops or to Android set-top boxes/Apple TV. They have their pros and cons. A laptop is convenient for traveling and performing computer-related tasks. An Android set-top box (Shield TV Pro or Google TV Streamer) or Apple TV are convenient for both TV streaming and emulation. A laptop or Android box/Apple TV are all friendly with Bluetooth gamepads, and they're 'novelty safe' (as explained above).
For those of you who want to get serious about reliving the classics, a RetroPie is best. You can load hundreds or even thousands of ROMs onto an SD card, resulting in a monster RetroPie that lets you play everything. RetroPie is immensely popular and backed by a strong community. There's a ton of RetroPie help videos on YouTube covering any question or problems you need help with.
If the RetroPie appeals to you, but you need something portable, an Anbernic handheld is the best option. What's cool is that even the most affordable Anbernic handhelds offer at least 64 GB of space. That's enough for hundreds of roms. Anbernic handhelds are also much easier/faster to setup than a RetroPie.
And then there's the Steam Deck. It's the only device on my list that can handle emulating higher-end video game systems. It's a handy portable 'desktop' computer with many uses. It's also very expensive, making me hesitate to recommend it to you. It's even more expensive if you get a docking station and Bluetooth peripherals for using the Steam Deck with your TV. That potentially brings the total cost close to $1,000 US! Nevertheless, if you're willing to pay this amount of money for a toy, Steam Deck is better than all the other options on this page.
Here's a “best of” breakdown from the options I mentioned above:
- 🏆 Easiest to setup: A laptop wins this category. With the comfort and ease of a desktop experience, you can quickly download ROMs from your favorite ROM site, load up the emulator, and you're ready to go. Everything can be ready within minutes. Anbernic handhelds are a close second. With the emulators already pre-installed on Anbernic devices, you just need to copy over the ROMs.
- 🏆 Quickest to start up: This is after your initial setup of everything. When you want to start a new gaming session, which device is the quickest to start up? A set-top box wins this category. All you need to do is grab your Bluetooth controller, turn it on, and your set-top box is already on and ready for gaming.
- 🏆 Most capacity: Everyone wins this category since their internal memory can be expanded with SD cards or external drives. Well, everyone except Apple TV, as its capacity cannot be expanded.
- 🏆 Best hardware specs: As already stated, the Steam Deck is the fastest device recommended on this page. The Nvidia Shield TV Pro is second place.
- 🏆 Best portability: Well, this category is subjective. I think a laptop wins. The Anbernic handheld wins if your preference is for a handheld like a Game Boy.
- 🏆 Best variety of emulators: Laptops win this category. With a Windows laptop, you have access to the best emulators in existence. With a Chromebook, you have full access to the Google Play Store. If you absolutely hate RetroArch, you've got many other options on these devices!
- 🏆 Best universal UI: By 'universal UI' I mean if the device offers a convenient all-in-one shared user-interface. It allows you to easily select the video game system with bright, colorful graphics, then select the game you want to play, which is displayed with a screenshot or box art thumbnail. RetroPie automatically sets up a great UI, so it wins this category. It's possible for RetroArch to offer an experience like this, but it doesn't do it by default and needs to be set up.
- 🏆 Best for tech geeks: Android is capable of a lot, but Linux is king when it comes to advanced customizations with the OS and emulators. Therefore, the Steam Deck wins this category. Second place would go to MiSTer, the more advanced competitor to RetroPie.
Here's a wrap-up of the options in a comparison table:
| 🎮 Option | 💸 Cost | 🙂 Pros | 😐 Cons |
| Chromebook | $200-$400 US |
Multi-purpose hybrid device--play games on your TV or on the go | Typically limited to 32-64 GB, and navigating needs to be done manually |
| Android set-top box | $50-$200 US |
The most convenient option, and offers power at a great value | Setting everything up might be tricky, and you may need to purchase external storage |
| Apple TV | $199 US |
Another convenient option, and offers power at a great value | Setting everything up might be tricky, and internal memory can't be expanded |
| RetroPie | $200-$300 US (for standard kits) |
Affordable, versatile, and highly customizable | Setting it up could take a long time--unless you buy a pre-loaded SD card |
| Steam Link | Free! (but you need a mouse & gamepad) |
Play your favorite desktop emulators on your TV | Performance relies on your Wi-Fi network's bandwidth |
| Steam Deck | $790-$950 US | Powerful hybrid portable system that can emulate higher-end gaming systems | It's expensive! And setting up emulators might be tricky |
| Anbernic handheld | $100-$200 US (standard models) |
The #1 system in portable gaming | Connecting it to a TV can be tricky |
| Retron 5 | $180 US | Very quick & easy to set up | Limited to five systems |
I hope this article inspired you to play ROMs on your TV. It's an amazing experience playing all of your favorite classics on a TV just like you used to years ago.

