
 Back
Back


Extracted Game Music
Introduction
For starters, as the name suggests, 'extracted' means it's taken out of something. Devote classic gaming fans dove into the programming of video games and pulled out the songs. With the proper software, you can play these songs as if they were MP3s! Cool huh?! These music files are sequenced music, much like MIDI music or chiptunes.
Extracted video game music offers several big advantages:
- Their memory size is incredibly small!
- Being that these are the actual programming of the songs, you're hearing them at their best possible quality!
- Every library of music is a complete collection! For example, the library for Super Nintendo SPC music contains the soundtrack for every Super Nintendo game. You would get to have soundtracks that would otherwise be impossible to own!
- They can be played on PC, Mac, Android, & Linux!
- They can be converted to MP3!
Each video game system has their own format of extracted video game music. They are the following:
- NSF - Nintendo Entertainment System (NES) music
- GBS - Game Boy (GB) & Game Boy Color (GBC) music
- SPC & RSN - Super Nintendo (SNES) music
- GSF - Game Boy Advance (GBA) music
- 2SF - Nintendo DS (NDS) music
- USF - Nintendo 64 (N64) music
- GCN - Nintendo GameCube music
- GYM, VGZ & VGM - Genesis/Mega Drive music
- SGC, VGM, KISS - Game Gear/Sega Master System music
- SSF - Sega Saturn music
- DSF - Sega Dreamcast music
- HES - TurboGrafx16 music
- PSF - Playstation 1 (PSX/PS1) music
- PSF2 - Playstation 2 (PS2) music
- PSF3 - Playstation 3 (PS3) music
- AT3 - PSP music
A little history
Let's roll back to the early 2000s. Back then, the Internet was slower and our computers didn't have a lot of space. Classic gamers relied on MIDI music to get their gaming music fix. They went to websites such as VGMusic.com regularly to check out what new MIDI music was added. MIDI music was cool, but it wasn't the best because songs didn't sound like the real thing. Then extracted game music came out. It was the perfect solution for classic gamers to get their music fix. They offered the space-saving benefit of MIDI music, plus they sounded exactly like the real thing (because it was the real thing!). The popularity of extracted game music eventually declined in the late 2000s when MP3s became standard and we all obtained high-speed Internet to download MP3 soundtracks with ease.
Still, the space-saving benefits of extracted game music remain valuable even today. At the time I'm writing this, mobile devices typically come with 32-64 GB of space. Filling up your mobile device with MP3 soundtracks for your favorite games could take up maybe 5-10 GB of your precious space. Or you could take up only 50-100 MB of space with the extracted game music equivalents of those same game soundtracks!
Popular players on Windows
There are only a few worthwhile options for playing extracted game music:
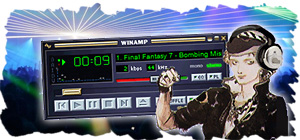
- WinAmp is a fully featured music player, which also can play extracted game music once the plug-ins are installed. This is the player I recommend. Keep reading for directions on how to download, install, and setup WinAmp.
- The Windows port of ZXTune is pretty good, too. Quite a few people prefer it over WinAmp. It can play extracted game music right out of the box. Its playlists feature is handy.
- Audio Overload is a specialized music player that can only play extracted game music. It's a basic music player with no special features.
WinAmp and the Plug-ins
Ever heard of WinAmp? It used to be extremely popular as the #1 music player. Its popularity declined when we moved away from our PCs to our smartphones for playing music. The cool thing about WinAmp is that it accepts custom-made plug-ins. Hence, the classic gaming community created special plug-ins that give us the ability to play extracted video game music with WinAmp! To make installing these plug-ins easy you, the gaming community created Chipamp, which automatically installs ALL extracted music plug-ins into WinAmp with one easy install wizard.
So all you need to do is download WinAmp and Chipamp, which you can grab below. First install WinAmp (make sure to choose the Classic skin), then install Chipamp.
Download WinAmp 7.82 MB
Download Chipamp 3.38 MB
Extracting Music Collections (RAR, 7Z Files)
When you download a game soundtrack, it'll be in either ZIP, RAR, or 7Z format. So you need to extract the extracted video game music.
- On Windows: Windows can extract ZIP files by default. RAR and 7Z files can be extracted with 7-Zip (which is free). Using 7-Zip is incredibly easy. Once installed, simply right-click a RAR or 7Z file and go to 7-Zip > Extract Here.
- On Mac: Mac OSX can extract ZIP files by default. RAR and 7Z files can be extracted with Keka (which is free).
- On Android: Most file manager apps such as Astro File Manager can extract ZIP files. ZArchiver can extract RAR and 7Z files. And both of these apps are free.
Opening Songs for the First Time
All extracted video game music songs will first appear as an unknown file or some weird certificate file. Below are directions on how to change the association of a file format to WinAmp on Windows 10:
- Right-click the music file and go to Properties, as shown here .
- The Properties window will pop up. Click Change.
- The Open With window will pop up. Click More Apps then Look for another app on this PC.
- As shown here , click the down arrow next to "(C)" and click Program Files (x86).
- As shown here , scroll down and double-click WinAmp to open it.
- As shown here , click on "WinAmp.exe" and click Open.
- Click Okay, Apply, Okay yadda yadda and you're done. From now on, that music format will open up in WinAmp. This must be done (just once) for each format of extracted video game music.
Playing PSP and PS3 music
Chipamp was last updated in the early 2010s, so newer formats such as Sony PSP (AT3) music and PlayStation 3 (PSF3) music are not supported. For playing those formats, there's VgmStream. It's a command line driven program, though, so it's not very user friendly. I need to direct you to YouTube for help because I haven't explored this yet.
Players on Android, iOS, Mac, & Linux
Players on Android
- ZXTune - This is the player I recommend. Compared to the other players, I think it's the easiest to use.
- foobar2000 - A simple player that works well.
Players on iOS
- SnesMusic - Despite having “SNES” in its name, it supports every common music format in addition to SNES music. This app gives you access to an online repository where you can download video game soundtracks.
- Modizer ($1.99 US) - A nice, simple player. It offers more features than SnesMusic. It gives you access to multiple online repositories where you can download video game soundtracks.
- GaMBi ($4.99 US) - This player has a cool UI design. It's pricier than the other players because it includes deep customization options for remix artists and DJs.
Players on Mac
- Audio Overload - The same guy who ported over all of Mac's best video game emulators, Richard Bannister, also created this special music player for any extracted video game music format.
Players on Linux
- Audacious - A popular Linux music player. It comes with extracted game music support out of the box.
- There's also the Linux ports for ZXTune and Audio Overload. It's possible to use WinAmp with Wine, but that could be tricky to get working.
Super Nintendo SPC vs. RSN
In my FantasyAnime's shrines for SNES RPGs, you'll notice a download for the SPC soundtrack and a download for the RSN soundtrack. So what's the difference? Well, it depends on your preference.
SPC soundtracks
SPC's consist of individual songs. You might prefer this if you're accustomed to playing MP3's. The only drawback with SPC soundtracks is that not all songs have a proper end time configured, which only poses a problem when you want to convert the songs to WAV or MP3. The SNES plug-in SNESamp defaults songs with no end time to 3 minutes. You can adjust this; check out Important Notes for directions.
RSN soundtracks
RSN's are a single file. All RSN songs have a proper end time configured, so RSN is ideal for WAV/MP3 conversion. You can browse among songs in an RSN soundtrack in two ways:
- Click Previous Track & Next Track .
- Bring up the WinAmp Playlist window to browse and choose a specific song. To do so: right-click WinAmp and click Playlist editor, as shown here .
Genesis GYM vs. VGM
They're both the same thing. Their difference is in how they were prepared.
GYM soundtracks
GYM songs are sloppy. Not all of them begin and end properly. To make matters worse, the WinAmp GYM plug-in is buggy and crashes easily.
VGM soundtracks
VGM songs are perfect, just like soundtracks for all other extracted game music formats.
Important Notes
Be gentle!
After clicking to open an extracted music song, wait for a second or two before clicking the next one. If you open the next song too quickly then nothing will happen, or WinAmp might stall or even crash.
No End Time
This applies to Super Nintendo SPC, Nintendo NSF, and Genesis GYM music. Most music ends at its proper time, just like an MP3. However, not all do. Having no end time poses a problem when you want to convert the music to WAV or MP3 because you'll end up getting a soundtrack with every song ending at 2 minutes. With Super Nintendo SPC music this isn't a problem because you can just download the Super Nintendo RSN soundtrack which has proper end times. But with Genesis GYM and Nintendo NSF, you're screwed. Once in WAV format, you'd have to download an audio editor and end the songs manually.
Adjusting End Time when there is none
For this, I'll refer to Super Nintendo SPC music since that's the most popular. By default, the SPC plug-in SNESamp ends songs with no end time at 3 minutes. But what if you want to adjust it to 5 minutes, or 10 minutes? This is how you adjust the end time:
- Right-click WinAmp, click Options, then Preferences - as shown here .
- You'll arrive here. As my little diagram shows: (1) scroll down this list, (2) click Input, (3) click Alpha-II SPC Player, (4) click Configure.
- Click the Time tab, as shown here . Where it says "Auto End" is where you can adjust the end time.
- When you've entered the new time, click OK and close Preferences. You're done! :)
RSN, NSF & GBS music are a single file
Super Nintendo RSN, Nintendo NSF, and Game Boy GBS are a single file instead of individual song files. Browsing among songs is easy. There are two ways you can do it:
- Click Previous Track & Next Track .
- Bring up the WinAmp Playlist window to browse and choose a specific song. To do so: right-click WinAmp and click Playlist editor, as shown here .
Step 1: Converting Songs to WAV (and batch conversion)
Here's how you can convert extracted video game music to WAV files. This is done in WinAmp.
- Open WinAmp if you haven't already. Also, if you have Repeat (Loop) enabled, disable it.
- Right-click WinAmp, click Options, then Preferences - as shown here .
- You'll arrive here . As my little diagram shows: (1) scroll down this list, (2) click Output, (3) click Nullsoft Disk Writer, (4) click Configure.
*If you don't see Nullsoft Disk Writer on this screen, you can download it here (it's 191 KB).
 - Here in the configuration screen , you can choose where you want the WAV files to get tossed to. In this case, I have it so that they appear on my desktop. Click OK when you're done and close the Preferences window.
- WinAmp is now configured to export anything is plays to WAV! Go ahead and open a song you want to be converted. WinAmp will look as if it will play the song, but instead, you'll hear silence and the
 is just speeding across. When it reaches the end the conversion is complete. That's it! It's quick and easy, huh?
 - When you're done you need to go back to Options > Preferences > Output and switch WinAmp back to Nullsoft Direct Sound Output so that it can play music again.
That's how you convert a single song to WAV. So what about converting entire soundtracks to WAV automatically? In that case, once you follow the directions above to enable WinAmp's WAV output, WinAmp's Playlist Editor becomes the queue of the songs that will be converted to WAV. This can become a little confusing because Super Nintendo RSN, Nintendo NSF, and Gameboy GBS automatically populate the Playlist Editor with every song in the soundtrack. Other music formats (the ones with individual song files) don't do that; they work on a single-song basis. Hence:
For mass converting Super Nintendo RSN, Nintendo NSF, and Gameboy GBS
Once you enable WinAmp for WAV output, simple play the first song and WinAmp will automatically convert every song in the soundtrack to WAV.
For mass converting all other formats
You need to drag all the songs of the soundtrack into WinAmp's Playlist Editor to build the queue of songs that will be converted. If you'd like, you can drag songs from other soundtracks as well. Then enable WinAmp's WAV output and play the first song in the list to convert them all to WAV.
Next, you'll probably want to convert these WAVs to MP3. Keep reading...
Step 2: Converting Songs to MP3
You can do so quickly and efficiently with an awesome free program known as WinLAME. You can download WinLAME here (1.5 MB). Here are directions to convert WAV to MP3 with WinLAME:
- First, you need to convert the video game music to WAV, as I just explained above.
- Open WinLAME. Click on the
 button, look for the folder where the WAVs are, select them all, then click on Open. You should see the WAV files you selected listed on the white box. Click Next to go to the next screen.
 - You'll arrive at the "Output Settings" screen. Under "Output Module" it should say LAME mp3 Encoder, as shown here . Click Next to go to the next screen.
- You'll arrive at the "Presets" screen. The default is fine, just click Next to go to the next screen.
- You'll arrive at the "Encoding" screen. Click
 to begin the converting.
Next, you'll probably want to fill in the tags for these freshly converted MP3s. Keep reading...
Step 3: Cleaning up the filenames
This step is optional, but helpful if you want a cleanly organized soundtrack. You may want your WAV-converted music files to be renamed from “07_1-06 Chrono Trigger - Guardia Millennial Fair.wav” to “Guardia Millennial Fair.wav”. Here's how to do this instantly.
- Download Advanced Renamer and install it. It's a free and open source program for batch renaming files.
- Drag over the files you want to batch rename into the area for files, as shown here . You may also click the Add button then Directories to add an entire folder of files.
- Next, click on Add method then Replace, as shown here .
- Look at this picture . Put a check in Use regular expressions. In the “Text to be replace” field, type in the full filename including spaces. When there's a numeric digit, type in '[0-9]'. In my example, entering “[0-9][0-9]_[0-9]-[0-9][0-9] Chrono Trigger - ” is what it takes to remove the track numbers and album names from the filename. Then take notice of the “New filename” column to see if your Replace command is working as intended.
- Lastly, click Start Batch
 to begin the batch renaming. That's it! If you need further help, YouTube has tutorials.
Step 4: Filling MP3 Tags
This is important to do if you want your MP3-converted songs to sort properly on music players that sort songs by artist or album. Windows allows you to edit MP3 tags very easily! Like so:
- Right-click the MP3 file then left-click on Properties.
- Click on the Details tab, as shown here . All these fields you see can be edited - click on a field to type text in it. Click OK when you're done.
However, what if you have 1,000 MP3 songs that you want to edit all at once? Well, now you're talking! Just use "Mp3tag" to do that. Here are directions:
- Download Mp3tag and install it.
- So in Mp3tag, click on
 to choose the folder that contains the MP3 files you want to edit, then click on Select Folder, as so .
 - Now select the MP3 songs you want to batch edit. Either press Ctrl+A to select all of them, or hold down the Shift key to select a specific set.
- Take notice of the left part of the screen . Here you can fill in any fields you wish. You might see a "<keep>" label in some fields; leave that if you want the selected MP3 files to keep that field with the existing label. When you're done, click
 and your changes will be saved. If you made a mistake - that's ok; just repeat the process to correct it.
 - Mp3tag has a useful feature that automatically populates the Title field of every song with the filename. To use it, first you need to select all the songs. Then go to Convert > Filename - Tag, as shown here.
Step 5: Album art
The last step is to find album art for your video game soundtrack. Google Images is the best for that. If it's a popular game, official album art may be available. Otherwise, try to find box art for the game. If box art isn't available, try to find the game's title screen (or capture it yourself with an emulator). Of course, this is up to you and your personal taste as to what album art you want.
If you want the album art to elegantly fit in your favorite music player, you should make sure the width and height are equal. A specific width and height isn't required, but 1200x1200 is recommended. Need a photo editor? Photopea is a good, free web based photo editor that is fashioned almost exactly like Photohop. I recommend using it for any cropping and resizing that you need to do to album art.
I recommend saving your album art as JPG. PNG is appropriate, too, but it's larger in size. Name the album art as “cover.jpg”. Place it in the same folder as your MP3 soundtrack so that your music player can find it.
Links to Download More Soundtracks
Given that my FantasyAnime only offers extracted video game music for its covered RPGs, you're probably starving for more soundtracks. Here are the best websites:
- SNESmusic.org - The #1 resource for Super Nintendo RSN soundtracks.
- PSF Mirror - The #1 resource for Playstation PSF soundtracks.
- USF Central - The home of the Nintendo64 USF format. They offer every available USF soundtrack. It's not very clear, but to download a soundtrack you need to click on the memory size of the soundtrack.
- Project 2612 - The #1 resource for Genesis VGM music.
- Zophar's Domain - The #1 place for downloading music for every system! They also include MP3 soundtracks for every game. When you click to view a game, you'll see two options: “Download all files as MP3” and “Download original music files”. To download the extracted game music files, click on “Download original music files”. Zophar doesn't have the best navigation, so here are direct links to their music categories:
Q: How can I convert select songs from multiple soundtracks at once?
So you have a bunch of individual songs from multiple soundtracks and multiple video game systems, and you don't want to have to click on each one to convert them all. You're going to run into one of two scenarios here, depending on the different systems you have music for.
For mass converting Super Nintendo RSN, Nintendo NSF, and Gameboy GBS
RSN/NSF/GBS is a little tricky. As you should know already, you can browse among a single RSN/NSF/GBS soundtrack in WinAmp's Playlist Editor. You can remove RSN/NSF/GBS songs from the Playlist Editor to make a custom playlist for conversion. If you double-click to open another RSN/NSF/GBS soundtrack, the Playlist Editor refreshes and removes the custom work you've done. If you drag & drop an RSN/NSF/GBS soundtrack to the Playlist Editor when one is already open, it embeds itself in the list as a single item and hence cannot be customized for custom conversion. PSF/USF/SPC/GSF/VGM songs are not an issue at all, you can just simply drag & drop your desired PSF/USF/SPC/GSF/VGM songs to the Playlist Editor along with whatever RSN/NSF/GBS setup you already have.
*Super Nintendo RSN soundtracks are an exception because those are actually SPC songs in a RAR file. If you extract the RSN, you can convert multiple soundtracks by dragging all the RSN-extracted SPC's to the Playlist Editor.
For mass converting all other formats
Bring up WinAmp's "Playlist Editor". To do so, right-click WinAmp and click Playlist Editor, as shown here . Simply drag & drop the songs you want to convert to the Playlist Editor window. Set WinAmp to convert, then double-click on the first song to start converting the list.

