Walkthrough
 Contents
1 Forest of Elel
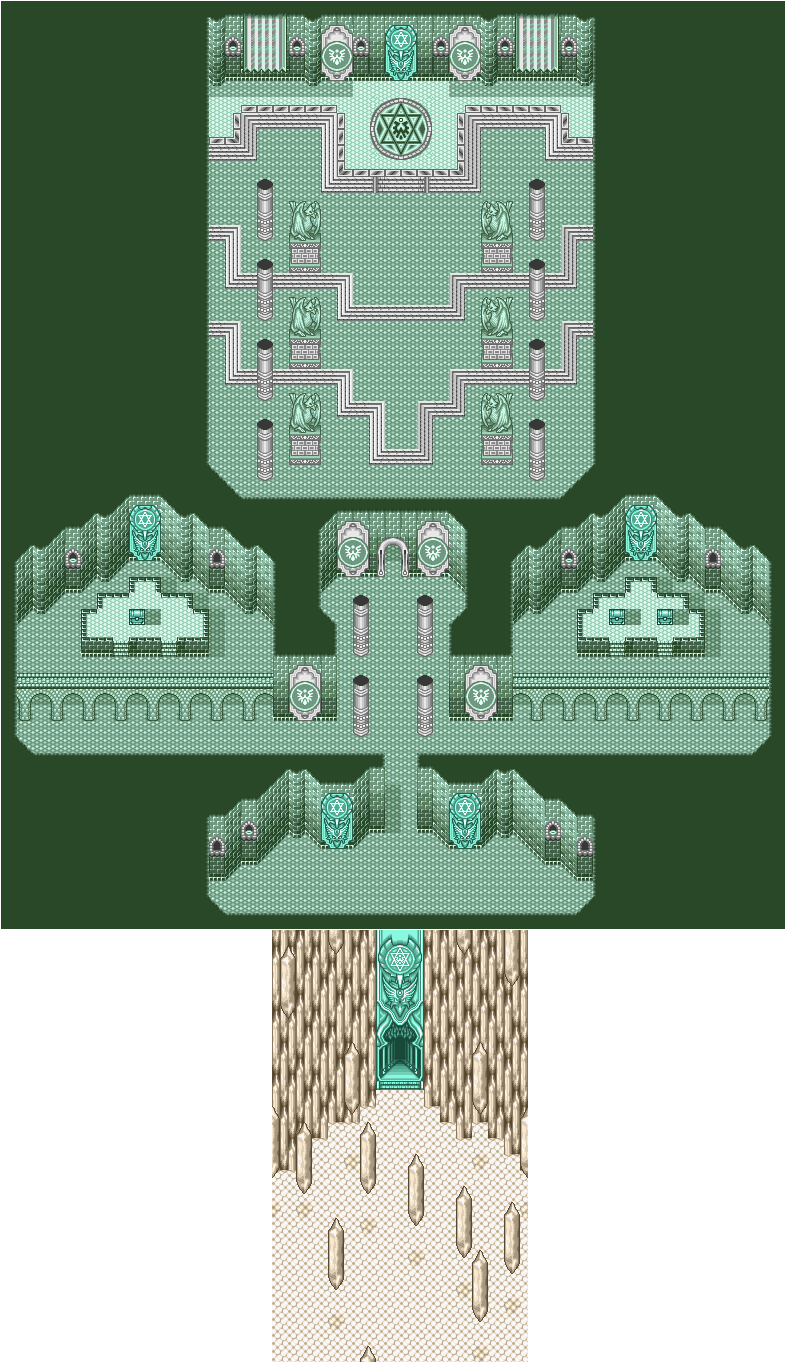
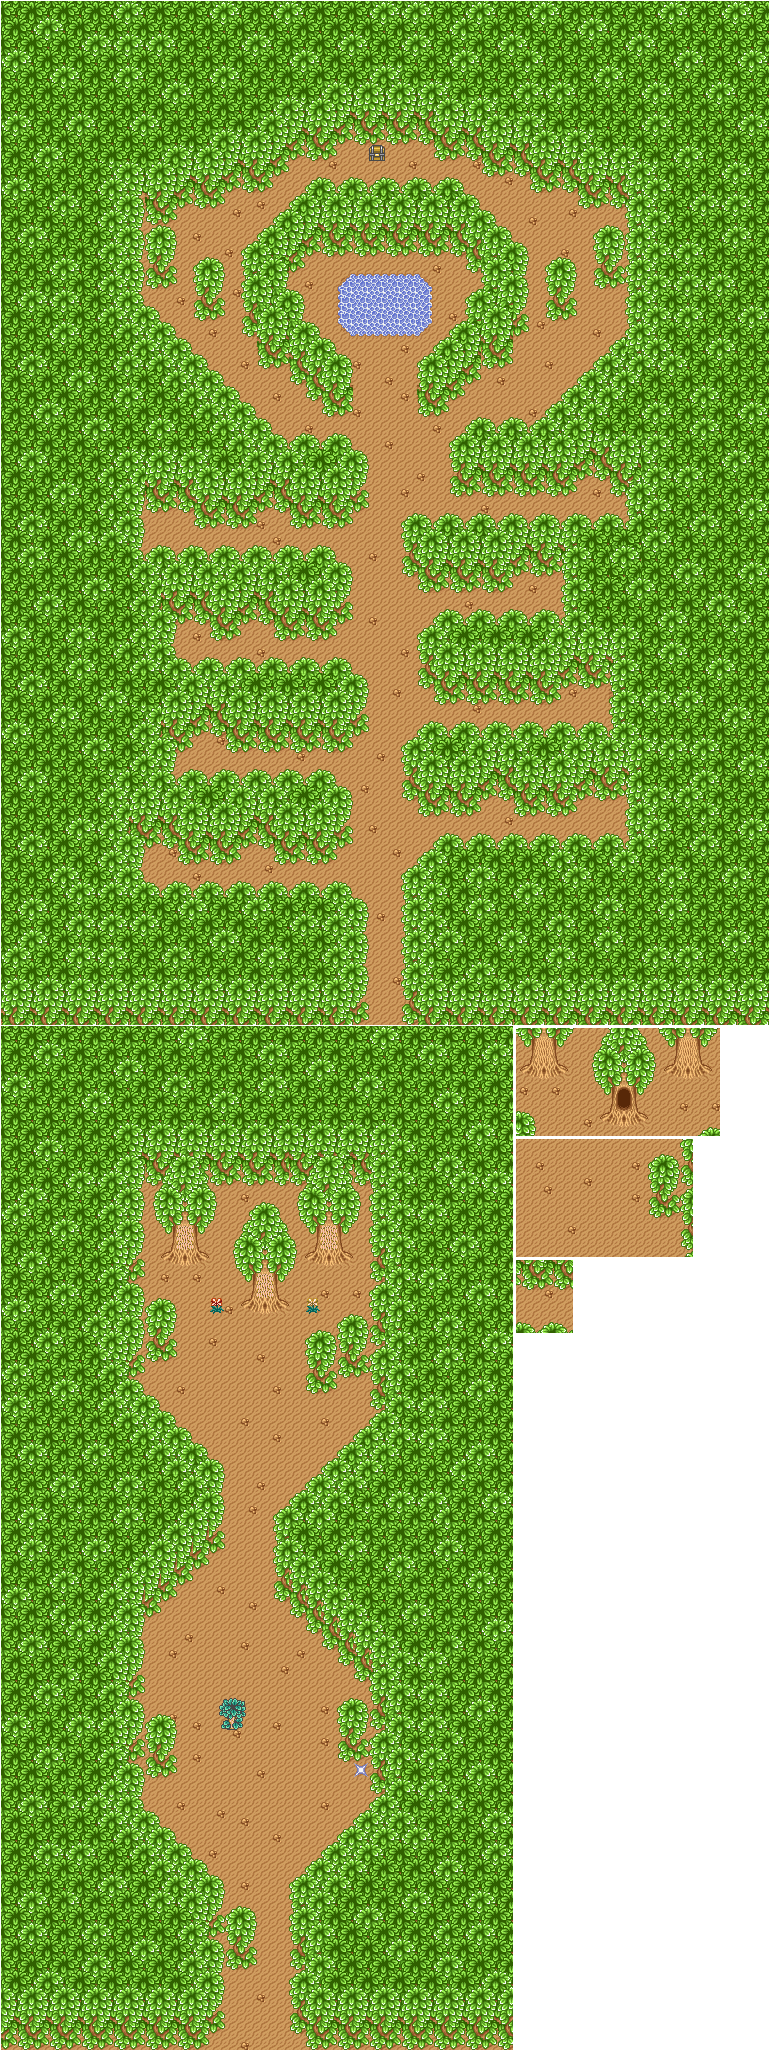 Map of Elel Woods
Treasure: Treasure Box
You start off by waking up thinking you came from a field trip from Tokyo Tower. All the characters are introduced and then a young looking person appears. This person, by the name of Clef tells you that you are in another world, and the only way to get back is to get the treasure chest in the forest south of where you stand. After he's done talking and gives you 6 life cubes, talk to him and he will restore your hp/mp. Then go south into the two little palm trees. Wow, you reached The Forest of Elel! The monsters here aren't very hard, just frogs and bees. When you walk in, you will find a save point where you can save your game. Then you see a small tree in the middle of the road. GO in front of it and a fairy will talk to you. She says to go between the pink and orange flowers. After she's finished talking, just keep going straight through the path till you reach the pink and orange flowers. A hole will open in the tree and you will appear in another area. Ignore all the left and right turning paths until you reach a pond. The pond will recover your hp/mp so use it. If you walk behind the pond, you will find out that the treasure box is on the other side of it, so go and get it. Once you retreive it, you will "flash" back to the map. You are south of the two trees now, so make your way back to where you met Clef. Talk to Clef and he will tell you the only way to get back is by becoming the Magic Knights and getting back Princess Emeraude. After a while of talking, Clef will give Huikaru (the red head) FIRE magic, but will not give the others because of a sudden attack of Priest Zagato. Alicione comes and Clef sends you off on a Griffin to find Puresea's House while he defends himself against a two headed dog. Alicione goes after you and eventually catches up to you and fights you. When you land you will be north of a village and your Griffin will dissapear.
Boss: Alicione
HP: ????
Just use Hikaru's newly learned FireShot and there shouldn't be a problem.
2 Village #1 & Presea's House
Go into the village and talk to the people to get some info. Then head east across the bridge - from there keep going up the stairs till you see a big house, which should be Presea's House. You see no one's at the house at the moment, so enter. As you go in, take a left and you'll be captured by Mokona, a rabbit like creature. Then Presea will introduce herself and find out that you are not from this world. She then will bring you to a room where she gives you temporary weapons. These weapons are only for borrow, so she sends you out to find a different metal to make weapons - Escudo. Here Mokona joins your party to show you the way through the Forest of Silence. After you exit you meet Lafarga who is Princess Emeraude's body guard who has sworn to get the Princess back.
3 Forest of Silence
 Map of the Forest of Silence
Treasure: Earrings (you get from Ferio)
To get here go to the forest you see in the east and go into the two palm trees. You need to go through here to reach the Spring of Eterna. When you enter Mokona opens up a tent and you go to sleep to bring your HP and MP back up. You then enter the forest and talk to Mokona to find out which way to go. It seems Mokona doesn't know and the path has dissappeared. Go west until you find a path leading north (shouldn't take you long) you see a plant monster, and a save spot. First save your game then fight the monster. This monster isn't too tough, regular attacks will do the trick. After you defeat the monster, another one comes, but luckily for you a young man comes and defeats it. He then joins your party to find Eterna. Follow the path where Mokona points. Keep going until you reach a more difficult plant monster. After following the path for a while, you reach Alicione. Umi trys to fight by herself, but is suprised and brought down, same with Hikaru. Clef (with Mokona) then gives Umi her magic power - WATER to help Hikaru defeat Alicione. Then the three Magic Knights fight together against Alicione. After you defeat her, Ferio leaves your party, because he realizes that you are the real magic knights. Ferio wanted to become a magic knight, but now he knows that you are the genuine things so he leaves. Before he leaves he gives earrings to Fuu, and then waves good bye. Also after the fight, Clef (with Mokona again) gives Fuu her magical power - WIND. With this power, Fuu heals the party and everyone's HP and MP is back to normal. You appear on the other side of the two palm trees. Now make your way to the Spring of Eterna
Boss: Death Flower (x2)
HP: ????
Just use regular attacks, both monsters should be killed easily.
Boss: Alicione
HP: about 5000-6000
This time Alicione is a little more difficult. Use Umi's Water Dragon (W. Dragon) and Hikaru's Fire Robe. Have Fuu heal your party with the healing cubes.
4 Spring of Eterna
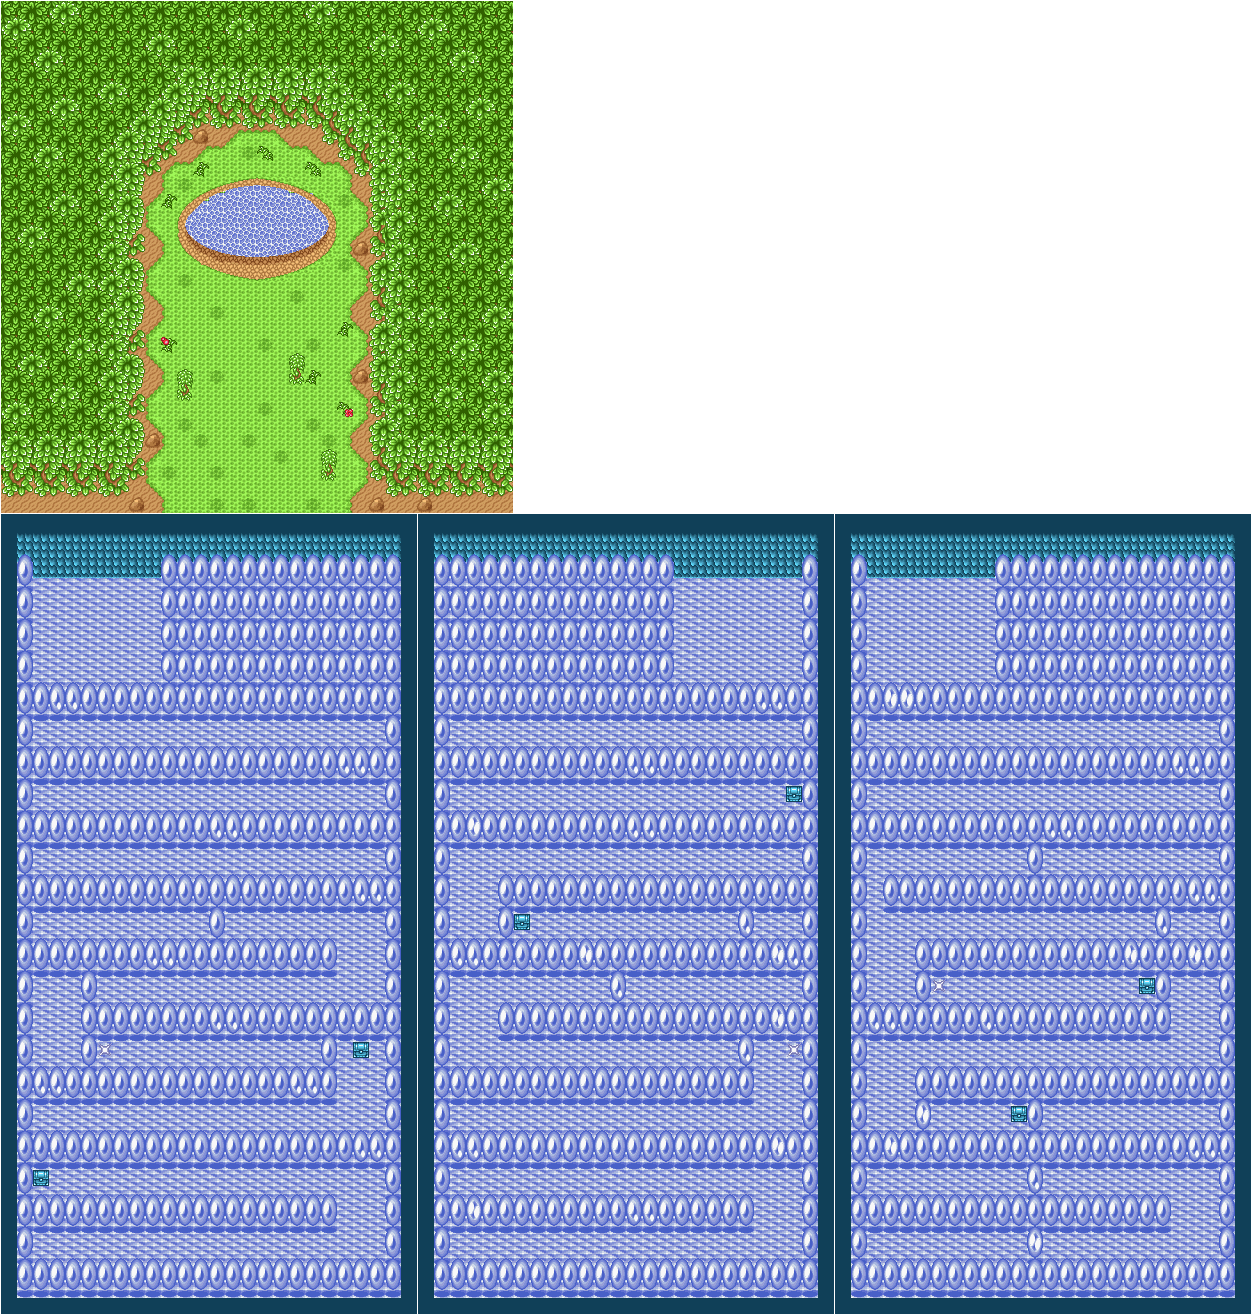 Map of the Spring of Eterna
Once you get in, jump into the pool and then a little scene will happen Zagato banishing Alicione because of her weakness. Then you have to choose a character to play as because all of the characters got seperated. I'll just go in order of character.
Hikaru's Scenario
In Hikaru's scenario, she is alone in a place that is not what it seems. Follow the path to get the treasure chest. When you get back look at the wall and it will crumble. Just follow the path to the other treasure chest and get it. Now look at the walls very closely. The ones with with little white dots (other than the big white ones) will crumble - took me a while to figure that out :). Now just keep following the path where the wall crumbles until you reach a save spot, this is a little more tricky. The pattern is getting a little more difficult, but keep following it and looking for white dots. Once you gwet to the end a dog will attack you. Hikaru will recognize it as Hikari, her dog from her world. Princess Emeraude appears and she tells her to use her mind and think that it is a fake Hikari, because her dog would never attack her. You then fight the dog and the scenario ends.
Boss: Hikari
HP: 2000
Use your Meteor or Fire Robe which do 700-1000 damage, but also attack with your sword. You should beat this boss easily with magic/sword combo.
Umi's Scenario
Treasure: Life Full, Star Cube (x2)
Umi realizes that she is alone also and hears a voice telling her to follow the path. Again follow the path with the small white dots. This time you'll see bigger white dots which indicate two difficult enemies. Look at the wall if you want to fight them. Keep going and you'll see a save point which tells you you are on the right path. Take your time to level up if you wish. After you are done follow the path until there is a right turn. Go right and follow the path. Look closely at the dots so you can get to the treasure safely. Once you get the treasure go back and take the north path. Keep going and you'll reach another treasure chest. As always just keep following the path. Shortly after the treasure chest you should reach Umi's parents who will attack Umi. After you beat them, the scenario will end.
Boss: Umi's Mom, Umi's Dad
HP: 1500 each
Use Sea Wave twice and that should be the end of them.
Fuu's Scenario
Treasure: WindCore (x5), Star Cube (x3)
Just follow the path to the treasure chest and notice the white dots again on the wall. As always just keep following the path. After a while you'll reach a save point, again level up if desired. Just a little bit to the east from the save point is another treasure chest, grab it :) At the end you'll fight Fuu. Fuu is an exact copy of herself. If you notice, in all the Scenario's, the Magic Knight's are fighting what the love most. After you beat Fuu, the scenario will end.
Boss: Fuu
HP: about 2000
Be careful each time you attack her, you get hurt as well...it seems when you use magic on her you do not get hurt though... So use Wind Fury and attack with your bow. Heal when necessary.
After you beat all the bosses, Presea will come to the Spring of Eterna and make you all swords out of the Escudo you got by beating the thing most precious to you. She will tell you to head for the sea shore, so that's where you go! :)
5 Village #2
Go south across the bridge with the Red Gem on it that you can now pass through. A little farther way south, you reach a village. Talk to the people and get some info, buy some things in the item shop. Then head south to the South Seashore
6 South Seashore
Once you get to a big sand of beach, you have reached the South Seashore. Here, Mokona will make a "Flying Cup" and you get on. When you are flying, the wings stop flapping and you fall into the sea.
7 Under the Sea
 Map of the Temple of Water
Treasure: Star Cube (x5), FuseCore (x9), Smoke (x3), Root Cube, PoisSeed (x2)
Once you get here, go left and right to get the treasures. The monsters here are pretty tough, so use magic. After you get the treasure on the right, the 2nd door fromt he right will lead you to the next level. The best way to beat the monsters is Fuu's Wind Fury, then regular attack. On the second level, again there is a treasure chest to the right and a save spot to the left. I suggest you level up at the save spot to become stronger and beat the monsters more easily. Get your characters all to at least level 19-21 and have them all know at least 6 magic attacks. After you are satisfied/or at these levels, go to the next level by going through the passageway on the very right. When you get to the thrid level go all the way to the left to get the treasure chest, then continue on the path going north. Once you get to the intersection where there are three paths, go left, then north. After you are in a cave like place with lots of doors. Go all the way to the west until you see a treasure chest, take it and then save your game at the save spot. Again, level up if desired. Then go to the second door from the left to get out of that area. Walk straight on the bridge until you reach the "Temple of Water." Umi says that a mashin sleeps here and then dissapears. You decide to look for her and go in. It appears that there are no monsters in here. Walk straight and search the two chests in the left and the one chest on the right to get their treasures. Then continue straight an you will see a dragon and Umi. The dragon, called Celes is a mashin that only the Magic Knights are allowed to touch. Then Ascot appears, another one of Zagato's henchmen, and sends Maxima's after you, luckily you destroy them all (not even needing to battle!). Then Ascot will send out Fezier to battle Umi alone. After you defeat Fezier, Ascot will find out that was he was doing was wrong and apoligizes to his "Maxima Friends" and to the Magic Knights. Then Celes "dives" into Umi and her sword and armor changes. Then Ascot tells you where the other Mashin's are - in the mountains of the floating land. He then joins your party. After that you see a scene where Caldina is called on by Zagato to destroy the Knights
Boss: Fezier
HP: 5500
Use SeaGuard to guard his attacks and attack with IceDance. 3x of IceDance should kill him easily, heal with Cubes if needed.
8 Village #3
Once you get in town a woman will be attacked by 3 Death Flowers. You then battle the Death Flowers and help the woman. Another Death Flower appears, but Ascot defeats it with Maxima. Ascot is then pounded on by the people because he is a summoner, but Umi defends him and so does the old woman for helping her. Now exit the village and go up to the mountain with the path on it.
Boss: Death Flower (x3)
HP: ????
Use Ascot's Maxima, Hikaru's Red Wave, Fuu's Wind Fury, and Umi's Ice Dance, and they should all be dead in one turn.
Upon entering the Mount of No Return, you find that the door is locked. Next, go back to the village. Once in the village, go to the elder's house and get the "Gate Key". Now you can go back to the mountain.
9 Mountain of No Return
 Map of the Mountain of No Return
Treasure: FuseCore (x5), FireCore (x2), StarCube (x3), LifeFull (x3)
Go straight until you reach the stairs (shouldn't take long :]). First go to the cave on the far right and go in to get the treasure. After you have done that, go to the far left and go into the cave to get another treasure. Then take the second stairs from the left to go to a recovery spring in a cave if you wish. I again suggest leveling up to at least lvl 27. Once you're done, go back down the stairs from where you came, the path going up is a dead end. Now take the 2nd stair from the right going up. Go into the cave and grab the treasure chest, then continue heading up. You should see another cave on your right, grab it then head on out and take the stairs going to another cave if you want to reach another recovery spring. Then go to the stairs leading to the top of the mountain. Here you will be sucked up by a tornado bringing you to the Maze of Wind.
10 Maze of Wind
 Map of the Maze of Wind
Treasure: LifeCube (x7), StarCube (x5), StarFull, RootCube, LifeFull
Follow Mokona! When the path cuts where you can either take south west or north, take the south west path. Keep going and step on the warper which will warp you to two treasure chests and another "warper." Step on the other warper and you'll arrive on another warper. We'll call this warper "originalone." Now take the south path until you reach another warper. Continue forward and step on the warper in the east which will warp you to another treasure chest. After you grab the treasure chest, step on the warper again and continue north and step on that warper. Go west and you will be back at originalone warper. Now go back and take the NORTH path and step on the warper. It will bring you to another warper - go south and step on the other one. Follow the path and take the SECOND north path to step on the warpers. (the first will bring you to the end of the dungeon, but you want to get all the treasures don't you? :|) Take all three paths to get 4 treasure chests. After getting the treasure, take the first north path to get to the end of the "maze" and find Mokona.
 Map of the Temple of the Sky
Now its Fuu's turn to step up and say that this is the "Temple of the Sky" and a mashin is inside, and dissapear inside the temple. Ascot now leaves your party to go to the old lady he saved and Hikaru and Umi go in alone. Caldina is waiting inside for them and attacks you. She then dissapears, but is not defeated. After fighting her, go to the left and right to get the treasures, then continue going straight. You then see Windam, the four-wing bird Wind mashin, and Fuu. Then Caldina will appear again and make Hikaru and Umi fight you because they are under a trance. In the fight let Umi and Hikaru kill you! Then you will fight Caldina, but don't worry, you will have full hp/mp. Use WindVeil to guard attacks and attack with regular attack and WindFury. Then Caldina will realize what she is doing is wrong. Windam will then jump into Fuu and her armor and sword will change. Now you will see a scene with Zagato looking into a pool of water - which is Princess Emeraude! Lafarga then shows up and challenges Zagato, but Zagato is too powerful and turns Lafarga into one of his minions. The scene cuts back to the Magic Knights and Miss Caldina joins your party - for 30,000. If you have the gold to spare get her, I mean, what will you spend on with the gold anyway? Now head northwest to the Volcano where the last Mashin sleeps.
Boss: Miss Caldina
HP: about 8000
Have Umi use Sea Guard on both of you to guard her attacks. Then let Hikaru attack her with Flash and Umi attack her with IceDance.
11 Back to Village #3
Treasure: Orb of Maxima
Go into the old lady's house and talk to Ascot. He will give you the Orb of Maxima which allows you to summon monsters. After head west across the bridge to the other continent. Then keep going west until you see a bridge heading north. Take that bridge to the other continent and you will find the Volcano.
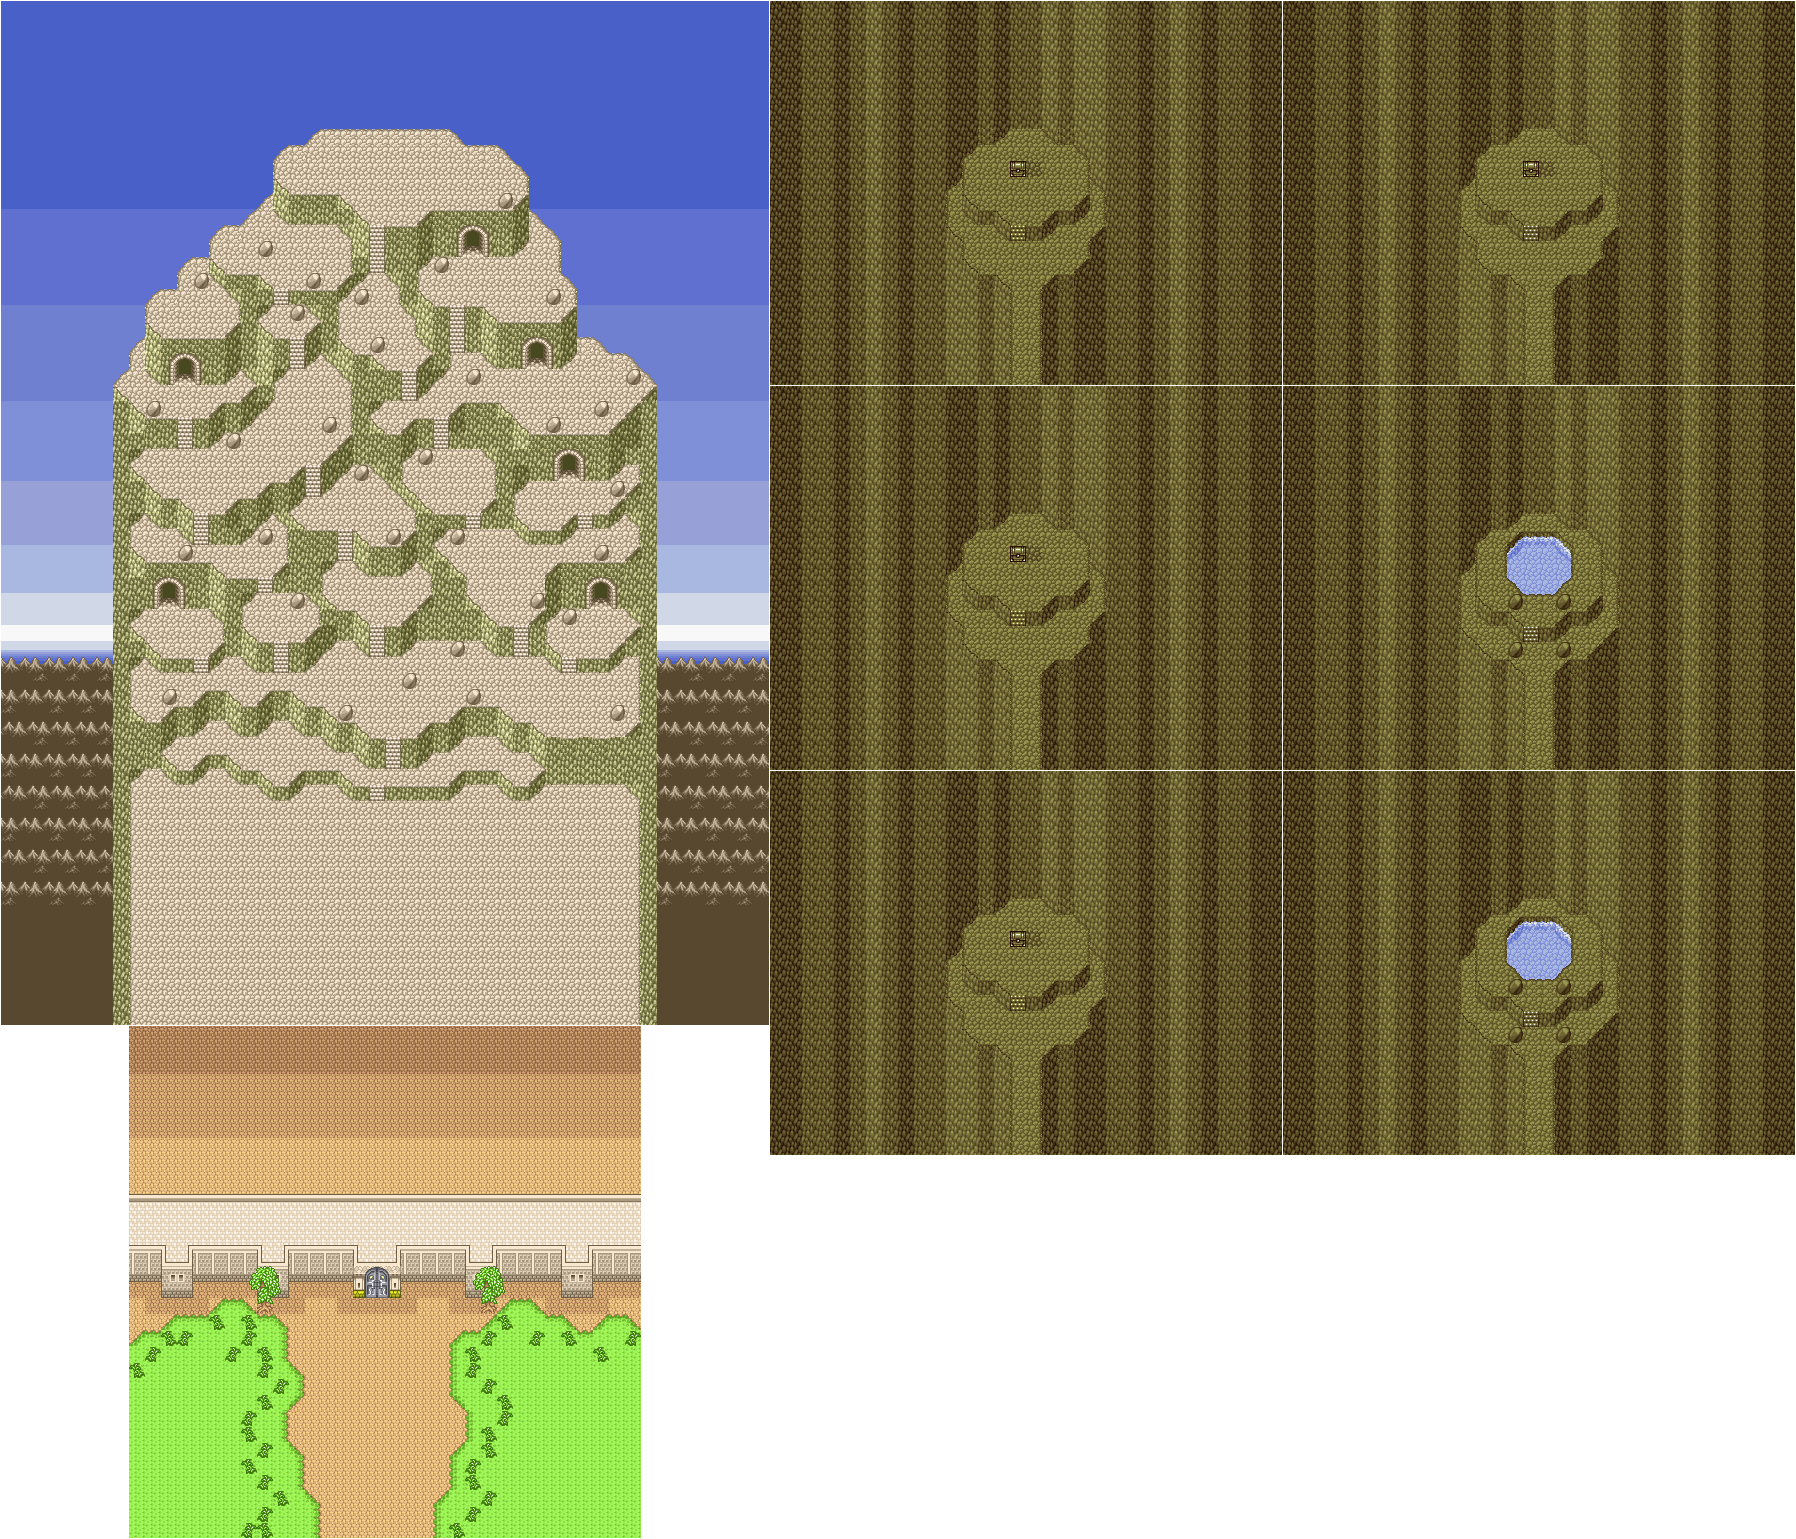
12 Volcano
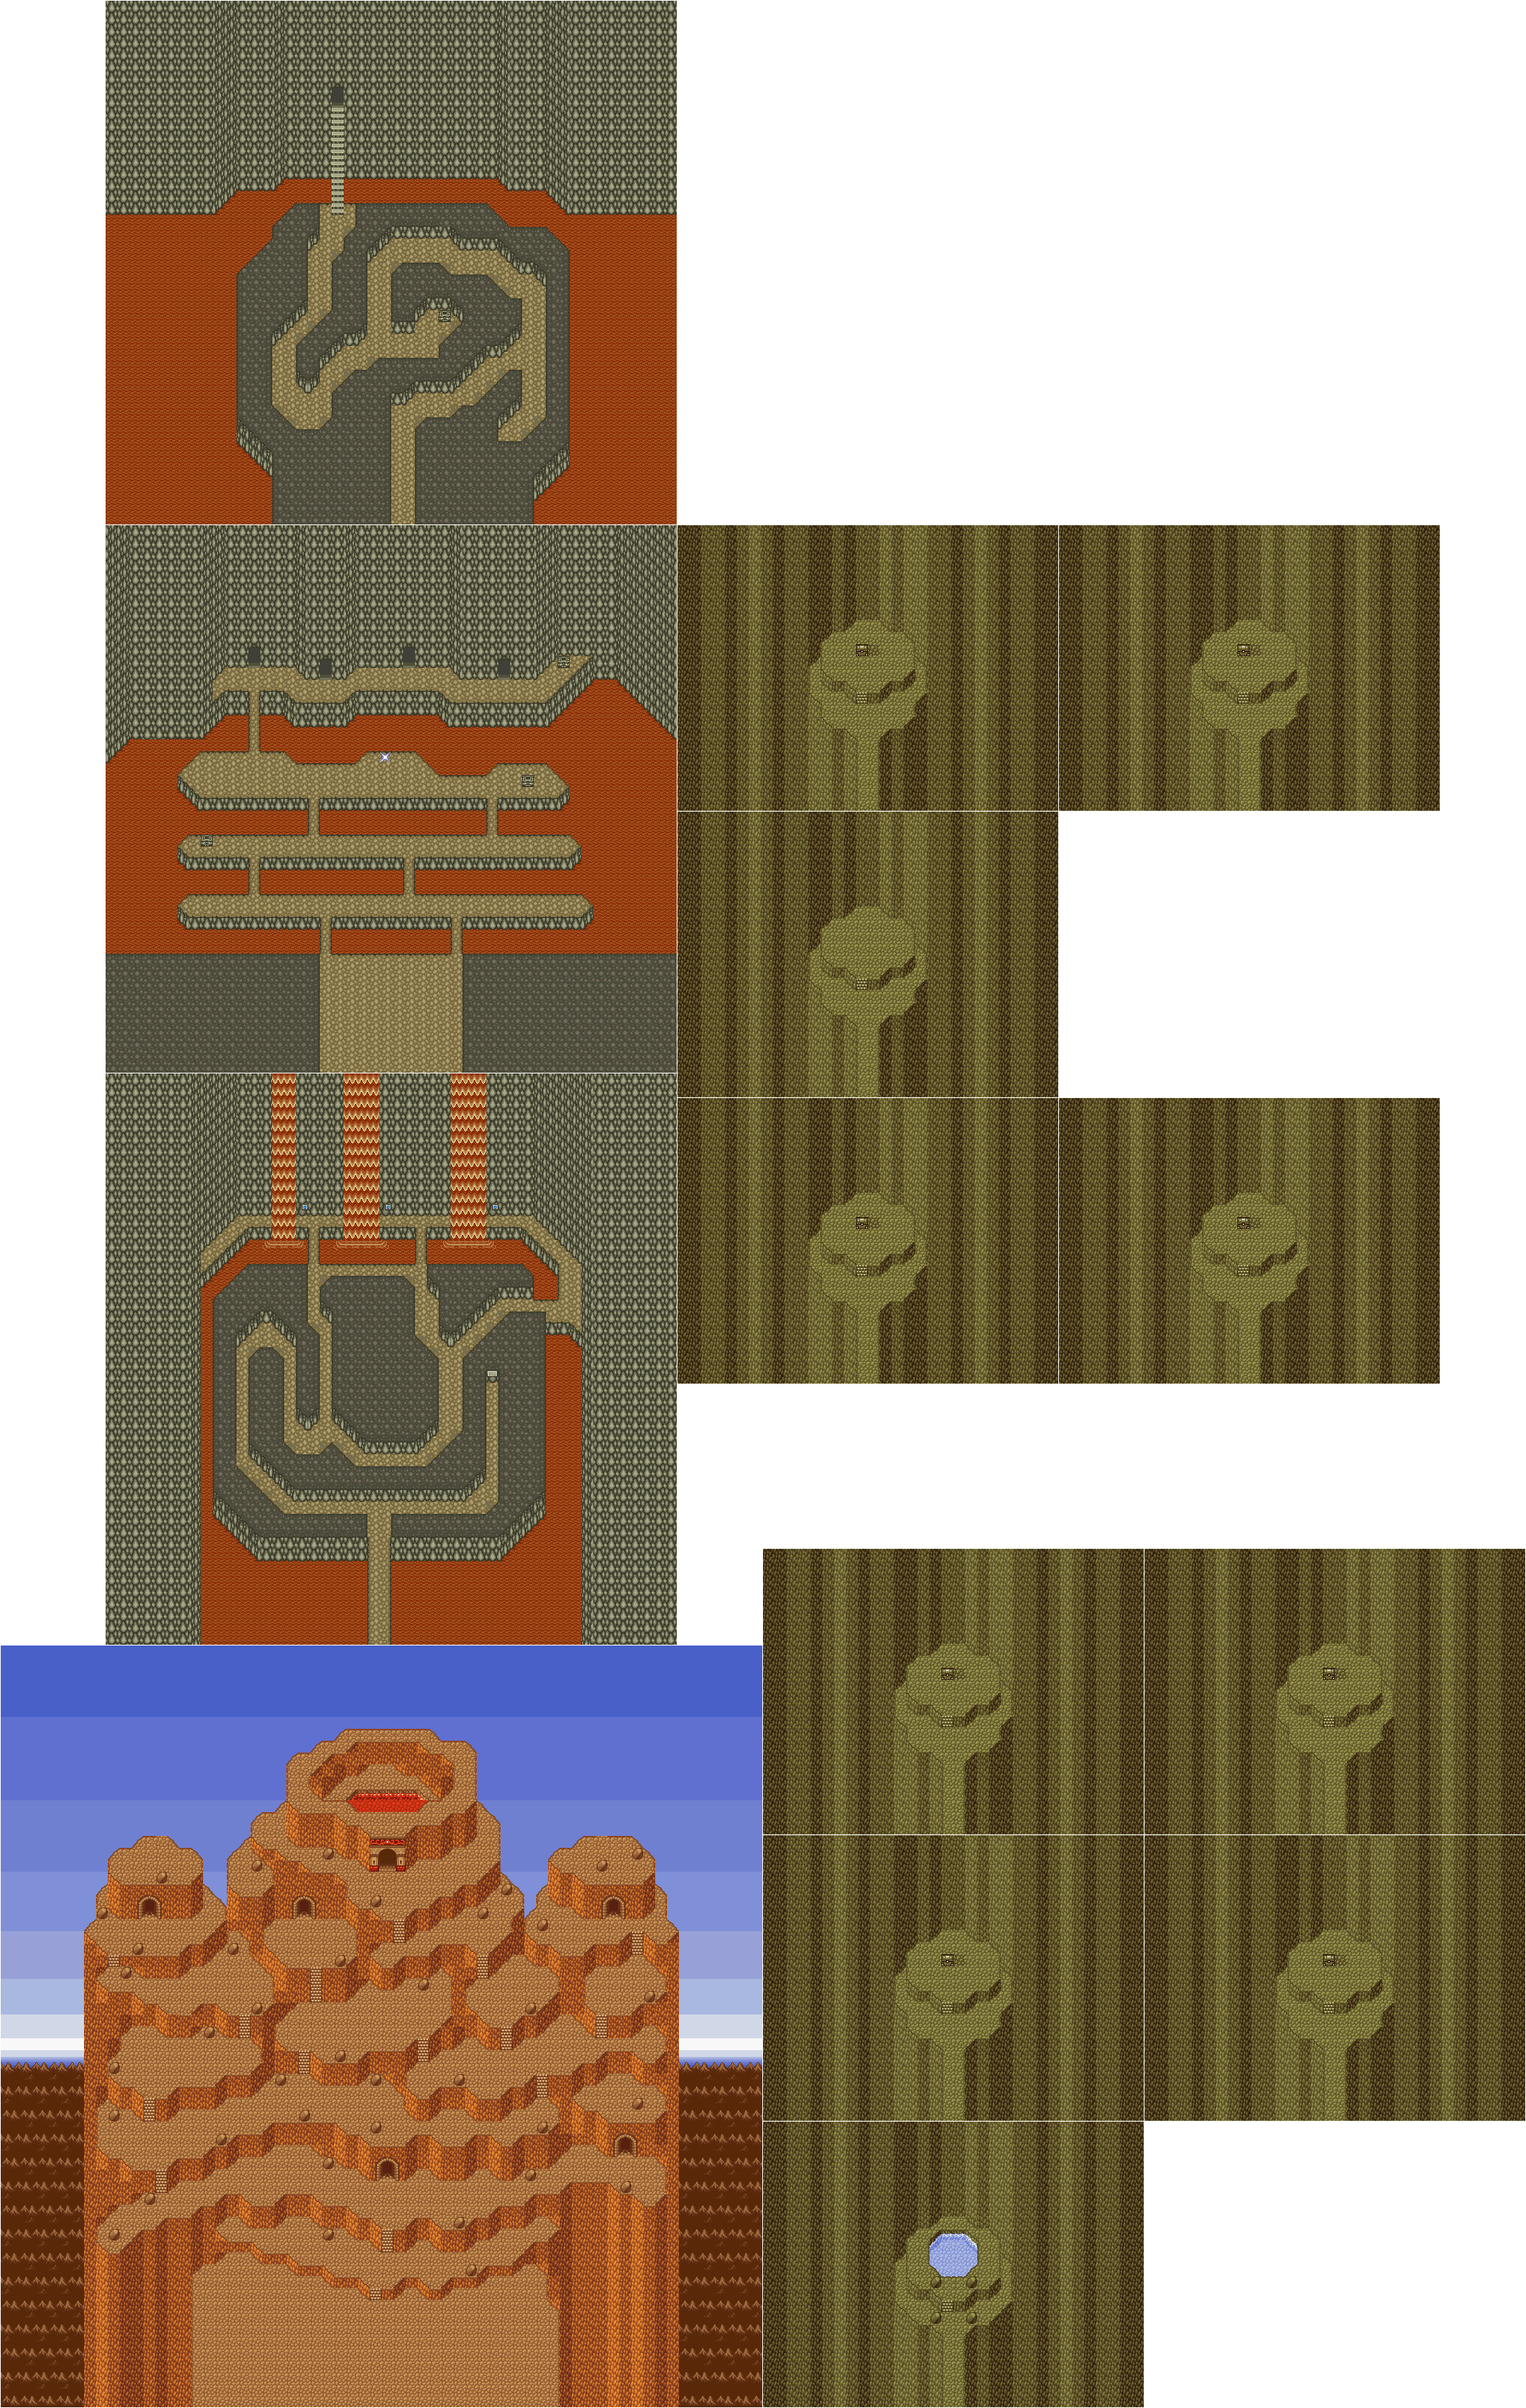 Map of the Volcano
Treasure: SoulCore (x4), Smoke, RootCube (x4), WindCore (x2), StarCube (x3), WaveCore (x4), StarFull, PasaSeed (x4), FireCore (x2), LifeCube, SoftSeed, PoisSeed, FuseCore (x3)
Go in, and go to the cave that is right in front of you, then go to the far right into the cave to get a treasure chest. After doing that go to the far left to go up the stairs. Then go to the far right and go the stairs to another cave to get another treasure chest. Now take the stairs right in front of the start point of this stair level to reach a cave with a healing spring in it. Level up is desired. Now go back down and east a bit till you reach a stair going down. Take that stair going down and take the stair going up right next to it. This will lead you to a dungeon. Go to the right and up and you'll get some information saying, "The Holy Road continues beyond the wall..." Then after you've read that, go back and take the left turn. Keep going until you reach an intersection that goes north and east. Take the east path first. Then take the path on the right which will lead you to a button. Press it and the "lava waterfall" will dissapear and open a door. Do the same to the next one after that, and that one after that one. The last door on the left side contains a treasure chest grab it, then take the next door. The next door after that one also contains a treasure chest, so take the last door, the exit. Go in and take the path on the left and keep going left until you reach a treasure chest. Get it! then continue on the path going right until you reach the end. The end has a treasure chest so grab it then go left again. A save spot should be in the middle of the path, so save your game. Continue and you'll reach several doors. The first door leads to another dungeon, so go to the third door which holds a treasure chest (2nd door has nothing in it). Then travel to the end where you'll get a treasure chest and go inside the door to get yet another treasure chest. Now travel back to the first door and go in. Just follow the path and you should reach a treasure chest. After getting the chest follow the path and go up the stairs. You have reached the Temple of Fire! Hikaru now does what the other magic knights did and dissapears. Because of a mysterious force, you can't get in the temple. Lafarga then appears and attacks you. LET HIM KILL YOU, if you don't you'll have to fight him over and over again. Then the scene cuts to Hikaru who is inside the temple with the mashin "Rayearth" calling her. As always in a temple, go to the left and right getting the treasures then go for the mashin. Rayearth tells you that you can't become a Magic Knight yet because your friends wait outside helpless. Gather the treasures where the mashin sits then go back for Umi and Fuu. Here Lafarga attacks you, but you don't have a chance to attack back. Then Rayearth appears and tells you to let your friends die (a test most likely :]), but Hikaru won't let her friends die and attacks Lafarga. After the fight with Lafarga, Rayearth sees your true power by protecting your friends. He then gives you its power and now all three of you are Magic Knights! If you have Caldina in your party, she now leaves in a flying cup to the nearest town. After she does that, Lafarga joins your party and you see a little scene with Inouva and Zagato with Inouva saying that he'll protect Zagato no matter what the cost.
Boss: Lafarga (fighting with Hikaru)
HP: about 16000
Use Hikaru's flash and that's about all you can do to attack him good. Use StarCubes and LifeCubes when needed.
13 Lake
Head for the lake as Lafarga told you. It should be just across the bridge at to the east. Once you are there, Mokona will make another flying cup to fly you to the island with the cave on it to go into Zagato's castle.
14 Cave
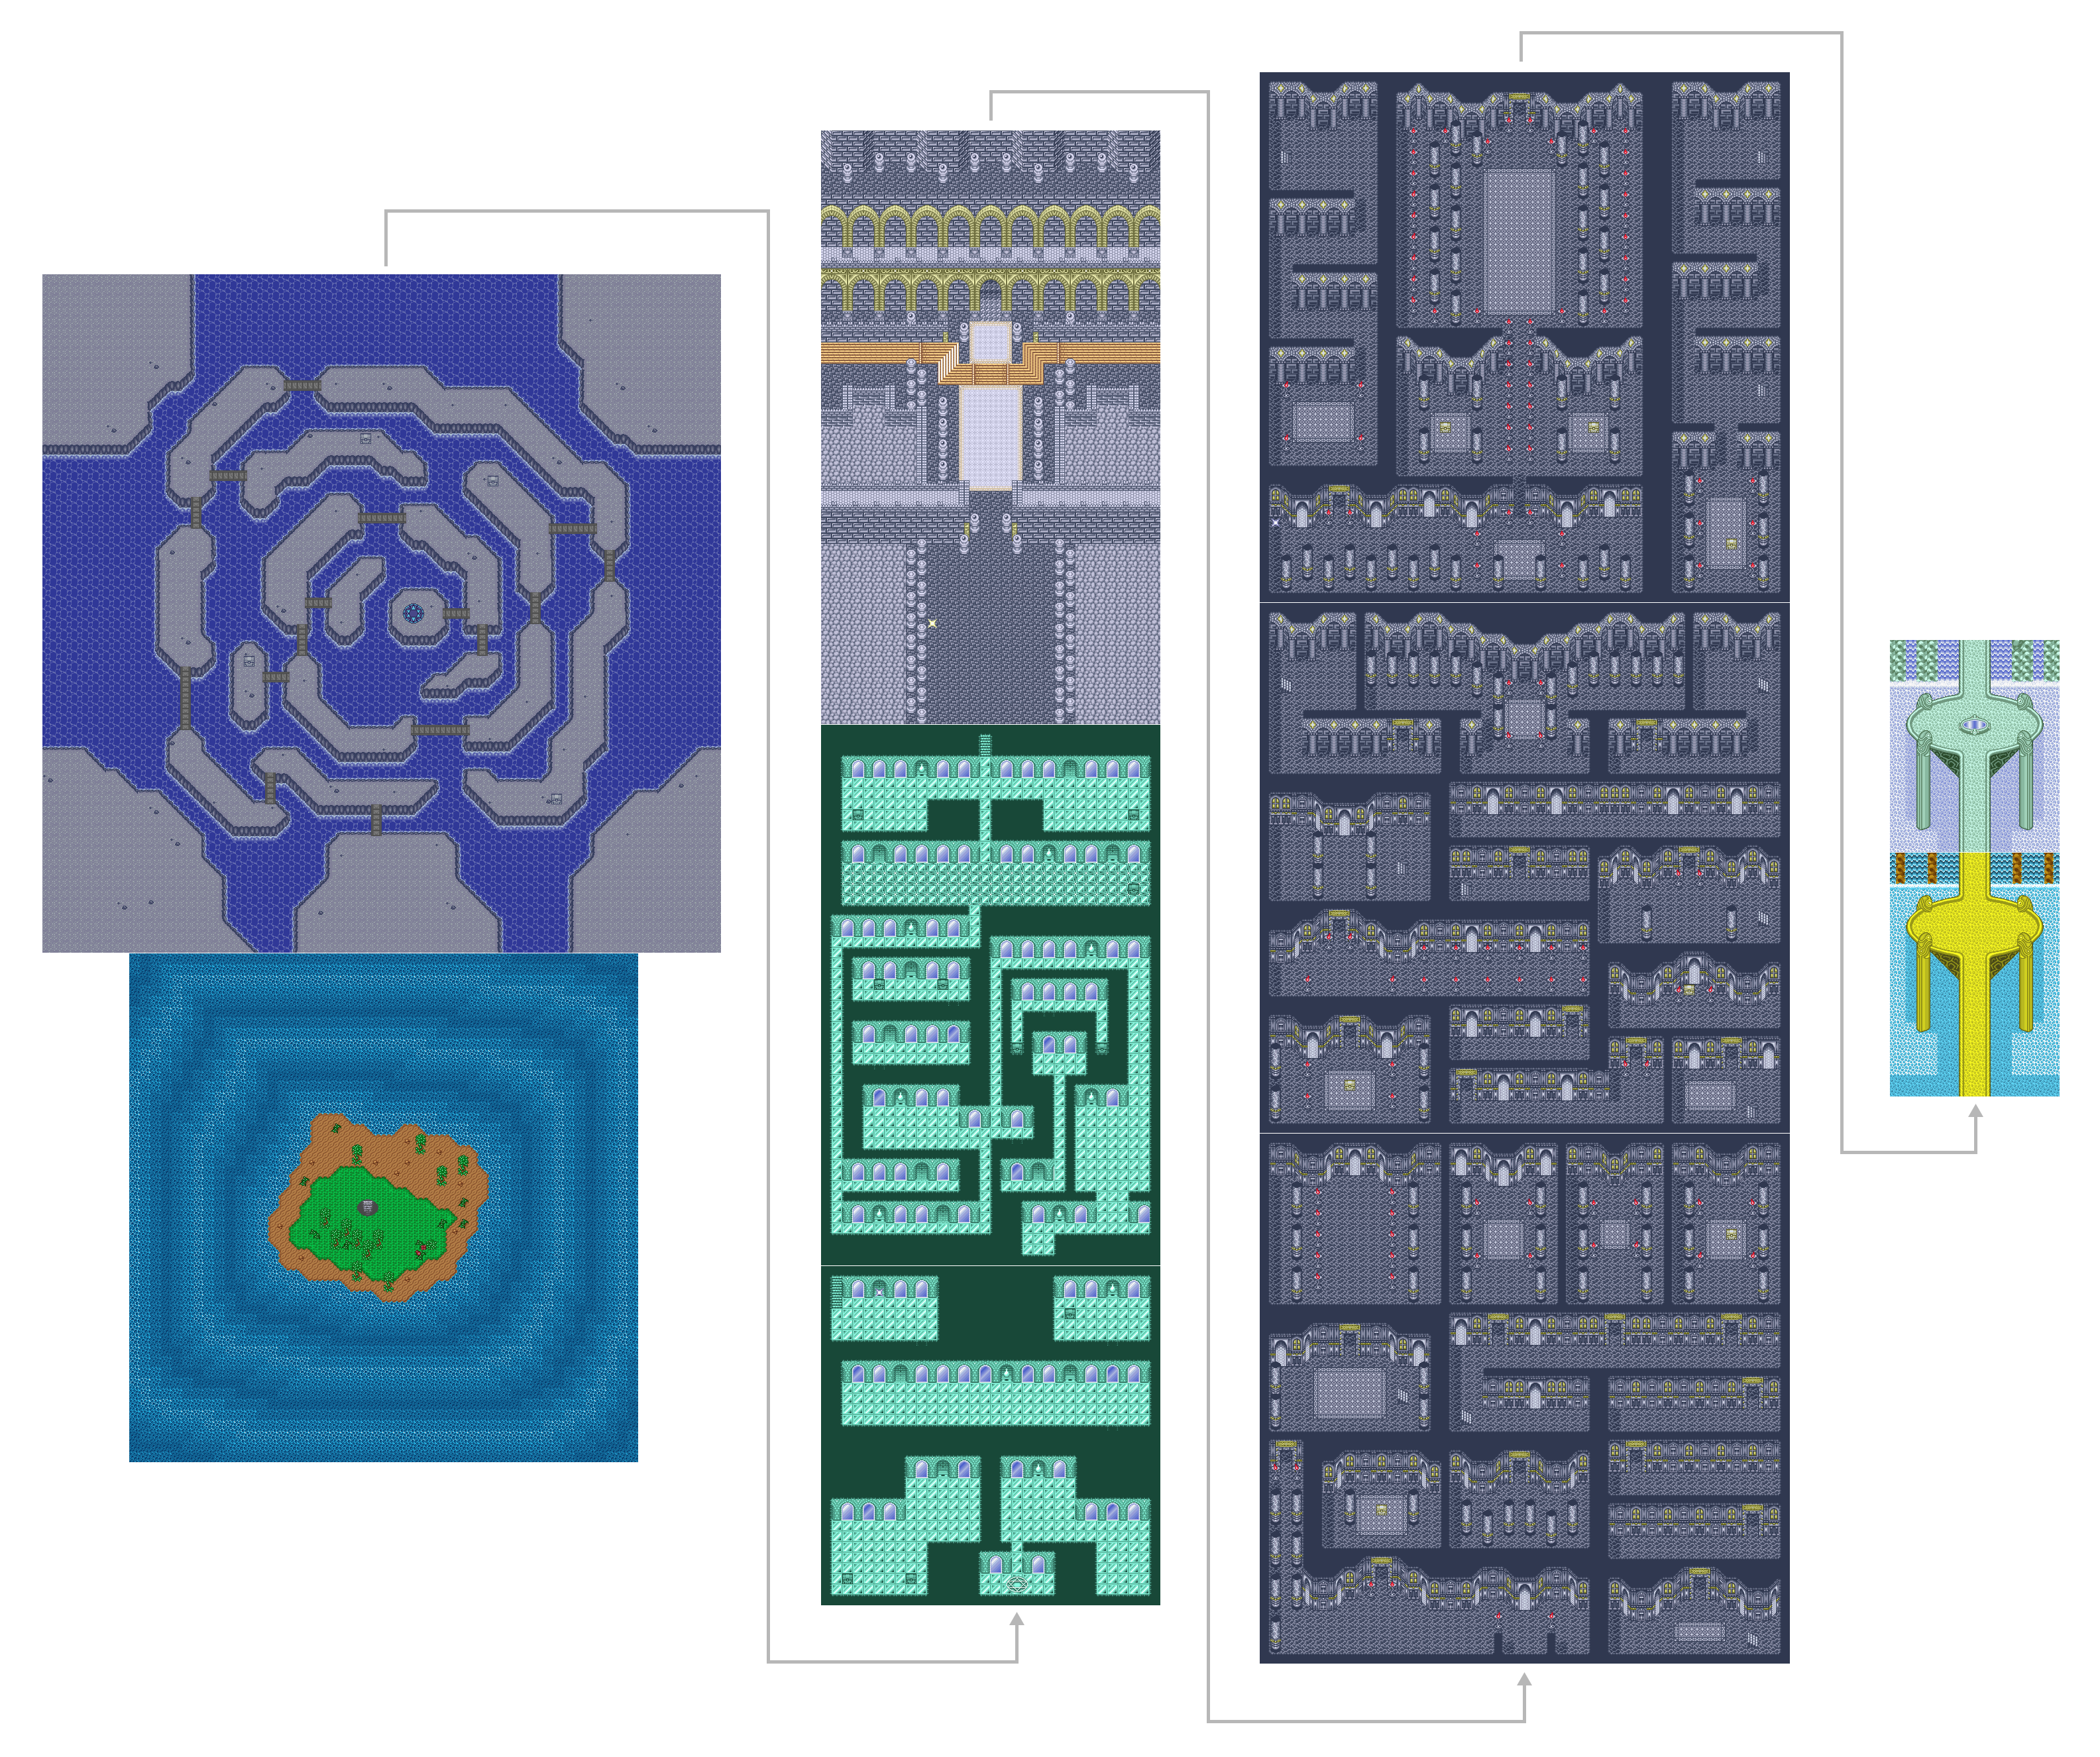 Map that includes the Cave
Treasure: LifeFull, LifeCube, StarCube
Go down the stairs on the island to get to the cave. Follow the path until you reach a spot where you can either go north or east. Take the east path to get a treasure chest, then go back up the north path. Follow the path again until you reach a place where you can either go south or west. Take the west path to get another treasure chest, then go south from THAT path. From this path you should reach another treasure chest. Keep following this path until you reach a warper. Take the warper to the Mirror Maze if you are ready.
15 Mirror Maze
Map that includes the Mirror Maze
Treasure: StarFull (x7), LifeFull (x4), SoulCore (x2), FuseCore (x2)
Look closely at the mirrors the mirror in between two mirrors on your left will let you go through. Those are the kind of mirrors that let you pass - so keep an eye out for those. Go through the center mirror that was an example. Go through the second mirror from the right to get a treasure chest. Now go back and go all the way to the left. Go through the last mirror and turn right, there should be a path that leads to the save spot. Use the save spot and LEVEL UP. I advise you to get the magic knights to lvl 45 and get Lafarga to at least level 40. After leveling up, go up the stairs and to the left to get a treasure chest. There is also another treasure chest to the right. After getting the treasure chests, continue on the path going south. Go to the right to obtain another treasure chest, but be careful, you can be pushed down to another floor by a trap. There is nothing on the left side, so don't worry and continue on the path. When there are two paths leading east, take the second path and don't worry about the first. Taking the second path will lead you to more mirrors. Use the mirror on the very to gain access to another room with more mirrors. From here take the mirror on the very left, and you're in the treasure room! :) Grab the treasures and go back. Then take the mirror path going south to get you to even more treasures, now go back and finally go on the north path. This will lead you to Inouva. Inouva attacks you. After you beat it, it turns into a two headed wolf. After you beat that, continue on the path and soon Lafarga will say that its time to invade Zagato's castle. The knights are too affable and lets Lafarga leave their party because they don't want him involved. The MagicKnights then head into the castle.
Boss: Inouva
HP: ????
Use Hikaru's FireEdge, Umi's BlueFang, and have Fuu use JadeWing and HolyWind to protect and heal. Have Lafarga just attack.
Boss: Keviroth
HP: ????
Use same strategy as you did with Inouva.
16 Zagato's Castle
Map that includes Zagato's Castle
Treasure: RootCube (x3), LifeFull (x3), StarCube (x8), LifeCube (x5), StarFull (x3)
Once you go in there will be a save spot to save your game. After you do that and proceed forward, Alicione will appear and tell you the only way that she can quell Zagato's anger is by defeating you. You fight Alicione and two Keviroths, after you beat them, Alicione will run to Zagato crying. Go down the white carpet and into the castle. You then will see a scene where Alicione storms into the room where Princess Emeraude is being held. She gets all pissed and stuff and Zagato destroys her. Then Zagato goes after the Magic Knights alone. Now that you are in the castle, search around. Go into the door to your left where you will fnid a treasure chest. Then take the route going north to the left of the place where you got the treasure chest. Continue until you reach a room where you can either go north or take the stairs. Take the stairs. Then follow the path and go south to get a treasure chest, then go back and take the east path. Continue and you'll reach a gold treasure chest, take the contents and keep going by taking the stairs downward and going north. You reach a place with three doors. Take the last door to get a treasure chest, the head south (other two doors have nothing). Soon you'll run into another stair case, take it. If you keep following the path you'll reach yet another stair case - again take it. From here go south to get a treasure chest, then take the north path. Keep going, go through the stair case and take the south path. Follow this path and go to the west side and you'll reach another stair case. Again, use this stair case. Just follow the path and you'll reach a save spot (FINALLY). Save your game and level up to lvl 54-55. After you're done, continue on the path and grab the treasure chests. Here you'll meet Zagato. After you defeat him, a Zagato Mashin will appear made just to kill you (how nice). Defeat it then head toward the Pillar. Inside a something odd is happening to Emeraude. She has turned into the Emeraude Mashin! This is because she was never kidnapped. She locked herself inside the pillar to pray, but never could get her mind off of Zagato because she loved him. Now that you killed Zagato, she's after you. The first time you fight Emeraude Mashin you can't harm her, so just let her kill you. After this Princess Emeraude will appear and tell you to kill her...its the only way that she could be with her true love. Now, kill Emeraude Mashin and you'll return to a different place.
Boss: Keviroth (x2), Alicione
HP: A LOT
Start off with JadeWing to protect your party. Then have Hikaru use RedHelix, Umi use AokiYell, and Fuu use JadeRage to attack and kill the two Keviroths. Heal when needed - especially when the dogs fire burn you and Alicione ices you. Heal with HolyWind - works great. Once Alicione is alone, use FireEdge, BlueFang and JadeRage.
Boss: Zagato
HP: ????
Use JadeWing to protect and attack with FireEdge, BlueFang and JadeRage. Heal with HolyWind when necessary.
Boss: Zagato Mashin
HP: ????
This guy isn't very tough, just looks big :) Use same strategy as above.
Final Boss: Emeraude Mashin
HP: ????
Protect with JadeWing and attack with Fire Edge, BlueFang and JadeRage. Heal when she attacks you, it does 1000+ damage.