Ootake Tutorial
⚠️ This tutorial is archived and no longer included in the main navigation. Competing emulators are overwhelmingly better.
View this guide on Google Docs to:
- Save as PDF or any common doc format
Share
About Ootake
This tutorial is to help you with Ootake for Windows. Ootake is a good TurboGrafx16 emulator. Unlike MagicEngine, it's free! Its interface is a little weird, though. The reason why is because Ootake was originally a Japanese emulator. It was (sloppily) translated to English.
There's another thing that might turn you off about Ootake (and MagicEngine). CD games can only be played via your CD-ROM drive. It does not support booting CD games from ISO. Ootake does have a feature that lets you rip your CD games to an Ootake-proprietary ISO format. That's neat, but you still need a CD-ROM drive to do that.
Ootake is still in active development and continuing to improve. It can be downloaded from its homepage: www.ouma.jp/ootake/.
Should you use Ootake?
With all the emulator offerings as of 2025, should you use Ootake? Well, probably not. It's still a bummer that Ootake doesn't support booting from ISO files. RetroArch, a popular multi-system emulator, supports booting from ISO files. It's a top choice for TurboGrafx16/PC Engine emulation. At this time, the best and most accurate TurboGrafx16/PC Engine emulator is Mednafen, another popular multi-system emulator. Although I think RetroArch is far easier to use.
If you dislike RetroArch and Mednafen and insist on using a standalone emulator, Ootake isn't a terrible option. It's even still in active development.
Installation
Ootake uses an install wizard. It's quick and easy. Just double-click to open and follow the steps. When finished, you'll find Ootake in your Start Menu programs list:

Click on Ootake to open it.
The welcome window
Every time you open Ootake, it will present you with this weird and confusing window:
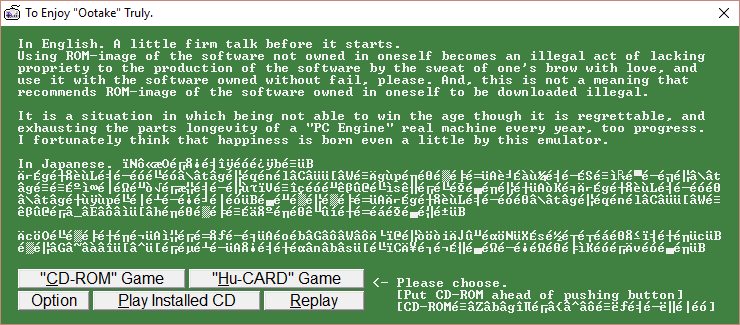
Ootake wants you to load a game before you enter it. Alright then, let's jump into that first. Keep reading.
Loading a game
- Before doing anything, I need to point out that Ootake does not support loading zipped ROMs. You must unzip all your ROMs that you wish to use with Ootake.
- Open Ootake. At the green welcome window, click on
 .
. - Navigate your computer to where your unzipped TurboGrafx16/PC Engine ROMs reside. Click on the unzipped ROM, then click Open - as shown here .
- Your game will begin immediately.
Booting a CD game
- The first thing you need to do is download the BIOS syscard files. I have them right here:
PC Engine CD Syscards (429 KB) - Extract “SYSCARD3.PCE” from my Syscards zip file. Rename it to “syscard.pce”. In Windows, navigate to Ootake's program folder: OS (C:) > Program Files (x86) > Ootake. Place “syscard.pce” here, as shown below:

- Insert your TurboGrafx16-CD/PC Engine CD game into your CD-ROM drive. Give it a minute for Windows to detect it.
- Open Ootake. At the green welcome window, click on
 .
. - Your game will boot to the BIOS screen. Press the Enter key (for RUN) and the game will begin.
Loading a CD game from ISO
I need to disappoint you: Ootake does not support running TurboGrafx16-CD/PC Engine CD games via ISO files. There are two workarounds you can try.
Workaround 1: Use RetroArch
The easiest way to play games from ISO is to use another emulator: RetroArch. This is a popular multi-system emulator that loads ISOs easily and effectively.
Workaround 2: Burn your CD games to CD
If you burn your ISO to a real CD (a CD-R disc), you'd have no problem playing your games with Ootake. I have burning directions below.
Burning CD games from ISO
These directions are for burning either a BIN/CUE archive or ISO/MP3 archive to a CD-R. Also, you should know that the real TurboGrafx16 system does not have copy protection. You can play CD-R copies on it with no problem.
Must have a CUE sheet!
It is essential for your CD game you are going to burn to have a CUE sheet . You cannot proceed without it. If it's missing, no worries. You can use this helpful utility, Sega CUE Maker (87 KB), to generate a CUE sheet.
I. Convert MP3s to WAV
If your CD game is an ISO/MP3, then the MP3 tracks must be converted to WAV. You can do so quickly with an awesome free program known as WinLAME. You can download WinLAME here (1.5 MB). Here's how to convert MP3s to WAV with WinLAME:
- Open WinLAME. Click on the
 button, look for the folder where the MP3s are, select them all, then click on Open. You should see the MP3s you selected listed in the white box. Click Next to go to the next screen.
 - You'll arrive at the “Output Settings” screen. Under “Output Module”, choose Wave Output, as shown here . Click Next to go to the next screen.
- You'll arrive at the “Presets” screen. The default is fine. Click Next to go to the next screen.
- You'll arrive at the “Encoding” screen. Click
 to begin the conversion.
II. Edit the CUE sheet
- We need to open the CUE file and change all instances of MP3 to WAV. The CUE sheet is this file . Go ahead and double-click it.
- You've probably never opened a CUE sheet on your computer. Windows will prompt you with an “Open With” window. Choose Notepad from the list, like this: on Windows 10/11 , on Windows XP . If Notepad isn't showing, click Other Programs and it should be there on the list.
- So you'll have a Notepad window like this . Click on the Edit menu then Replace. In “Find what” type “.mp3” and in “Replace with” type “.wav” - as shown here . Take note that this is case-sensitive! If your wav files have “.WAV” instead of “.wav”, then you must type it in caps here as “.WAV”. Click Replace All when you're ready.
- I don't think this part is necessary, but I like to do it anyway just so things are consistent. Do another Replace to change instances of “MP3” to “WAVE”. Your finished CUE sheet should look like this .
III. Burning to CD-R
Now we can burn to a CD-R. You can use a CD-RW disc, but CD-R discs have a higher success rate.
- Download & install ImgBurn (it's free). You can download ImgBurn from the ImgBurn homepage.
*If you have an anti-virus such as AVG, it may flag ImgBurn for containing adware . Don't panic - it does not contain adware! This warning is false. All that ImgBurn does is show you ads during the install wizard (which is why AVG falsely flags it). ImgBurn is 100% safe. - Upon opening ImgBurn, click Write image file to disc, as shown here .
- Under “Source” click the folder icon, as shown here . Navigate your computer to where your CD ISO resides. Select the CUE sheet and click Open, as shown here
- Take a look at this picture . Insert the CD-R disc. Upon insertion, you'll see information appear (where indicated in the picture at “1”). Next, make sure your CD drive is selected (it should do it automatically).
- Click the icon to burn. Depending on the speed of your CD drive, your game could take maybe 2-10 minutes to finish burning. That's it! Enjoy your fresh copy of a CD game.
*If your burned CD game is not playing music, then you messed up. Go through my directions again and pay attention to every detail.
Setting up the keyboard or gamepad
- A game needs to be running so you can gain access to the menu.
- Access the menu by pressing the Alt key or Esc key, or left click on the screen.
- Go to Input > Configure Pad #1, as shown here .
- A DOS-like prompt will pop up. Do as it asks and press the keyboard key or gamepad button for the button specified.
Full screen
Press Alt+Enter or F12 to enter full screen mode. To go back to window mode, press Alt+Enter or F12 again.
Save states
Save states is a feature that saves the exact spot you are in any game. You can use this feature manually by going into the main menu or by quick keyboard shortcuts.
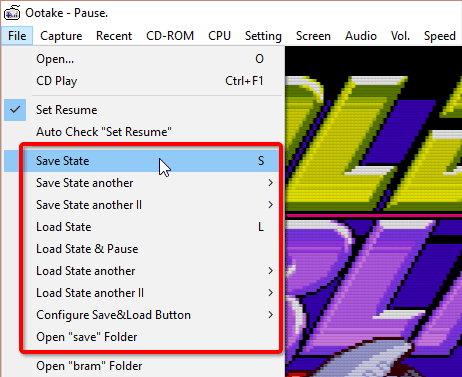
- Capturing a state: To capture a save state in slot 1, press the “S” key. You can also do it via the file menu by going to File > Save State.
- Loading a state: To load a state you previously saved in slot 1, press the “L” key. You can also do it via the file menu by going to File > Load State.
- 50 slots! Ootake lets you save up to 50 different save states. You can save and load from these extra slots by accessing the Save State another and Load State another sub menus in the File menu.
Capturing screen shots
To capture a screen shot, press the Prt Scr key. Ootake will save the screen shot into a folder called “screenshot”. The easiest way to find this folder is by going to Capture > Open screenshots folder.
By default, Ootake saves screen shots in 200% zoom and in BMP format. You can change it by going to Capture > Setting of Screenshot, as shown below:
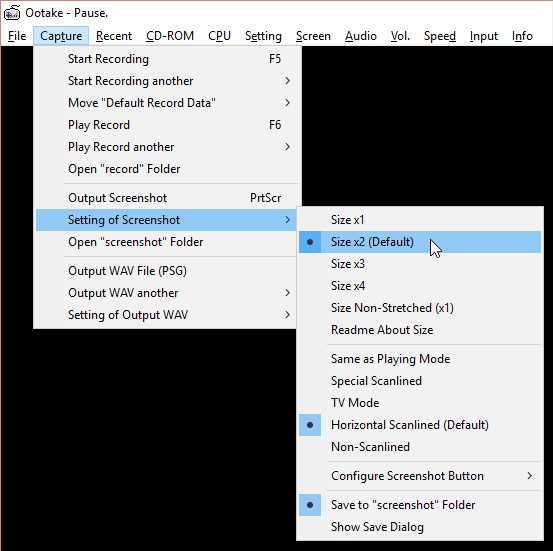
See, you have several options here. You can customize how large the screen will be. You can disable the scanlines (the screen filter) from being captured with the screen shot.
Disabling the scanlines
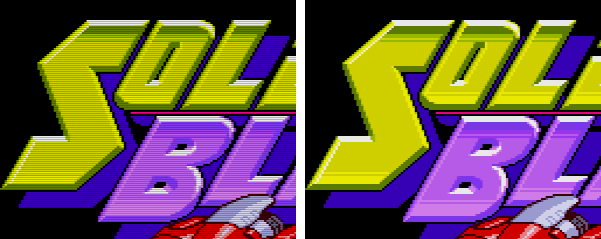
A minor annoyance with Ootake is that by default it shows scanlines. See above - on the left is the default screen with scanlines, and to the right has scanlines disabled. Do you prefer scanlines to be disabled? Then keep reading.
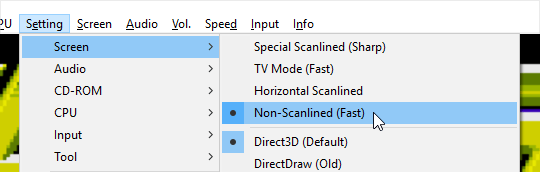
As shown above, go to Setting > Screen > Non-Scanlined (Fast).
Finding ROMs
In my links page, I have some good links to sites where you can download ROMs. If you want to try to find more sites than what's in my collection of links, just Google around. For example, if you want to download Bonk's Adventure just Google “download bonks adventure tg16”.
The only tricky thing is that the TurboGrafx16 has several aliases. Below is a list of the ones I know of. Try them out during your ROM or ISO searches. “TurboGrafx16” is the NA name and “PC Engine“ is the Japanese name. Although even in NA, it's common for people to refer to NA games as for the PC Engine.
- TurboGrafx16, TurboGrafx-CD
- TG16, TG16-CD
- PC Engine, PC Engine CD
- PCE, PCECD