RetroArch Tutorial
Setting things up
- First-time setup (important!)
- Understanding the cores
- Deleting a core
- Required BIOS files
- The BIOS file directory
Playing games
- Loading a game
- Q: Games don't fill the screen!
- Q: The screen feels squished
- The quick menu
- Loading Sega CD & TurboGrafx-CD games
- Loading PlayStation 1 games
- Q: My PAL PS1 game won't load!
- Notes about Saturn
- Notes about N64
- Disc swapping for multiple-CD games
- Navigating the screen overlay
- Changing the screen overlay
Features
- Shaders (screen filters)
- Configuring a Bluetooth gamepad
- Save states
- Capturing screenshots
- Using cheats
- Adding your own cheats
Other info & troubleshooting
View this guide on Google Docs to:
- Save as PDF or any common doc format
Share
About RetroArch for Android
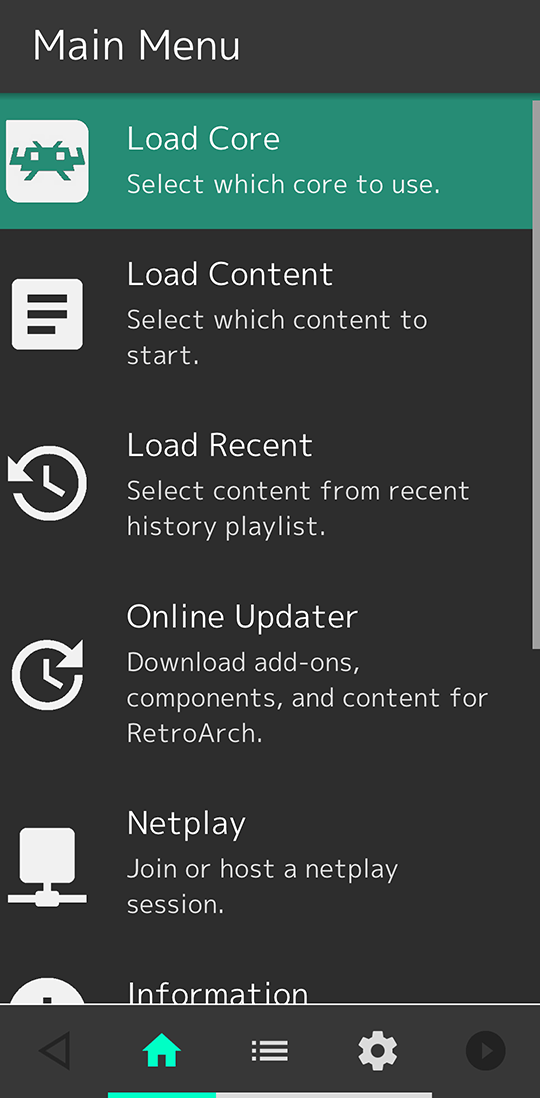 RetroArch's home screen
RetroArch is a multi-system emulator that supports pretty much every video game system. Atari Lynx, Neo Geo Pocket Color, WonderSwan, Game Boy Color, Game Boy Advance, NES, SNES, Virtual Boy, PC Engine/TurboGrafx-CD, PC-FX, Game Gear, Genesis/Mega Drive, Sega CD/Mega CD, Sega Master System, PlayStation 1, Saturn, PSP, and more! It's an open source emulator available for every operating system, and is genuinely 100% free.
The fact that RetroArch covers every video game system gives Android users a huge advantage. The available single-system emulators only cover the usual assortment of popular systems. There may be some instances where you'll have no choice but to use RetroArch.
RetroArch is particularly ideal for Android tablets and Play Store supported Chromebooks. Single-system emulators don't fare well on large screens, but RetroArch does.
The drawback with RetroArch is that it wants to do everything and cook your dinner! It's loaded with an overwhelming amount of features and customization. The result is a poor user experience. RetroArch is confusing for beginners. However, that's exactly the reason why I created this tutorial. Hopefully, I can make RetroArch easy for everyone :)
Downloading RetroArch
This is where things get a little confusing. There are two downloads for Retroarch in the Play Store:
- RetroArch Plus - This version is meant for devices that have Android 8.0 or higher installed and for 64-bit capable devices. In other words, this is for most modern Android devices.
- RetroArch - This version is intended for older Android devices and devices that are not 64-bit.
Everything is BIG
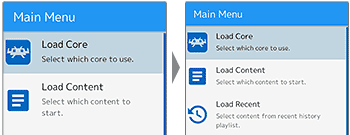 Shrinking the UI, before & after
Newer versions of RetroArch have the UI larger than it should be. It's quick to shrink it down. Follow this flow - in the settings go to User Interface > Appearance > Menu Scale Factor. Select a ratio smaller than “1.00x”. I recommend “0.80x” or “0.85x”.
First-time setup (important!)
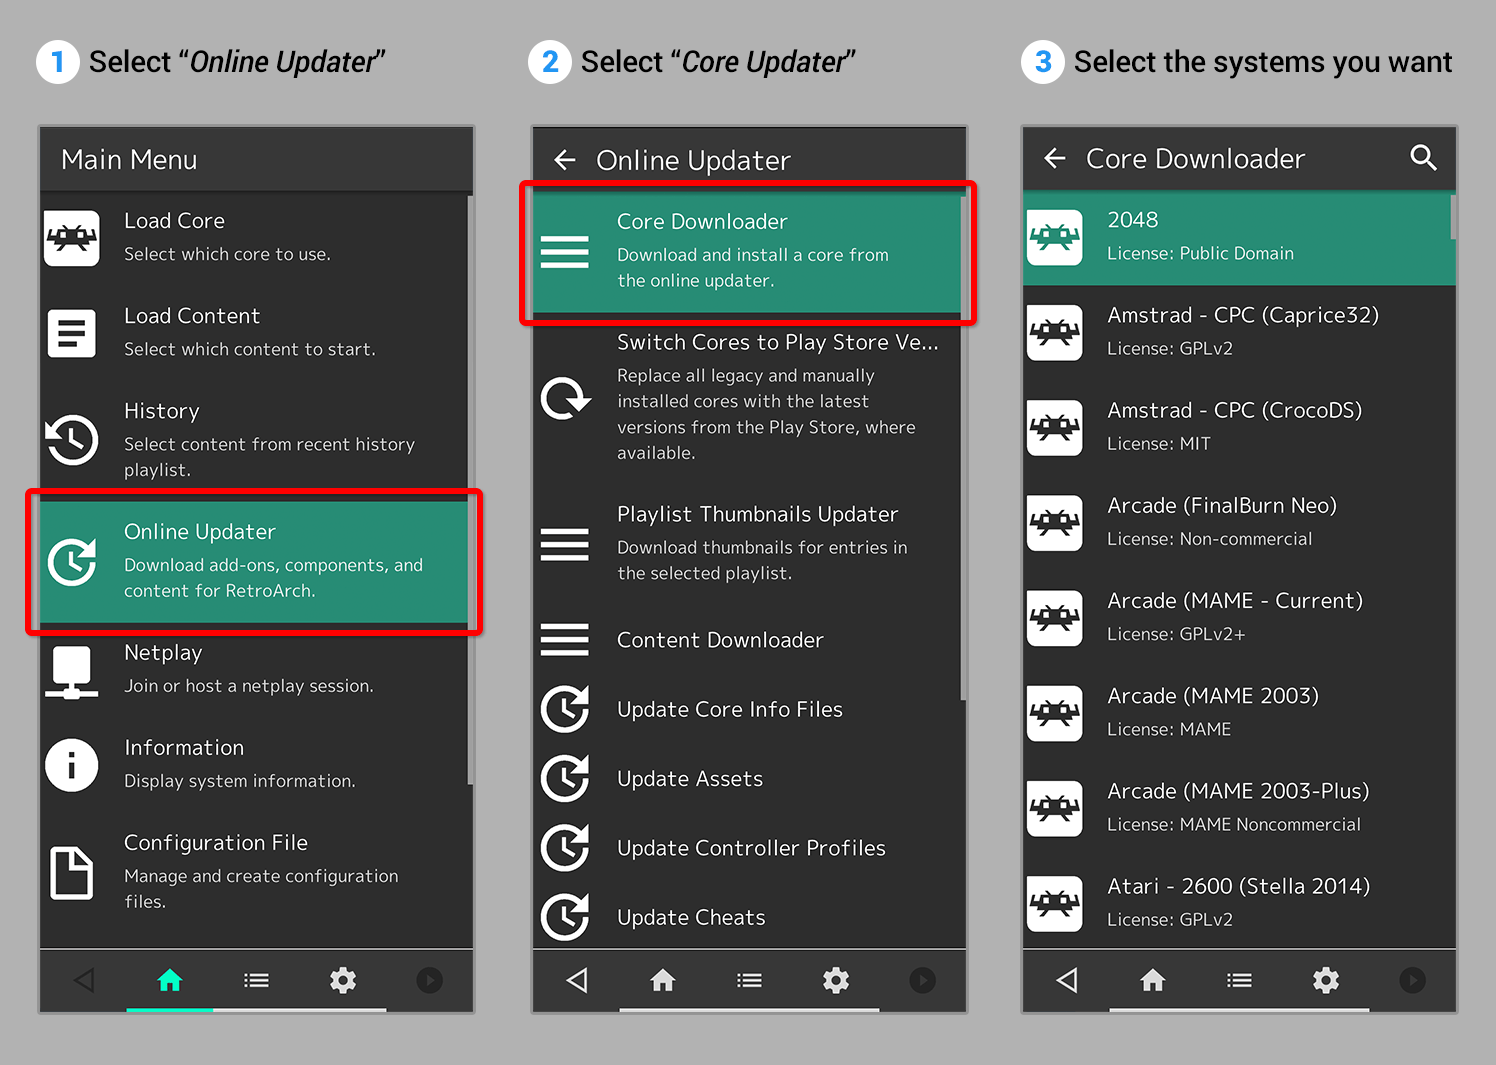
RetroArch doesn't come packaged with its 'cores' (its video game emulators). The authors of RetroArch are mindful of the limited space we have on our Android devices. Maybe you just want to use RetroArch for SNES emulation? Well then, only download the SNES cores.
You access the core updater screen by going to Online Updater > Core Updater, as shown to the right. Then select the systems you want.
That's all there is to it! Once you download a core it becomes available immediately. So if you download an SNES core then you can immediately proceed to playing your SNES ROMs.
If you're finding the list of cores confusing, continue reading below.
Understanding the cores
Browsing through RetroArch's massive cores list, you're going to see cores listed like this:
- Game Boy Advance (gpSP)
- Game Boy Advance (Meteor)
- Game Boy Advance (mGBA)
- Game Boy Advance (VBA Next)
- Game Boy Advance (VBA-M)
So what does all that mean? I don't know how involved you are with video game emulation, but enthusiasts take emulation very seriously. RetroArch wants to satisfy everyone's OCD for perfection by offering a variety of cores for specific emulators. As a beginner, you may or may not recognize those emulators.
To familiarize yourself with the best emulators (which RetroArch has cores for), you could review my list of top emulators. Or just pick a core at random; unless you're an emulation purist, you probably won't notice any difference between cores.
Deleting a core
RetroArch's interface makes it easy to accidentally download an unwanted core. The following directions are how you can delete a core. It's oddly several steps and not a convenient process.
- On the home tab
 , go to Load Core and select the core you want to delete.
 - At the very top, you should see the header updated with the core you chose. On the home tab , scroll down and select Information.
- On the Information screen, select Core Information.
- On the Core Information screen, scroll all the way down and you'll find an option for Delete core. Select it to delete the core.
Required BIOS files
The following video game systems require these BIOS files in order for games to work. You don't need every single region. For example, if you only intend to play US games, you only need the US region BIOS.
- PlayStation 1
- scph5500.bin - required for Japan-region games.
- scph5501.bin - required for North America/US-region games.
- scph5502.bin - required for Europe-region games.
- Sega CD/Mega CD
- bios_CD_J.bin - required for Japan-region games.
- bios_CD_U.bin - required for North America/US-region games.
- bios_CD_E.bin - required for Europe-region games.
- PC Engine CD/TurboGrafx-CD
- syscard3.pce - general BIOS required for all regions.
- Sega Saturn
- mpr-17933.bin - required for North America/US-region and Europe-region games.
- sega_101.bin - required for Japan-region games.
- Arcade (MAME)
- neogeo.zip - required for NeoGeo games (don't extract it!).
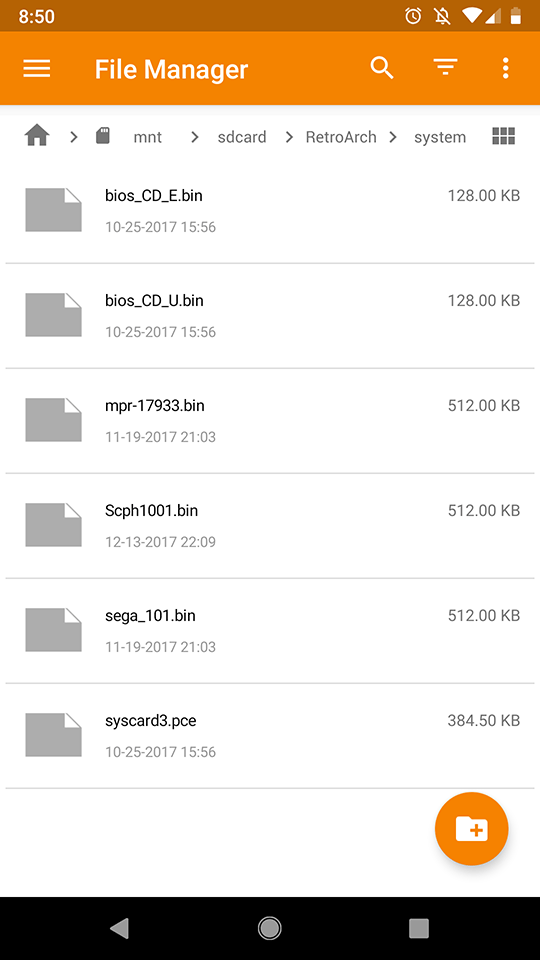 BIOS files in RetroArch's system folder
These BIOS files are CASE SENSITIVE. Depending on which website you downloaded them from, they may be named differently. Make sure every BIOS is named exactly as you see it above. Speaking of where to download BIOS files, you can grab all of them below.
- RetroArch BIOS Bundle (3.45 MB). Contains all the BIOS files listed above. It's a zip file with the extension changed to “_ip”. On Windows, follow these directions for changing it back to “zip”. On Android, it should recognize it as a zip file for you to extract it; here's more info .
Extract the BIOS file(s) from their ZIP file (except for 'neogeo.zip'). Place all of the BIOS files in RetroArch's “system” folder in one of two ways:
- If you have your Android device plugged into your computer, simply copy over the BIOS files to the RetroArch's “system” folder. The RetroArch folder will be there in the initial list of folders when you first open your phone.
- If you downloaded the BIOS files using your device's Internet browser, they'll all be in the “Downloads” folder. You'll need a file manager app to move them to RetroArch's folder. It doesn't matter which one you use. Your Android device probably has a file manager app pre-installed. If it doesn't, try Astro File Manager and follow these directions: moving BIOS files with Astro .
- File manager apps are normally user-friendly. You might have an advanced one that'll start you at the true root of your device. In that case, find RetroArch's folder by going to storage > emulated > 0 > RetroArch.
The BIOS file directory
As I pointed out above, RetroArch currently defaults to the “system” folder for the placement of your BIOS files. Previous versions of RetroArch defaulted to the root folder. This can cause some confusion. If you're having trouble with placement of the BIOS, know you can find out what the default directory is set to for BIOS files and you can change it. Here's how:
- Press the sprocket
 and scroll down to select Directory - as shown here .
 - At the top, you'll see “System/BIOS”. This tells you the current default path for BIOS files. You may want to rotate your Android device so you can see the full path. Or you can gently press and hold it for the full path to slide into view.
- If you want to change the path to the BIOS files, press it to select the new location.
Loading a game
RetroArch offers two different ways to load games. You can either (1) have RetroArch scan for ROMs to build an easily accessible list for you, or (2) load a game manually in the traditional manner.
ROMs can remain in zip files, but ISOs needs to be extracted from their archives. ROM sites deliver ISOs in either ZIP, RAR, or 7Z format.
- On a PC: Windows can extract ZIP files by default. To extract a RAR or 7Z file you can use 7-Zip (it's free).
- On an Android device: To extract a ZIP, RAR, or 7Z file you can use ZArchiver.
And don't forget that PlayStation 1, Saturn, Sega CD/Mega CD, and PC Engine CD/TurboGrafx-CD games require the BIOS.
Scanning for games
This step is optional. What this process does is build a list of all your games within RetroArch so you don't have to fuss with selecting multiple folders every time you want to play your games. Here's how to scan for games:
- Select the list icon
 , then Import Content, and then Scan Directory - as shown here .
 - Navigate your device for your ROMs folder then select Scan this directory. Depending on the number of games you have, this scanning process could take maybe 1-10 minutes.
- When finished, all your games will appear in this list tab . It'll look something like this .
- Select a game you want to play. From there select Run, select the core you want to use, then select Run again - as shown here .
Manually loading games

Make sure you downloaded the cores for the systems you want to play games for. And keep in mind that Sega CD/TurboGrafx-CD games require some extra steps.
- In the home tab select Load Content > /Storage/Emulated/0.
- Navigate to your ROM and select it.
- Select Load Archive, then select the core you want to use. Your game will start. Enjoy!
Q: Games don't fill the screen!
Depending on your Android device, when RetroArch loads a game the screen may not entirely fill the screen. The image is shrunk in the center with too much black space all around it. This has an easy fix.
- Press the sprocket and select Video.
- Select Scaling then Integer Scale. Press it to disable it. That's it! If a game is currently running, restart it to see the corrected screen.
Q: The screen feels squished
Depending on your Android device, when RetroArch loads a game the screen might feel squished to you. This has an easy fix.
- Press the sprocket and select Video.
- Select Scaling then Aspect Ratio. Press it to bring up a list of options. By default, RetroArch is set to “1:1 PAR (4:3 DAR)”. Try maybe “16:9”; press it and load a game to see if the image stretches better. Play around with different aspect ratios to find the desired result. Don't forget that every time you choose a different aspect ratio, you need to load a new game or restart your current game to see the change.
The quick menu
I mention the quick menu a lot in this tutorial. The quick menu is where all the goodies are during gameplay: changing shaders, using save states, using cheats, etc. Here's how to access it:
- First, you need a game to be running.
- Press the
 button. That takes you to a screen like this - the quick menu!
Loading Sega CD & TurboGrafx-CD games
There are a few different types of formats that people have prepared ripped Sega CD/TurboGrafx-CD games as. They consist of one or more BIN files (the game's data), audio tracks, and a CUE sheet. The CUE sheet is a simple text file with a programmatic list of the audio tracks. ROM websites deliver games in one of four formats:
- A binary BIN/CUE (Recommended)
As of the early 2020s, this is the new popular format being distributed from sites. It looks like this when you open it. All files are BIN files. When you look at the CUE sheet , the BIN files are organized as the audio tracks. - A standard BIN/CUE (Not recommended)
This is how video game ISOs (for any CD-based system) are normally ripped as. It looks like this when you open it. When you look at the CUE sheet , the audio tracks are listed even though there are no actual audio files present. - An ISO/MP3 (Doesn't work)
This used to be the most popular format for most of the 2000s and 2010s when the Internet was slower. Converting the audio tracks to MP3 significantly reduced the file size of Sega CD/TurboGrafx-CD games. It looks like this when you open it. - An ISO/WAV (Not recommended)
This is an ISO/MP3 with the audio tracks converted to WAV .
I need to point out that not all of the above formats are compatible with RetroArch. ISO/MP3 is not supported at all. ISO/WAV will load, but the CD audio will run fast as if in fast forward. Only BIN/CUE ('binary' or 'standard') will successfully run on RetroArch. If you do have games in ISO/MP3 or ISO/WAV, you need to look for other ROM websites to find them in BIN/CUE.
Anyway, with a BIN/CUE in hand, the next steps are easy. Make sure the Sega CD BIOS is in RetroArch's “system” folder. This is how you move BIOS files to it using Astro File Manager. Lastly, load your game by selecting its CUE file.
As for which core to use, “Genesis Plus GX” is the top recommendation for Sega CD/Mega CD emulation. If you find that it's running slow or choppy on your device, “PicoDrive” is the next best choice.
Loading PlayStation 1 games
Firstly, I want to highlight that ePSXe (costs $4 US) and DuckStation (free) are better options for PlayStation 1 emulation on Android. They're far easier to use. Plus I have a DuckStation tutorial here. Particularly, they both make it easy to swap CDs, while RetroArch makes it a hassle. I'm not saying RetroArch is bad. RetroArch just requires more steps because it's designed to be heavily customizable.
Here's how to get games up and running:
- As pointed out in loading a game, ISOs need to be extracted from their archives.
- Sometimes ROM sites deliver PlayStation 1 ISOs in ECM format. To extract an ECM file watch this video. This process can only be done on Windows.
- RetroArch only accepts PlayStation 1 ISOs that are in “BIN/CUE”, “CHD”, “CCD”, “TOC”, and “PBP”. Like below:
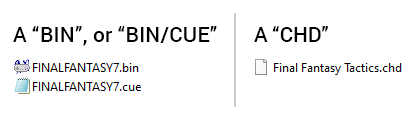
If the PlayStation 1 ISO you downloaded came in a weird format such as NRG, IMG, UIF, DAA, CDI, XBX, B51, BWI, etc. - they are not supported. - The PlayStation 1 BIOS needs to be in RetroArch's “system” folder. This is how you move BIOS files to it using Astro File Manager.
- Download the PlayStation 1 core. On the home tab , go to Online Updater > Core Updater. If you're using RetroArch Plus, scroll down the long list and select Sony - PlayStation (Beetle PSX HW). If you're using regular RetroArch, look for Sony - PlayStation (Beetle PSX).
- What's the difference between “Beetle PSX HW” and “Beetle PSX”? HW provides a GL and Vulkan renderer. It also offers more rendering options such as “PGXP Perspective Correct Texturing” (this is explained below). The regular Beetle PSX core uses software rendering. If your Android device doesn't support RetroArch Plus, then you're stuck with the regular Beetle PSX.
- Next, load your PlayStation 1 game. If it's a BIN/CUE, select the CUE file. If it's an ISO, select the ISO.
-
By default, this core doesn't have enhanced 3D graphics enabled. After loading a PlayStation 1 game, press
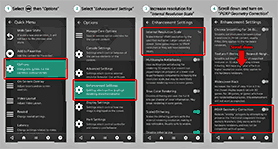 Beetle PSX's options
for the quick menu, scroll down and press Options, and then select Enhancement Settings. You'll arrive at the picture shown to the right. There are two important options here that boost the graphics.
Beetle PSX's options
for the quick menu, scroll down and press Options, and then select Enhancement Settings. You'll arrive at the picture shown to the right. There are two important options here that boost the graphics.
- Internal Resolution Scale - This upscales the 3D graphics, making them gorgeous and sharp. Change this to 2x or 4x, depending on if your Android device's CPU can handle it. See the difference this makes.
-
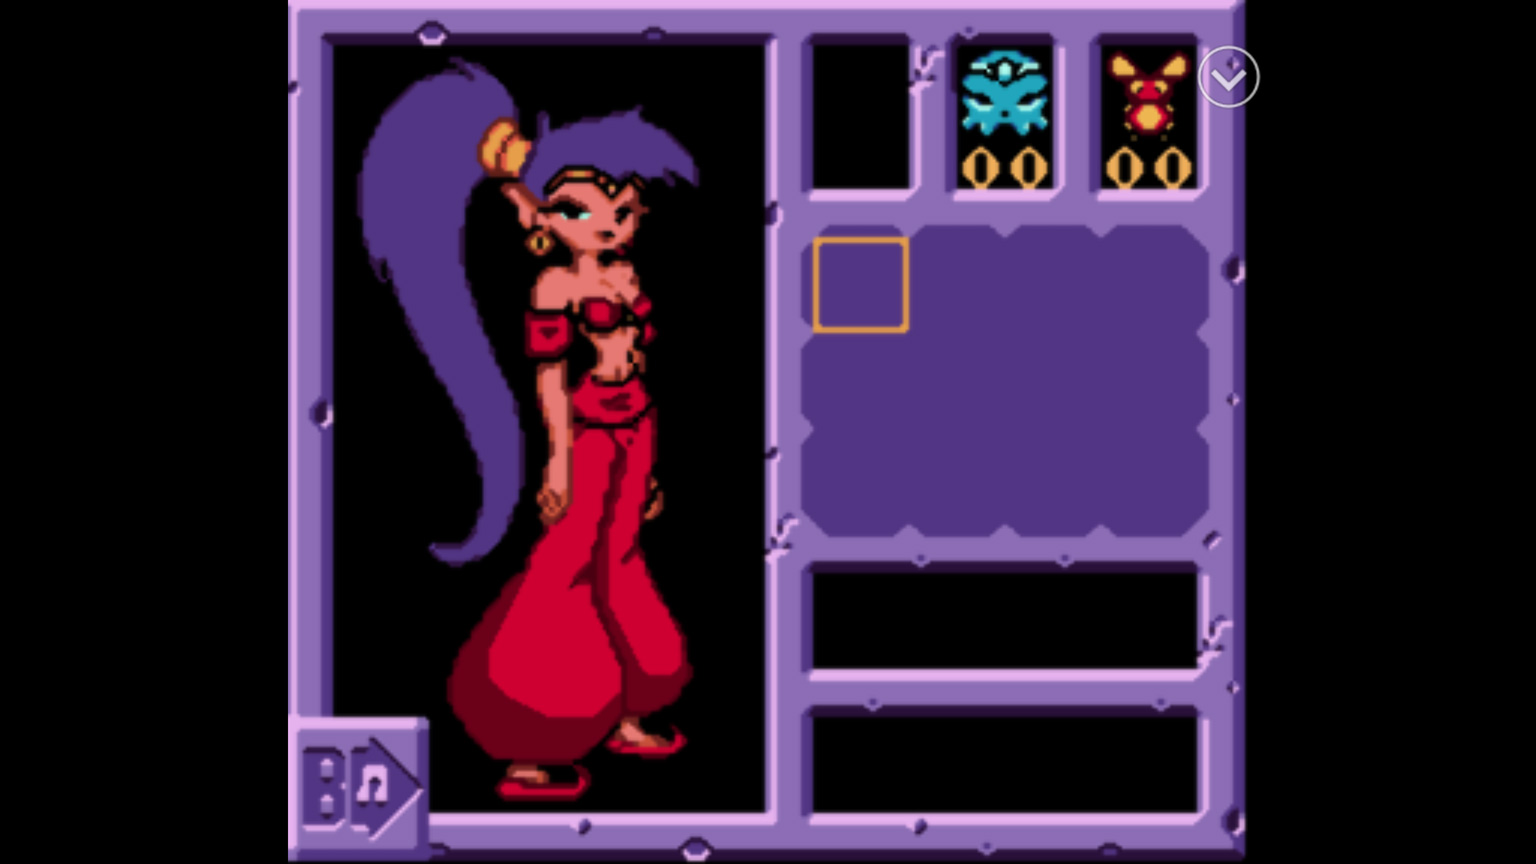
PGXP Geometry Correction - 3D games suffer from jittery animation. Setting PGXP to “Memory Only” will attempt to correct it. This is best described with the animated GIF to the right. Notice the face of the lady.
 (Left) Normal, (Right) PGXP Mode
Note: Beetle PSX isn't very friendly with games that are hacks or fan translations. Tales of Phantasia in particular is a popular fan translation that doesn't work on it. However, the other PSX core “PCSX ReARMed” is.
Q: My PAL PS1 game won't load!
Upon loading a PAL version of a PlayStation 1 game, you may receive this error:
ERROR: System failed to boot.
Error loading content
Some PAL PS1 games (mostly by Infogrames and EA) use LibCrypt anti-piracy protection. For these games, you must have the SBI file in order to properly emulate them properly.
Depending on where you downloaded the game, an SBI file might already be included in it. If that's the case, simply make sure the SBI file and your PS1 ISO have the same name. If the SBI file isn't there with your PAL ISO, you can download a collection of all SBI files below.
- All PAL PS1 SBI files (109 KB)
If you need more help, check out this page on CDRomance.
Notes about Saturn
Firstly, I want to discourage you from using RetroArch for Sega Saturn emulation. Yaba Sanshiro's Saturn emulator (a.k.a. ouYabause) is a far better emulator. Emulation quality is excellent and it's easy to use. And at the time I'm writing this, it's actively in development.
If you want to proceed using RetroArch, here are some Saturn emulation notes:
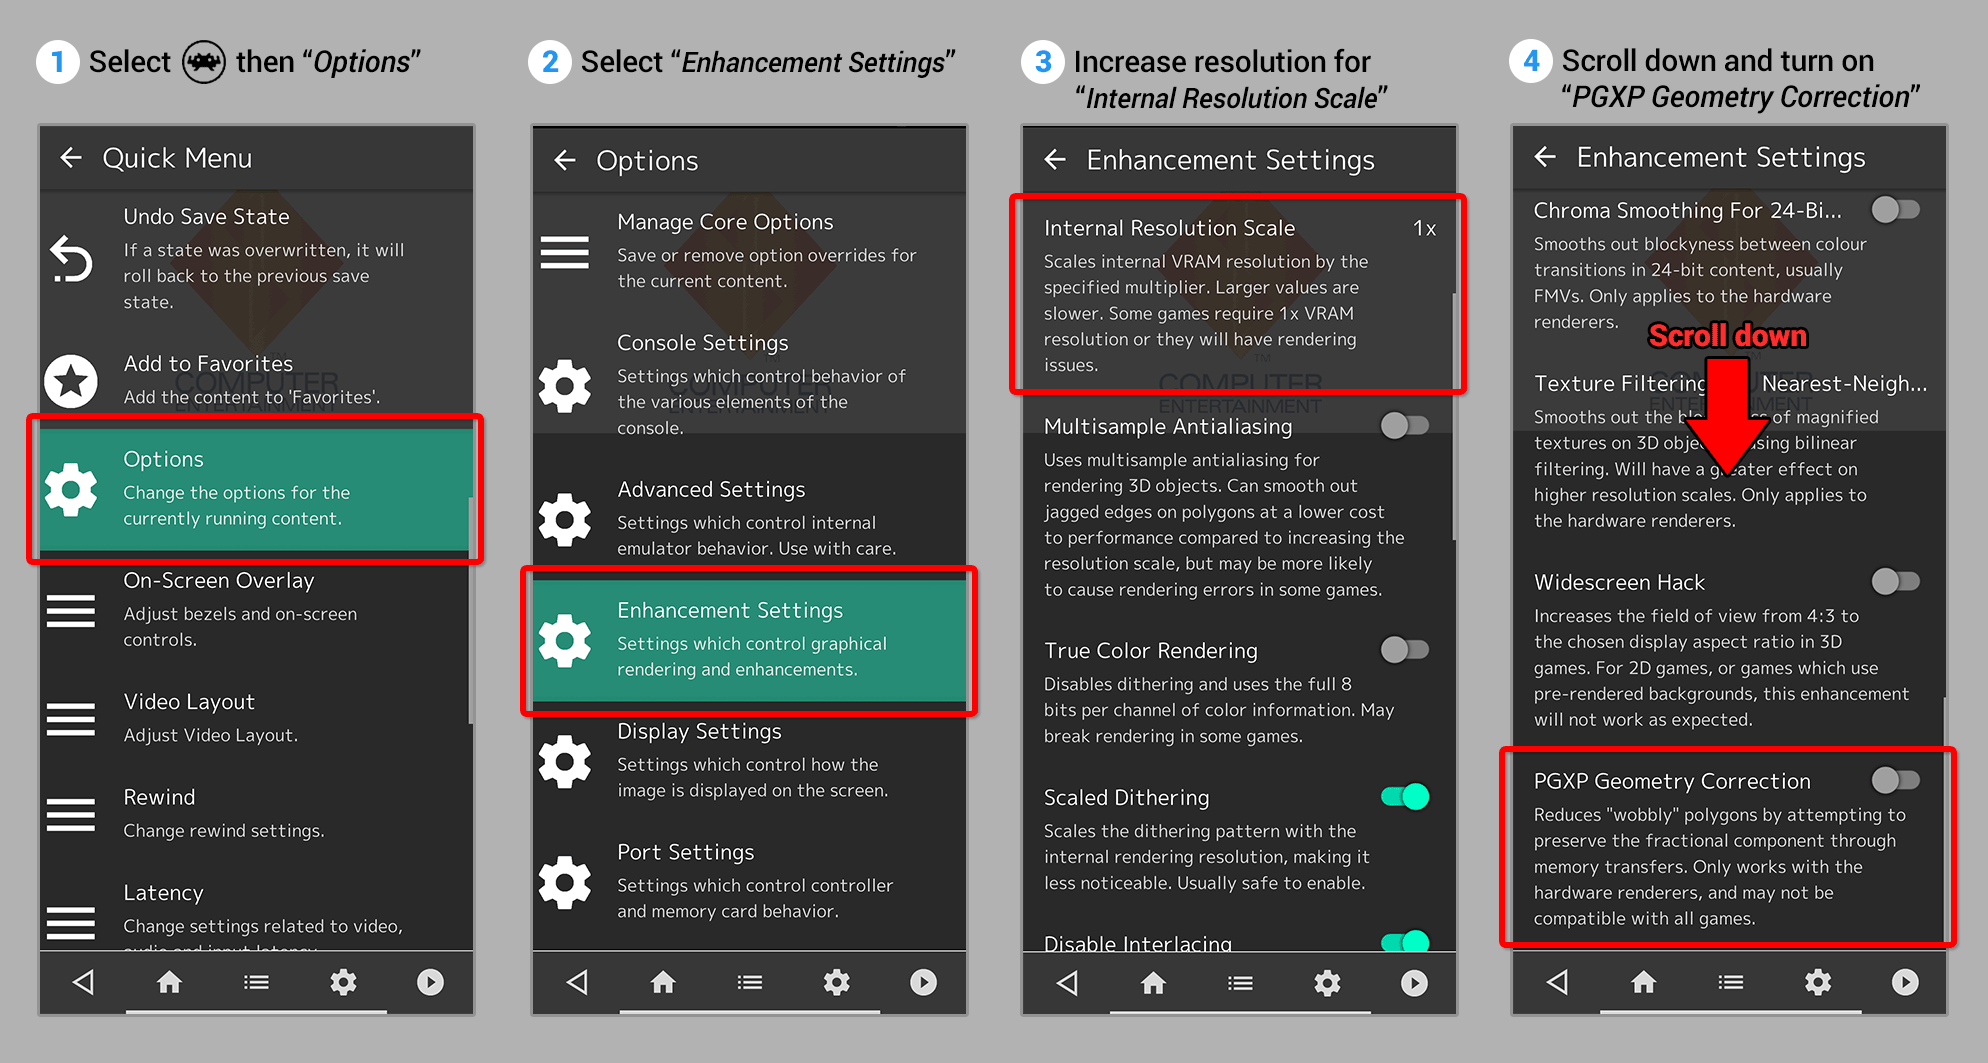
- RetroArch only accepts Saturn ISOs that are in “BIN/CUE”, “CHD”, “CCD”, and “TOC”. Reference below:
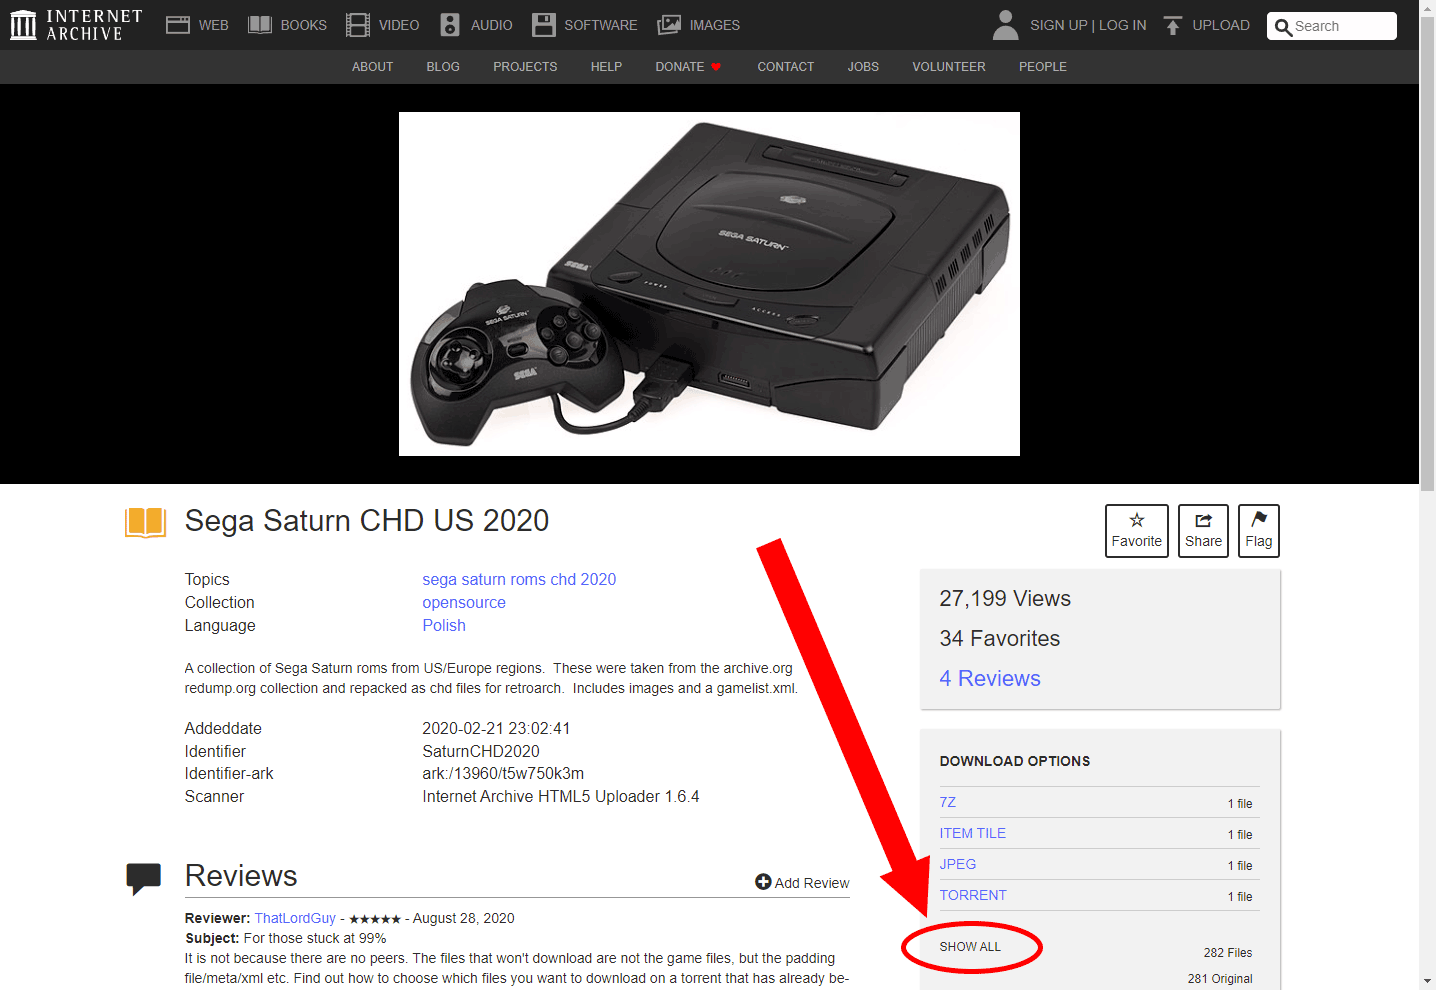
- RetroArch is finicky with its compatibility with Saturn ISOs. People often find that the Saturn ISOs available in rom sites don't work. Fortunately, Saturn games in CHD format have a high success rate of working. To find Saturn CHD games, search Google with “archive.org saturn chd”. Click the first search result, then click SHOW ALL, as shown here . Then download all the games you want :)
- Don't forget that Saturn games require the BIOS in order to run.
Disc swapping for multiple-CD games
If you're not very computer savvy, I recommend using my RetroArch (Windows) tutorial for this process. Setting things up for disc swapping involves working with text editors, and doing so is easier on Windows. Then you could copy everything over to your Android device for use with RetroArch on Android.
Otherwise, if you want to try doing this process entirely on your Android device, here's how:
- First, you need a text editor that can work with text files (not to be confused with a word processor such as MS Word). There are many available on Android. For these directions, I'm going to use one called QuickEdit Text Editor. Install it.
- I'm going to assume you already have some familiarity with using file manager apps. If you don't have one installed, I recommend using Astro File Manager. For this tutorial, I'm using Final Fantasy 7; which I placed in a dedicated folder .
- Optional: To save you from some typing, you may want to pretend to rename one of the game files just to copy its filename .
- Open QuickEdit Text Editor. In a new document, type up the names of every disc in your game's files. Or if you have the filename copied to the clipboard, paste it 2-3 times to save you from typing everything. For the example of Final Fantasy 7, the finished list looks like this .
- Next, we save this text file. Go to Save As, navigate to your game's folder, and save this file as “[name of your game].m3u” - as shown here . In my example for Final Fantasy 7, I saved this file as “Final Fantasy 7.m3u”.
- Now you should have a setup like this .
There you go! You now have an M3U file for disc swapping. From this point, you no longer load the game by selecting the CUE or ISO files. From now on, you load the game by selecting this M3U file you just made. You know you're successful when you load the M3U and RetroArch immediately presents you with this prompt .
Be careful! If you've already been playing the first disc without creating an M3U file, loading the M3U file will overwrite your memory card file and delete your save(s)! Because loading the new M3U file for the first time creates a new memory card file (one that's shared between all discs).
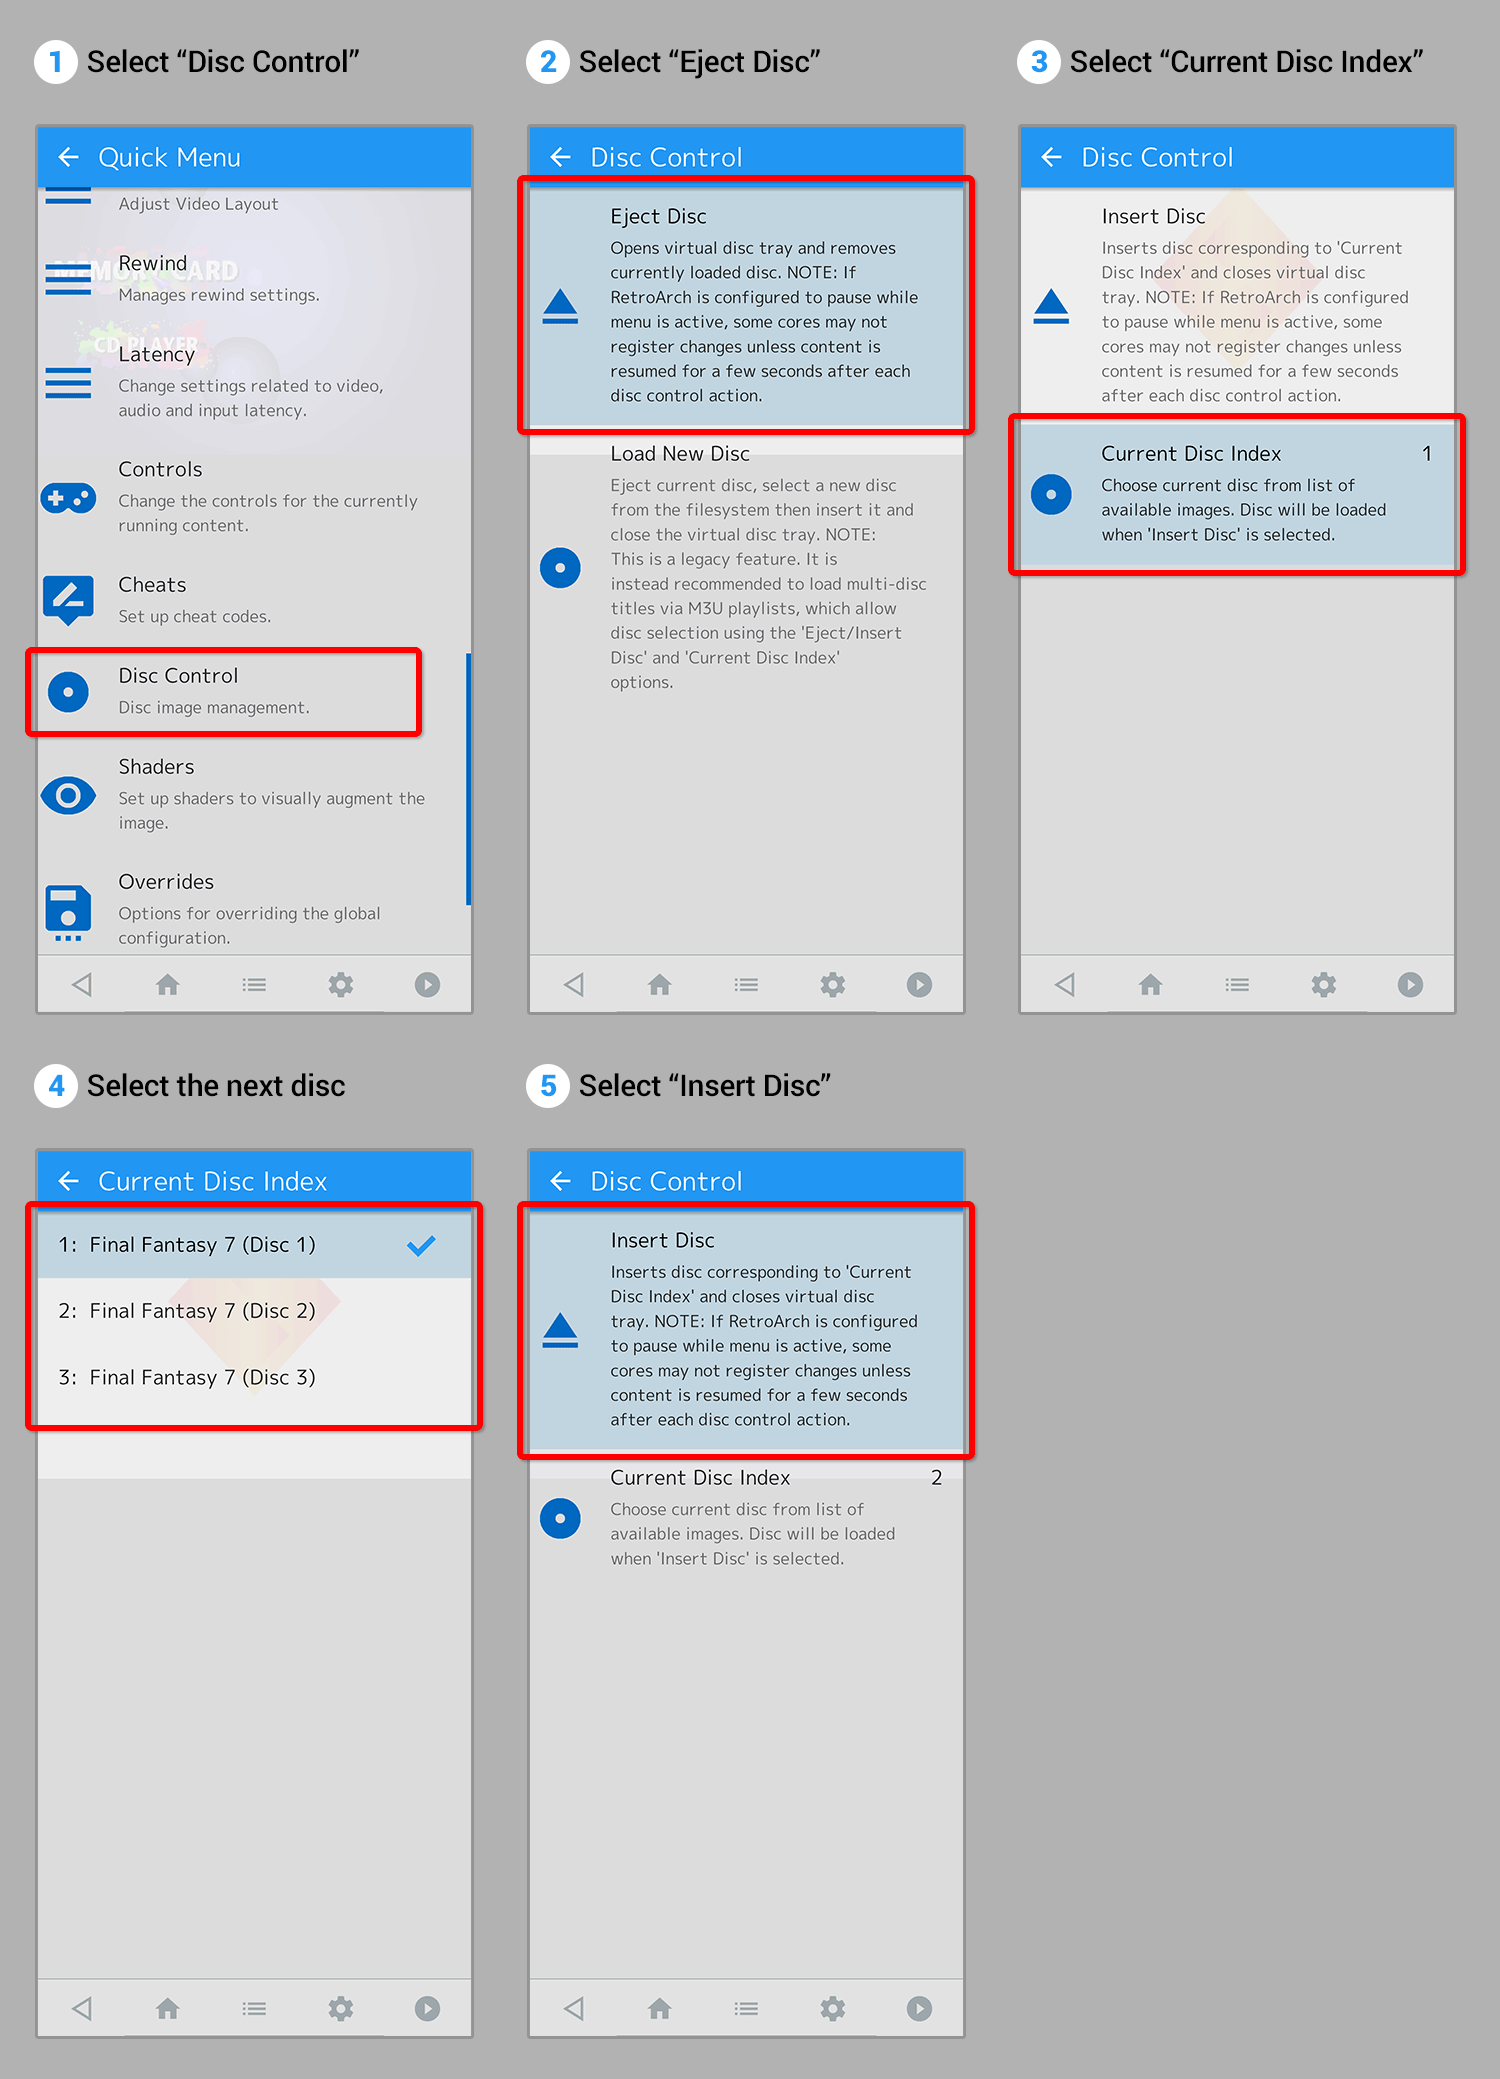
There's one more piece left to the disc swapping process. When you reach the end of a disc, you need to swap discs within RetroArch's UI. To do so:
- Press for the quick menu then scroll down to select Disc Control > Eject Disc > Current Disc Index.
- Select the next disc you want to swap to.
- Select Insert Disc. You'll return to the game. Press the Start button or whatever the game says to do when you've inserted the next disc.
Notes about N64
Firstly, I recommend using M64Plus FZ (Mupen64 Plus). It's a far better experience for N64 emulation. There's two versions of it: the free version (every time you load a game, you need to look at an ad for 10 seconds) and the premium version (costs $3.99 US). If ads bother you and you refuse to pay for M64Plus, then go with 100% free RetroArch. The best N64 core is Mupen64Plus-Next.
Upon loading an N64 game in RetroArch, you're going to find that the direction pad doesn't work. That's because you need to press the left-most ![]() button to change it to a joystick type of pad. I talk more about this below in “Navigating the screen overlay”.
button to change it to a joystick type of pad. I talk more about this below in “Navigating the screen overlay”.
As I explain in changing the screen overlay, you also have the option of swapping the screen overlay for a specialized N64 overlay.
Navigating the screen overlay
The 'screen overlay' is the virtual gamepad. RetroArch Plus and RetroArch have two different default overlays.
RetroArch Plus' overlay
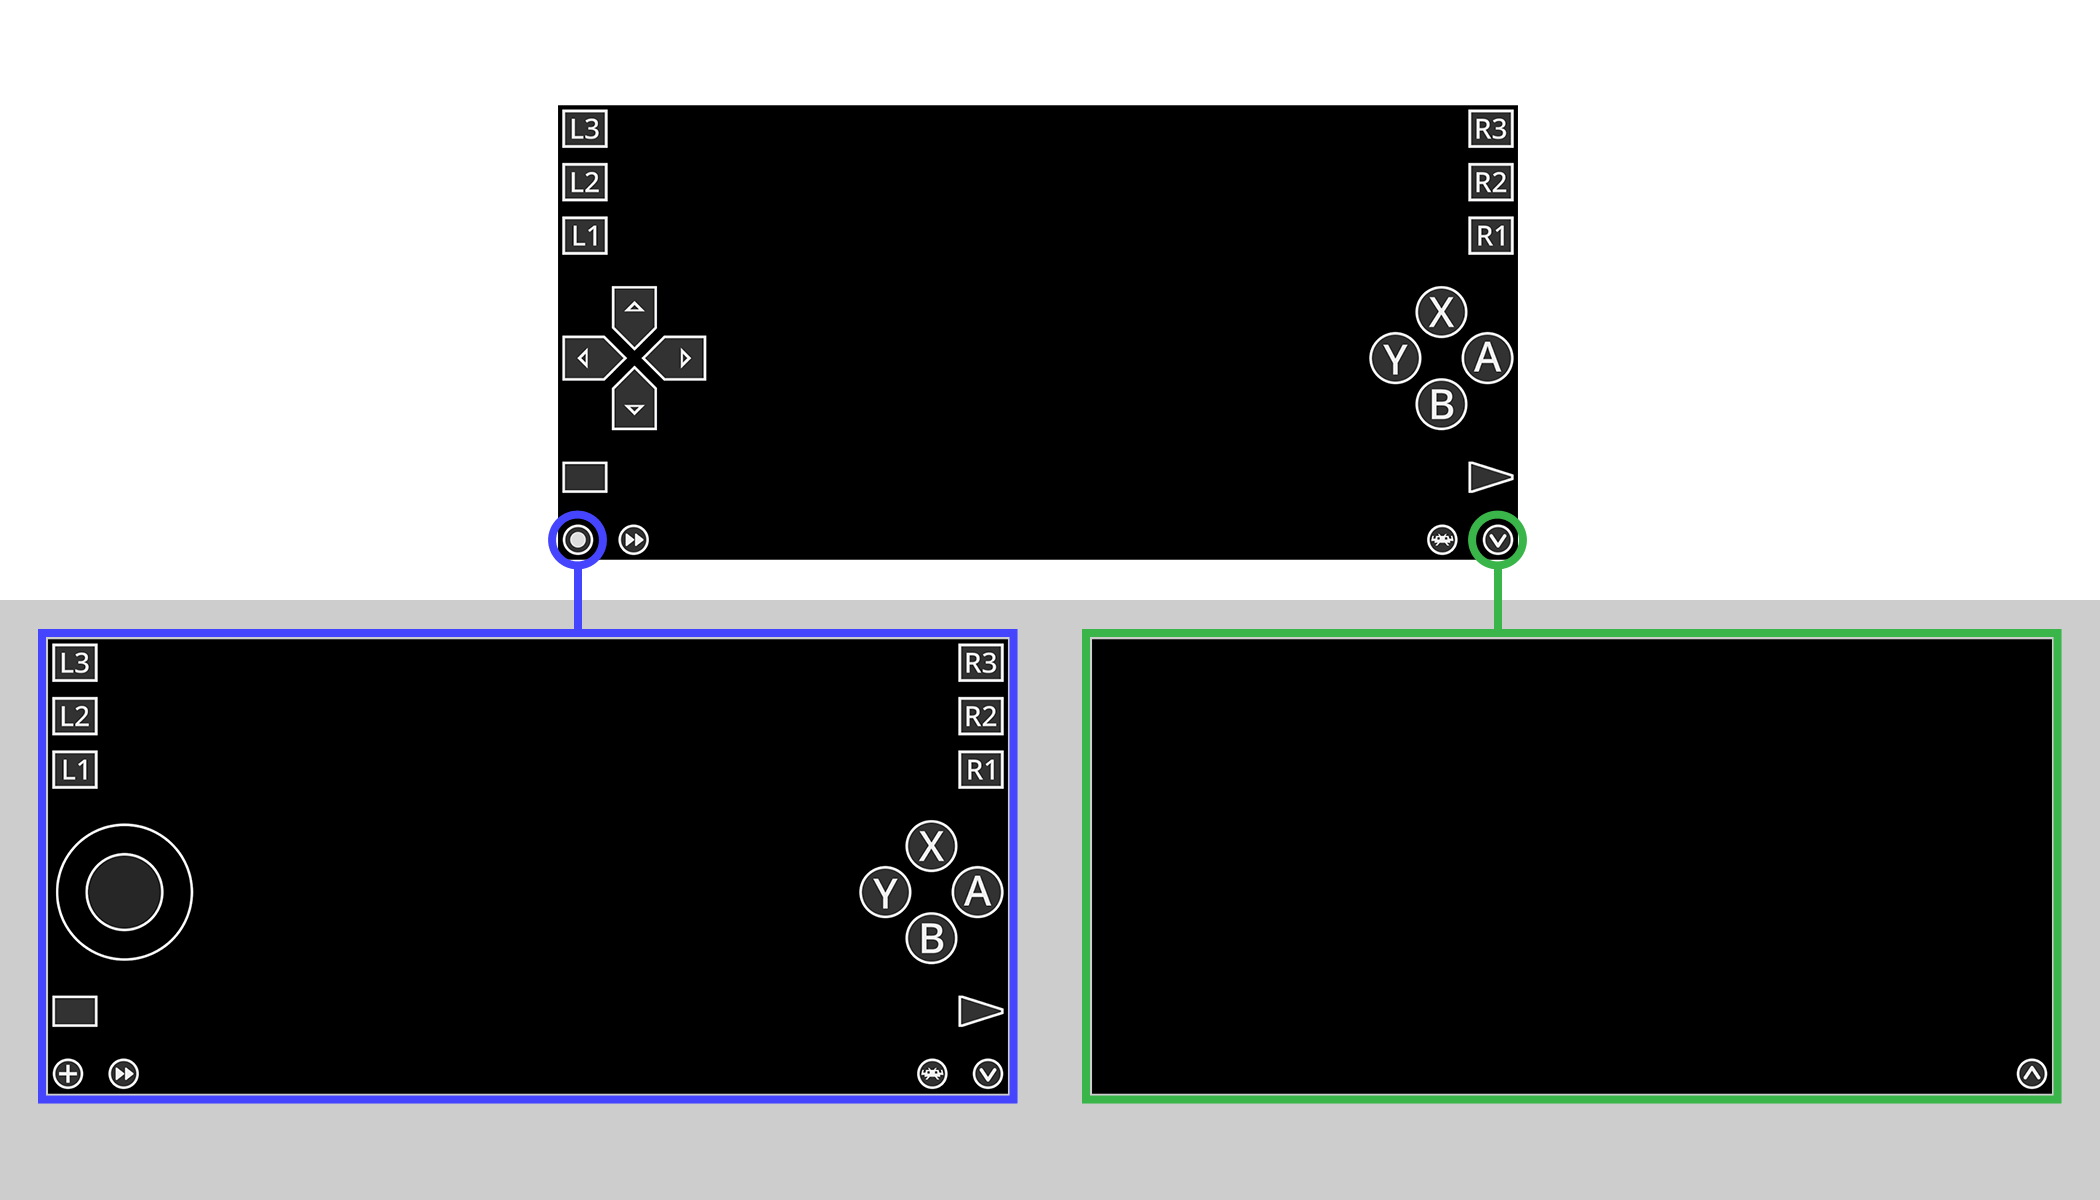
 The icon changes the D-pad to a
joystick type of pad. This is helpful for 3D games.
The icon changes the D-pad to a
joystick type of pad. This is helpful for 3D games. This icon toggles fast forward.
- This is the most important icon, which takes you back to RetroArch's menus.
 The caret icon hides the screen overlay. This is useful when you've connected a Bluetooth gamepad and have no use for the screen overlay.
If you prefer RetroArch's original overlay (the one right below), you can select it by following the directions to change the overlay and look for “retropad” in the list of overlays.
RetroArch's overlay
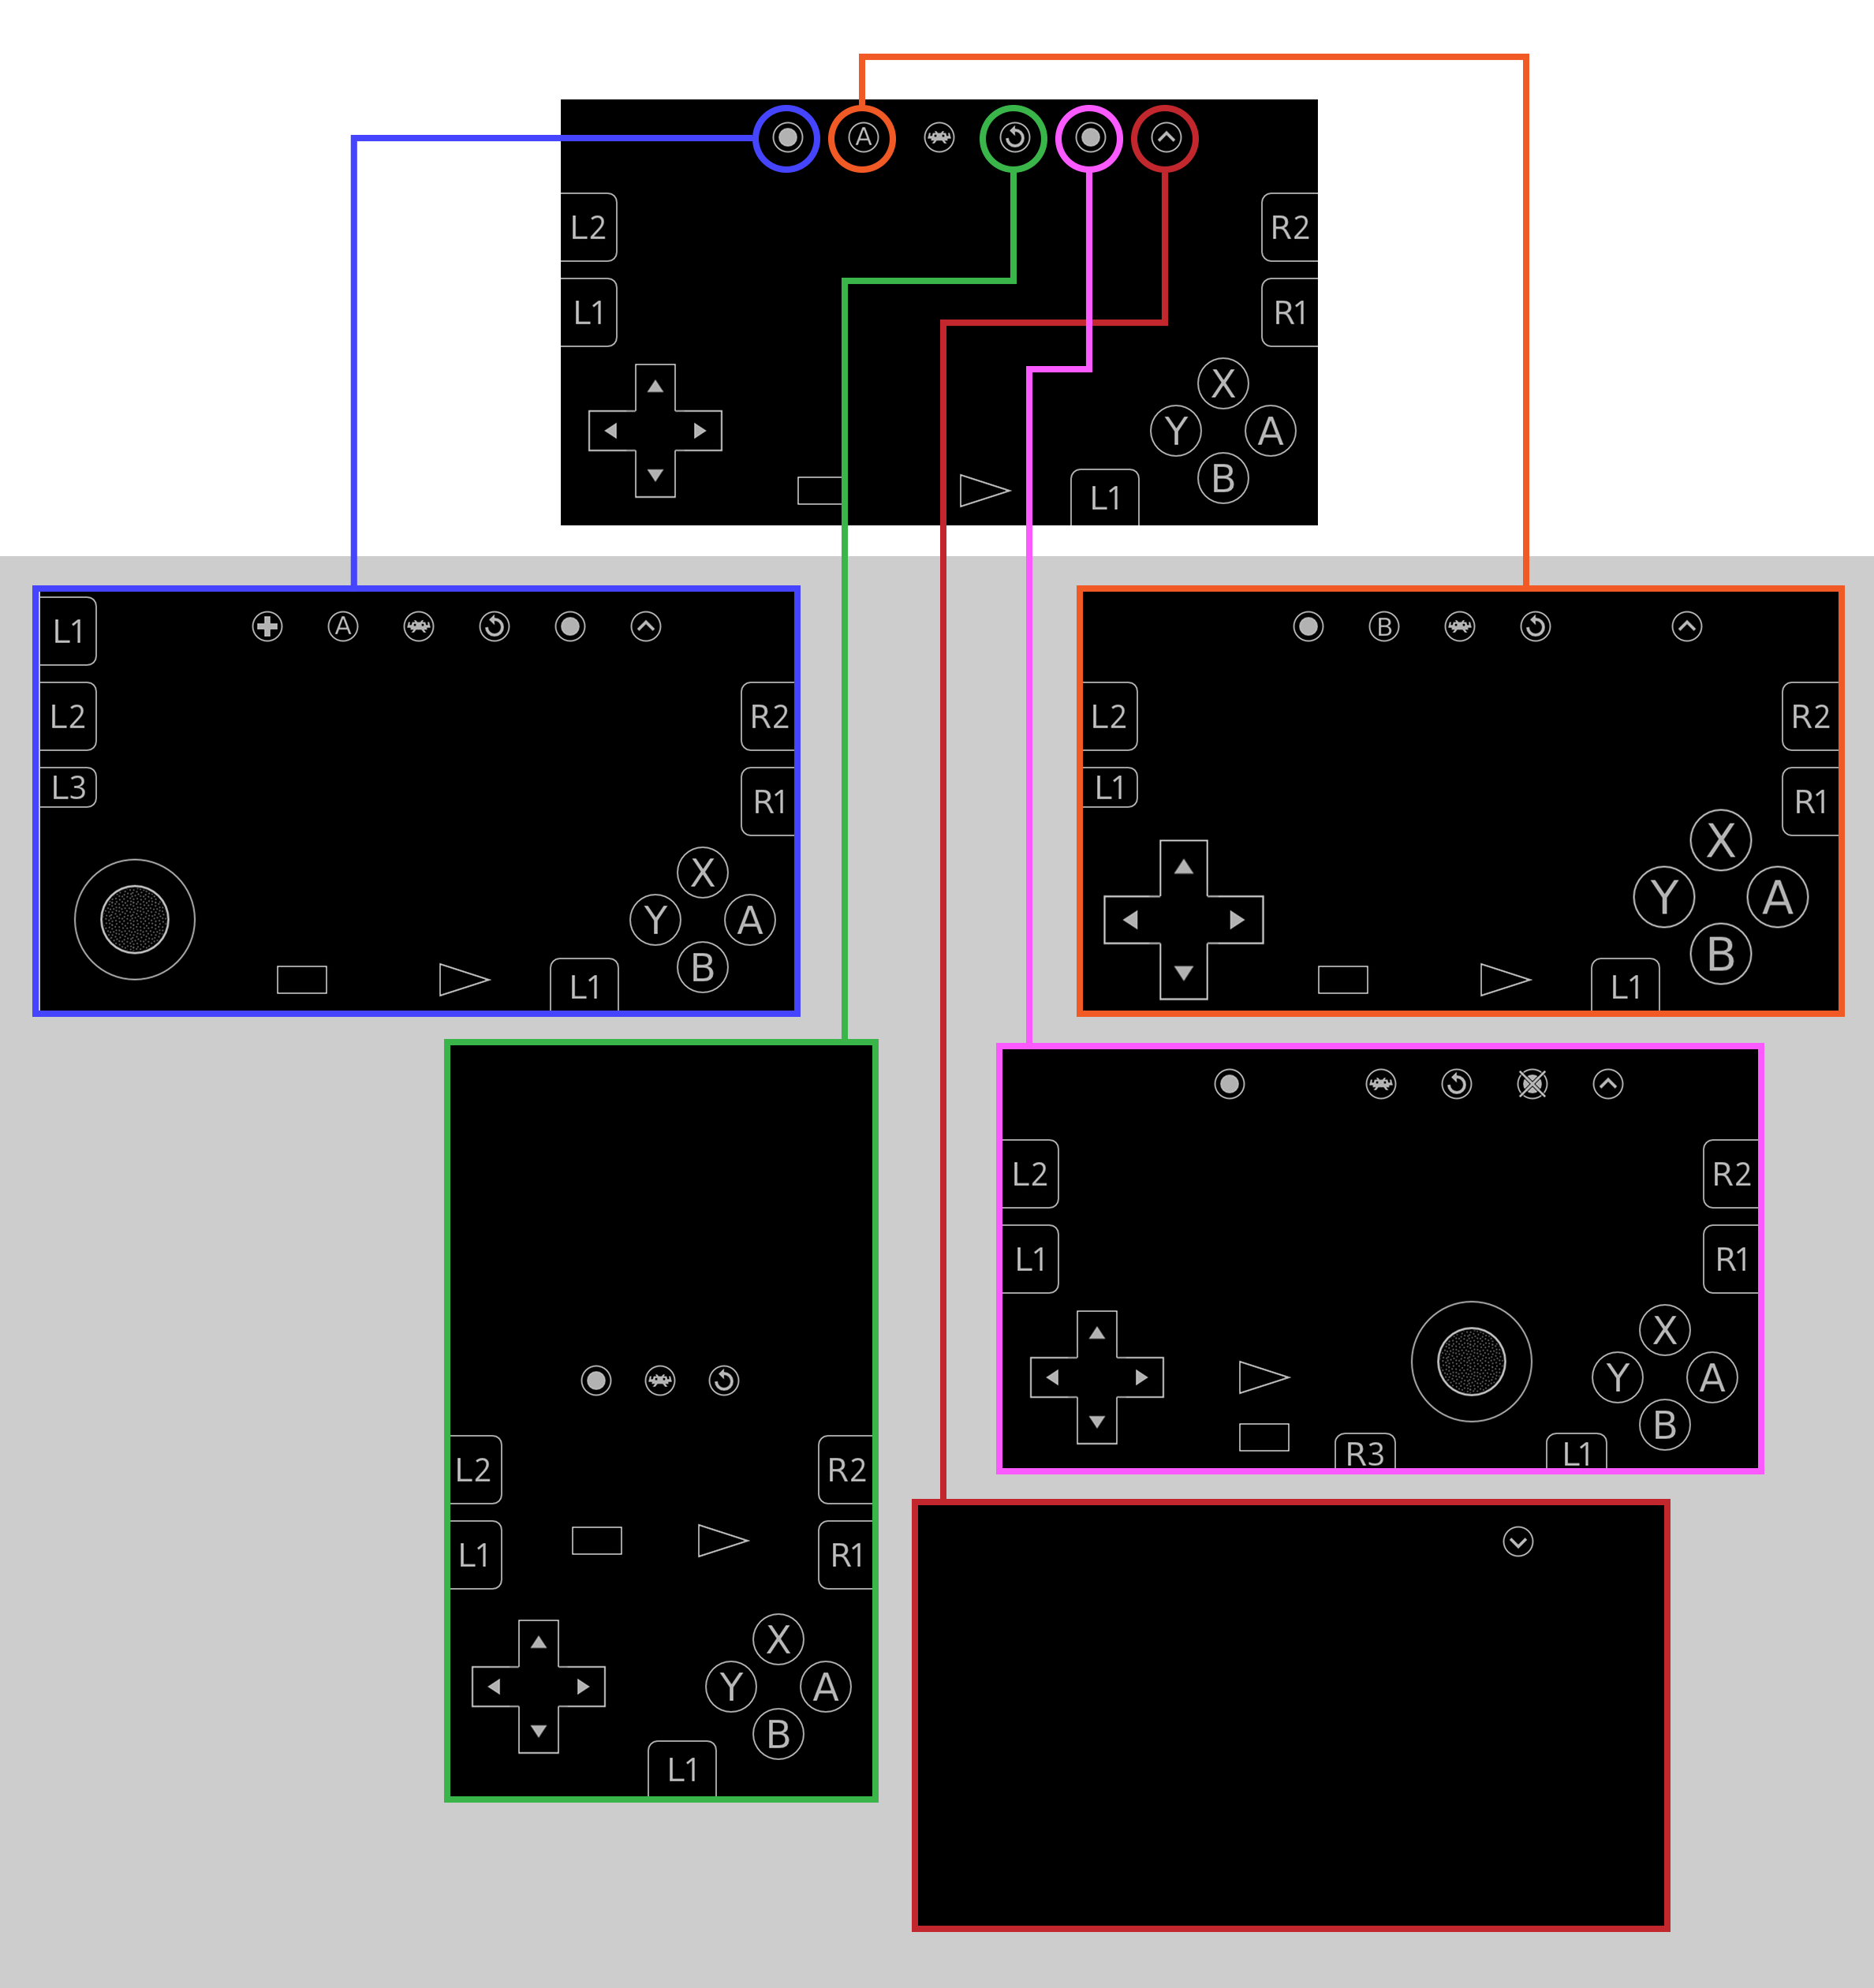
- The left-most circle icon changes the D-pad to a joystick type of pad. This is helpful for 3D games.
 The “A” icon makes the D-pad and main buttons bigger. This is helpful if you feel the buttons are too small.
- This is the most important icon, which takes you back to RetroArch's menus.
 The circling arrow icon arranges the screen overlay for when you're holding your smartphone in portrait. Hence, you can play games as if you're holding a Game Boy Color.
- The right-most circle icon adds in a joystick type of pad to the existing set of buttons. This is helpful for 3D games.
- The caret icon hides the screen overlay. This is useful when you've connected a Bluetooth gamepad and have no use for the screen overlay.
Tip: I want to point out that, if you'd like, you can decrease the opacity of the screen overlay to make it dimmer. This is useful if you're using a physical gamepad and you want to hide the overlay some more. This configuration is found by going to ![]() > On-Screen Overlay > Overlay Opacity.
> On-Screen Overlay > Overlay Opacity.
Changing the screen overlay
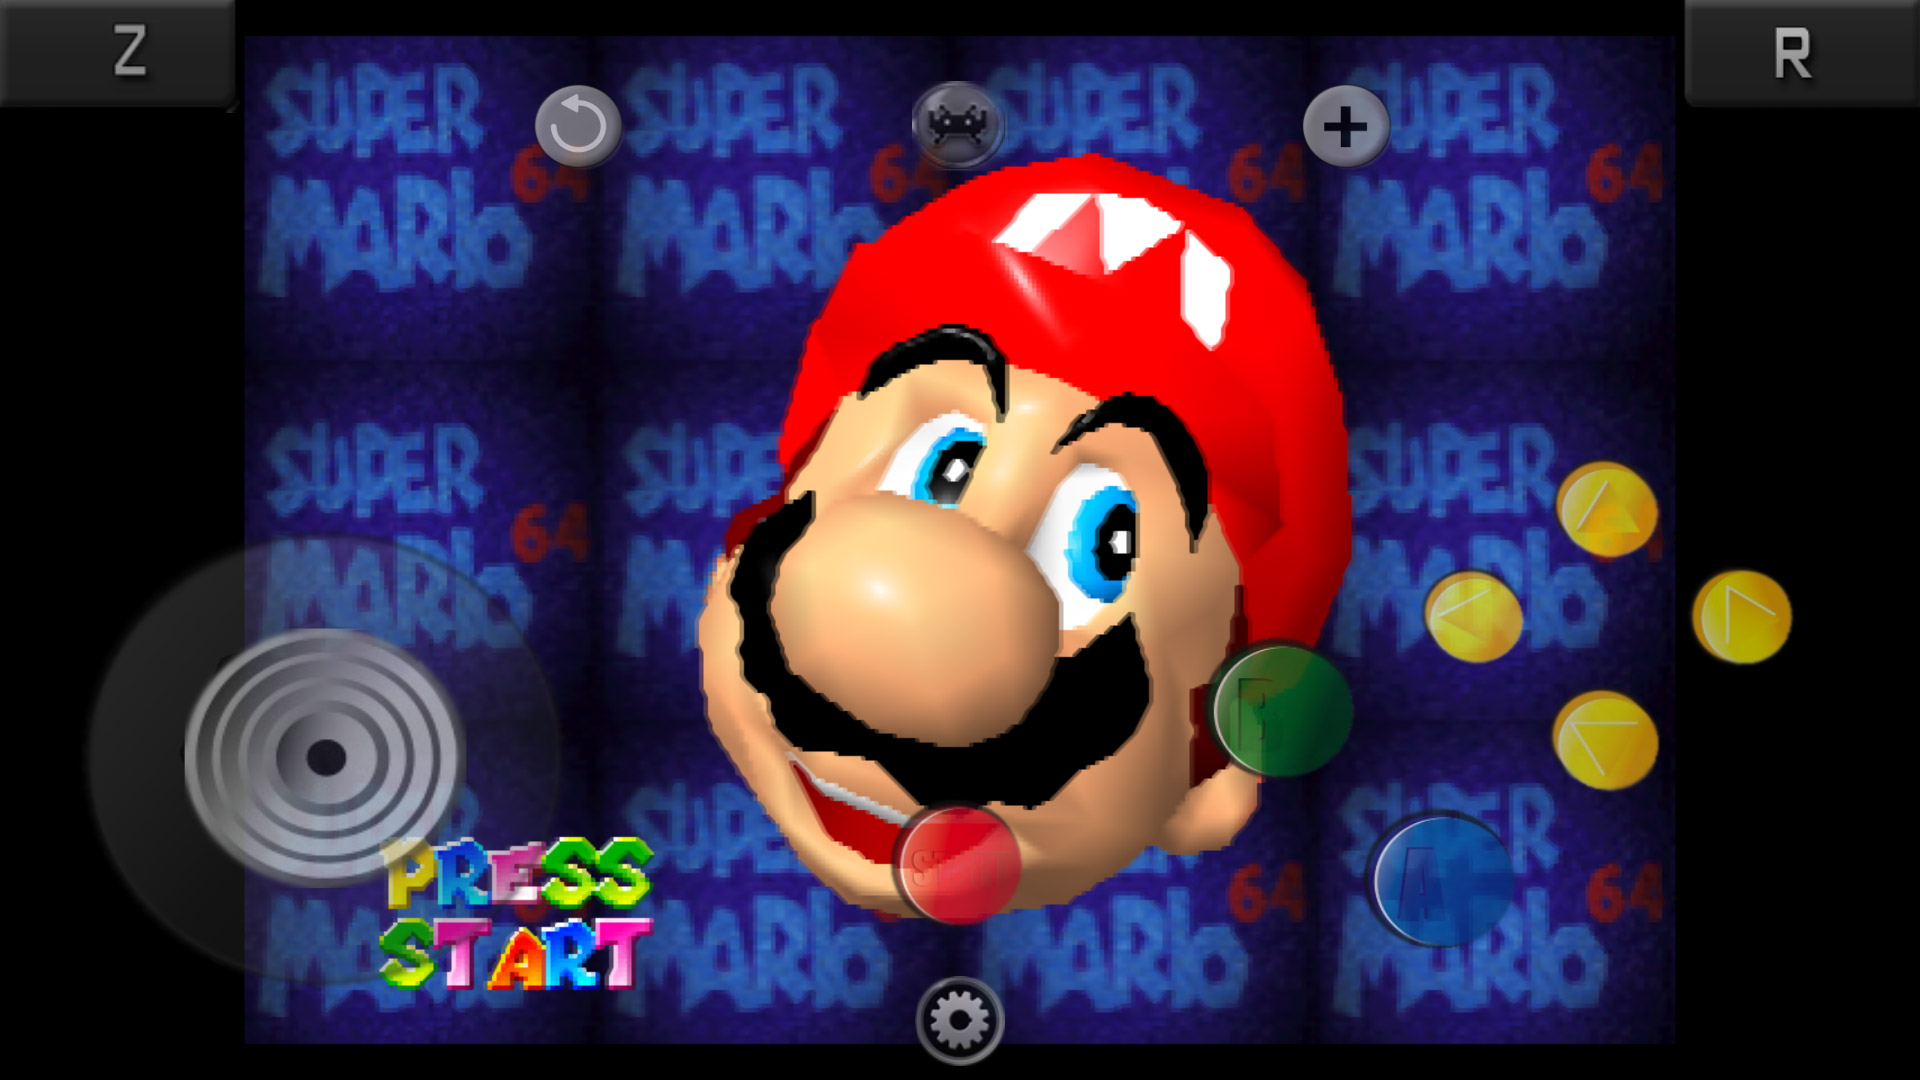 Sample of the N64 screen overlay
The default screen overlay is pretty good for playing most types of classic video games. But remember you're using RetroArch - you can customize everything! It offers a variety of screen overlays for you.
Here's how to globally change the screen overlay for all games:
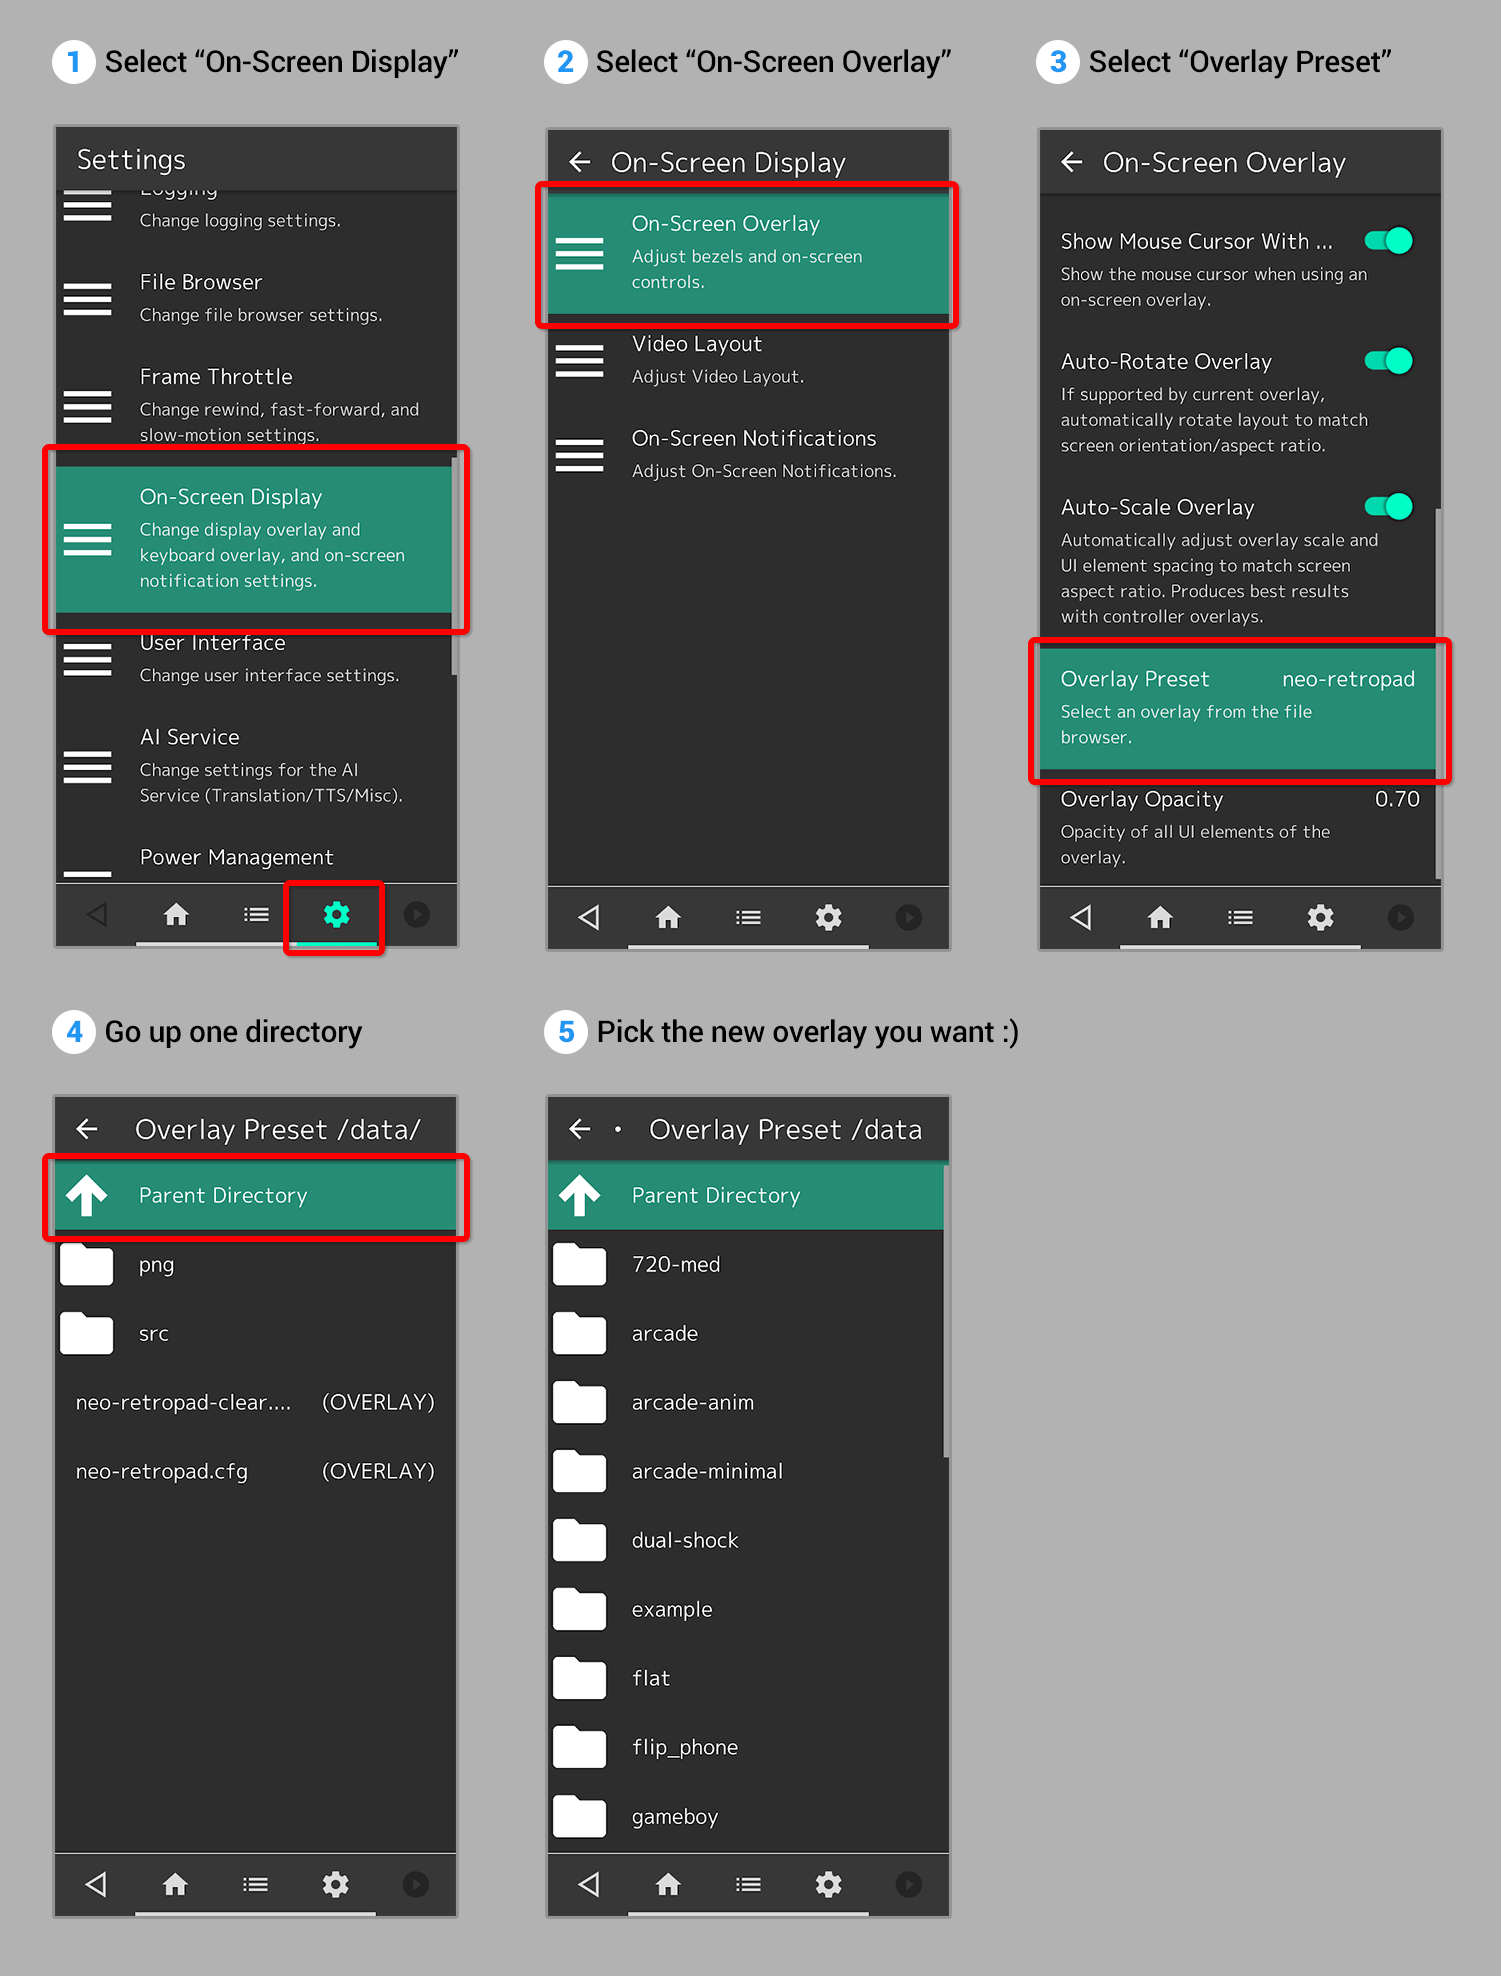
- Press the sprocket and select On-screen Display.
- Then select On-screen Overlay > Overlay Preset.
- Go up one directory and you'll arrive at the list of on-screen displays. You have lots of options here! Select the folder for the video game system you want. The “flat” folder also has some nice options. Select the “cfg” file for the new on-screen overlay you want.
- Play a game and enjoy your new virtual gamepad!
So that's how you change the overlay globally. Keep in mind, though, that you can also customize overlays on a per-game basis. To do so, run a game, access the quick menu, and scroll down to On-Screen Overlay. From there it's the same steps as above.
Note: If you want to revert back to the default gamepad, in the overlay list go to neo-retropad > neo-retropad.cfg.
Shaders (screen filters)
Screen shaders (called 'screen filters' in other emulators) render your screen in a variety of ways to make it look sharper and beautiful. By default, RetroArch uses a basic shader that only blurs the screen a little bit. You can change it to something a lot better! Here's how:
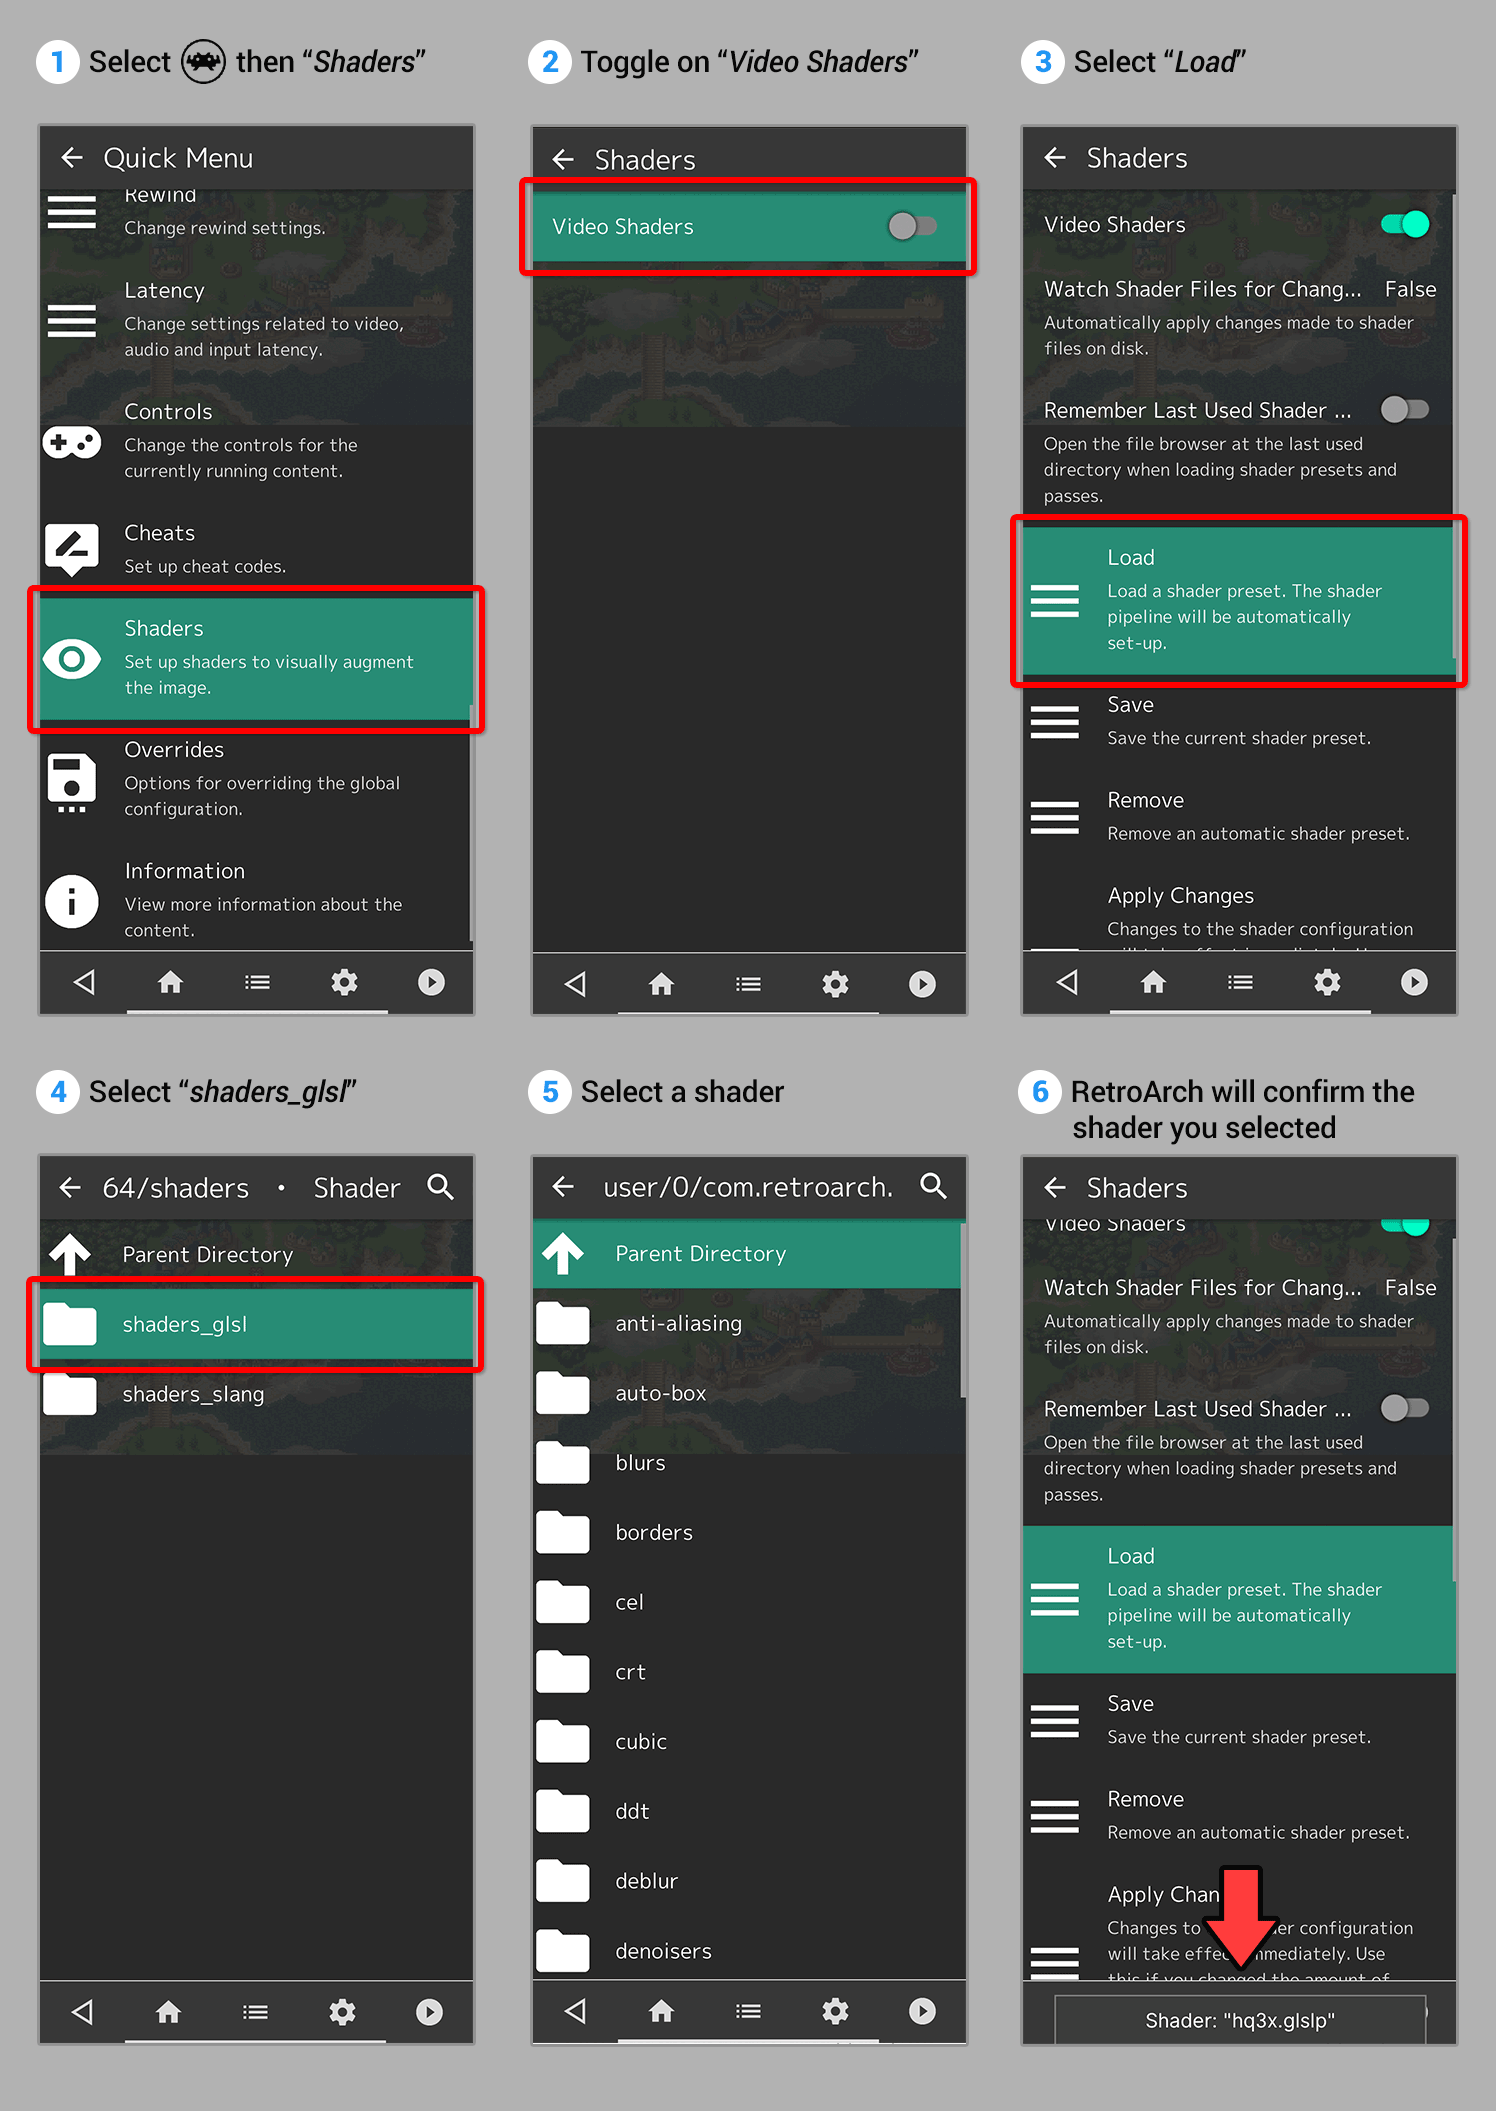
- During gameplay, press for the quick menu then scroll down to select Shaders.
- Toggle on Video Shaders to enable the screen filter options.
- Select Load > shaders_glsl.
- What are GLSL and slang? GLSL are shaders that work on a wide range of platforms including phones and tablets. Slang are shaders compatible with the new Vulkan renderer. They both should work fine on your Android device, so it doesn't really matter which one you choose.
- You'll arrive at the shaders folder, which is full of sub folders. Take a little time to explore these folders. When you're ready to try a shader out, select the “glslp” file for it.
- Once a shader is selected, you'll be taken back to the initial screen. And on the bottom, RetroArch briefly confirms the name of the filter you selected.
Not sure which shader to pick? Keep reading.
The Shaders
RetroArch offers an overwhelming amount of shaders. I think the count is well over 50. On your smartphone's small screen you won't even notice the subtle differences between most of them. I'm going to make it easy for you and recommend only 2 shaders.
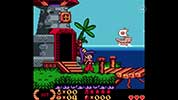
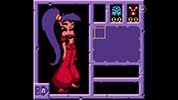
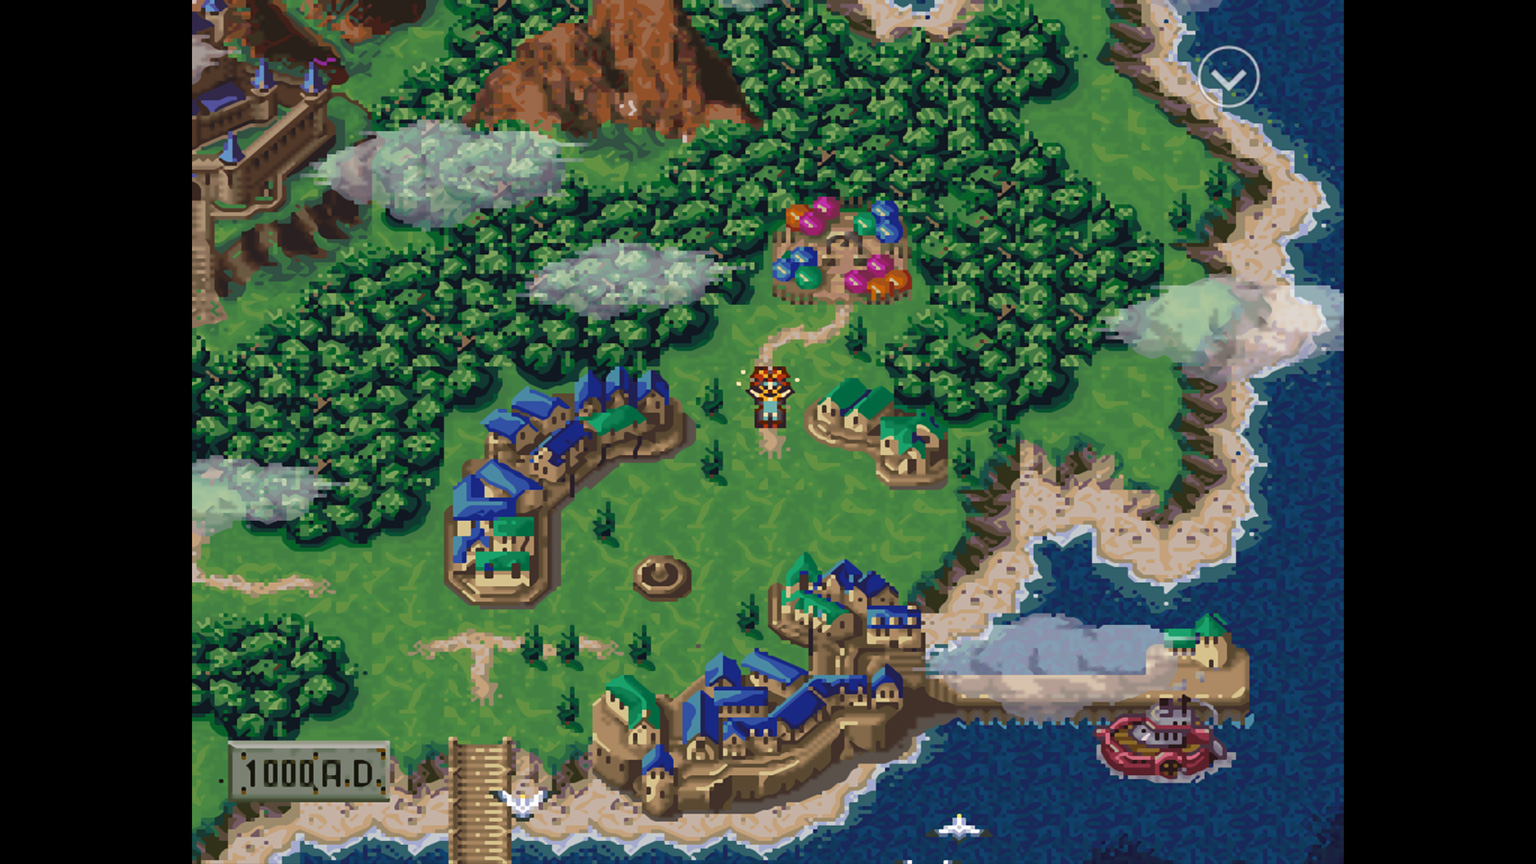
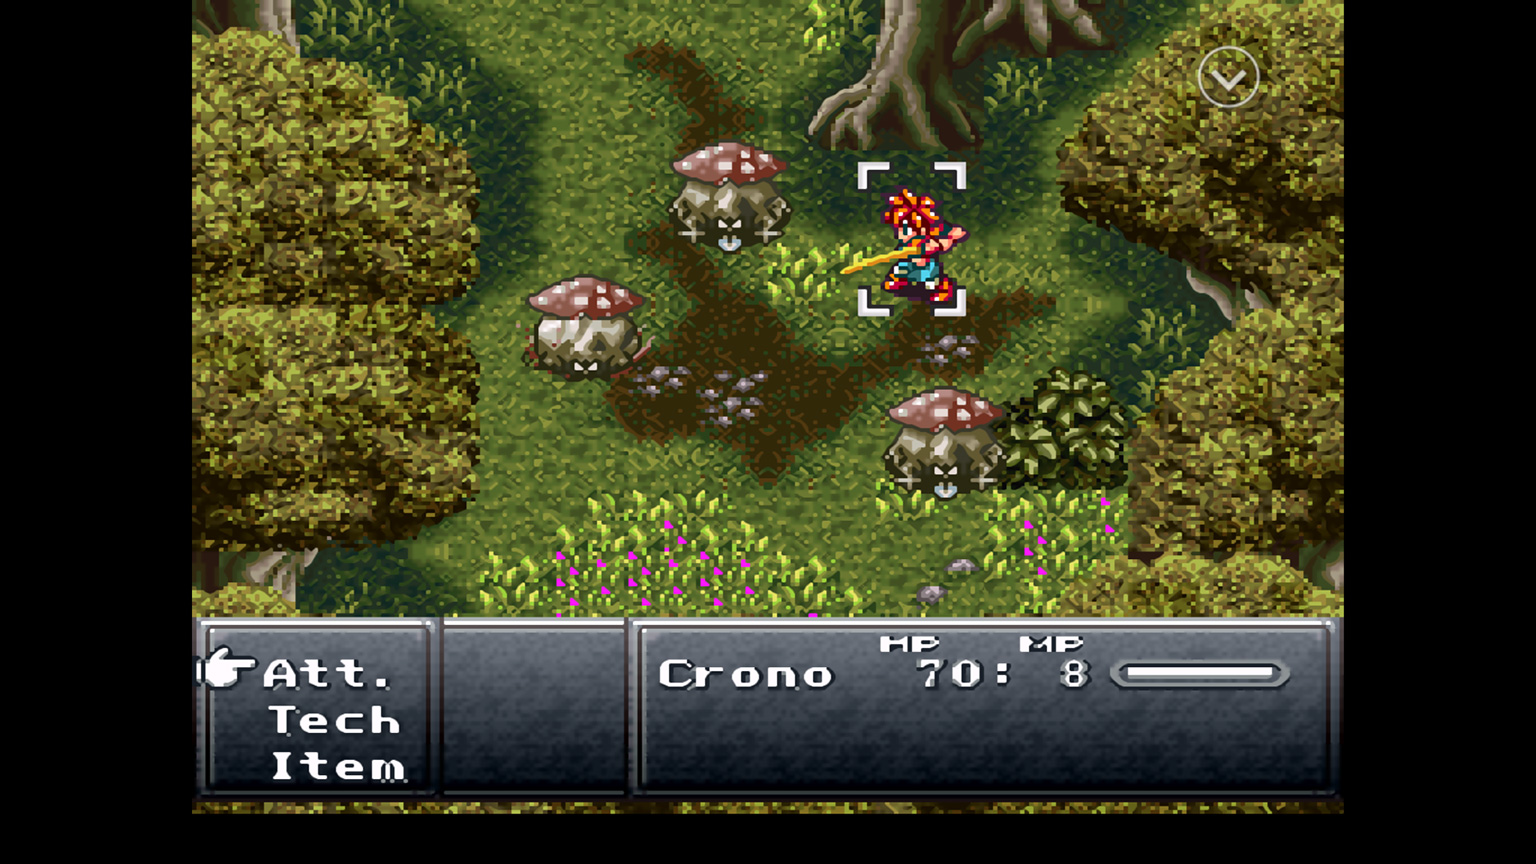
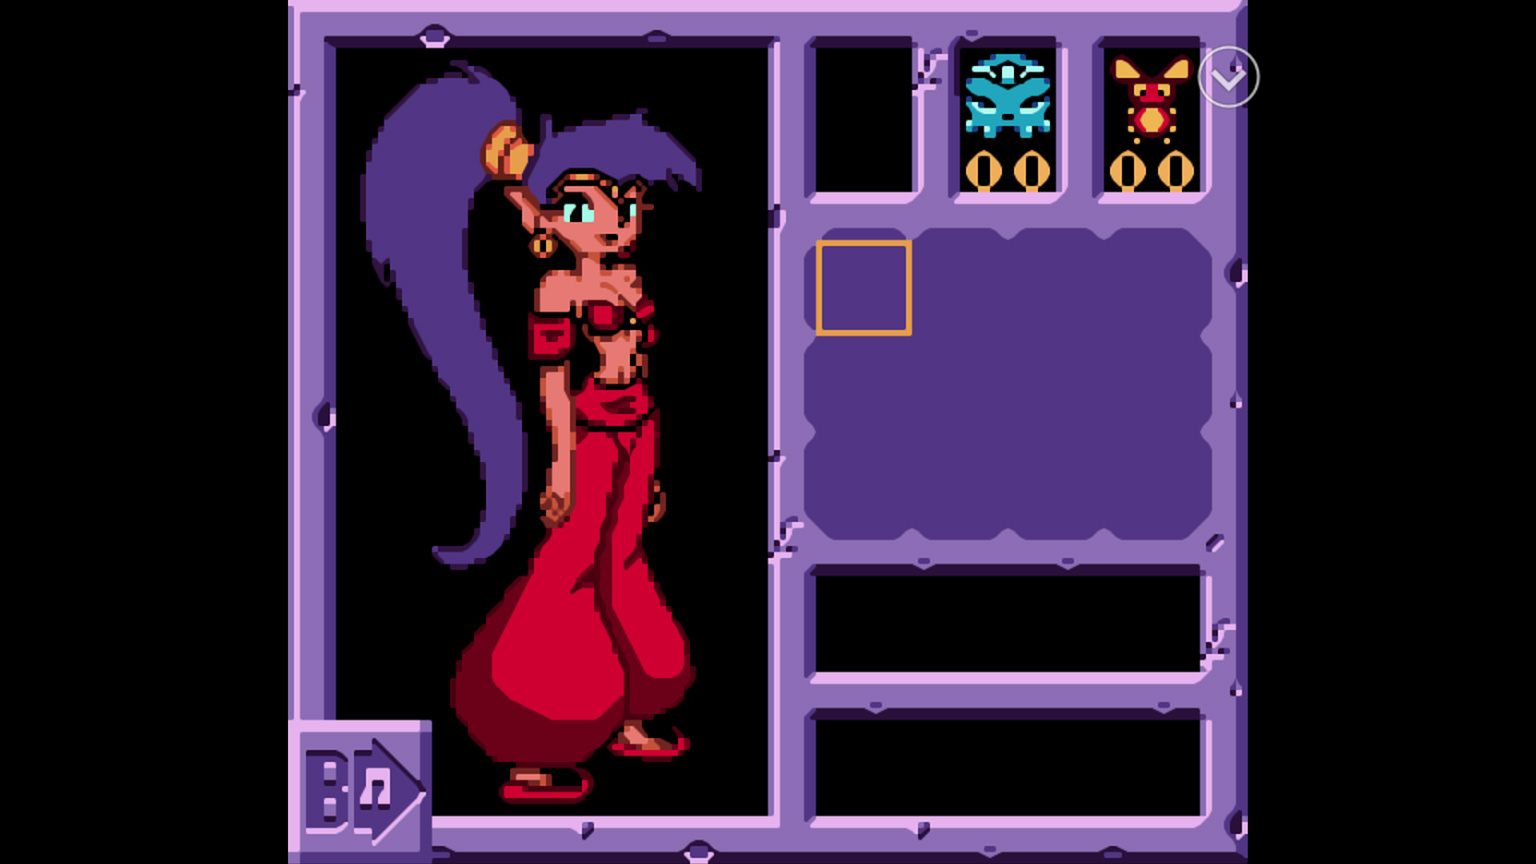
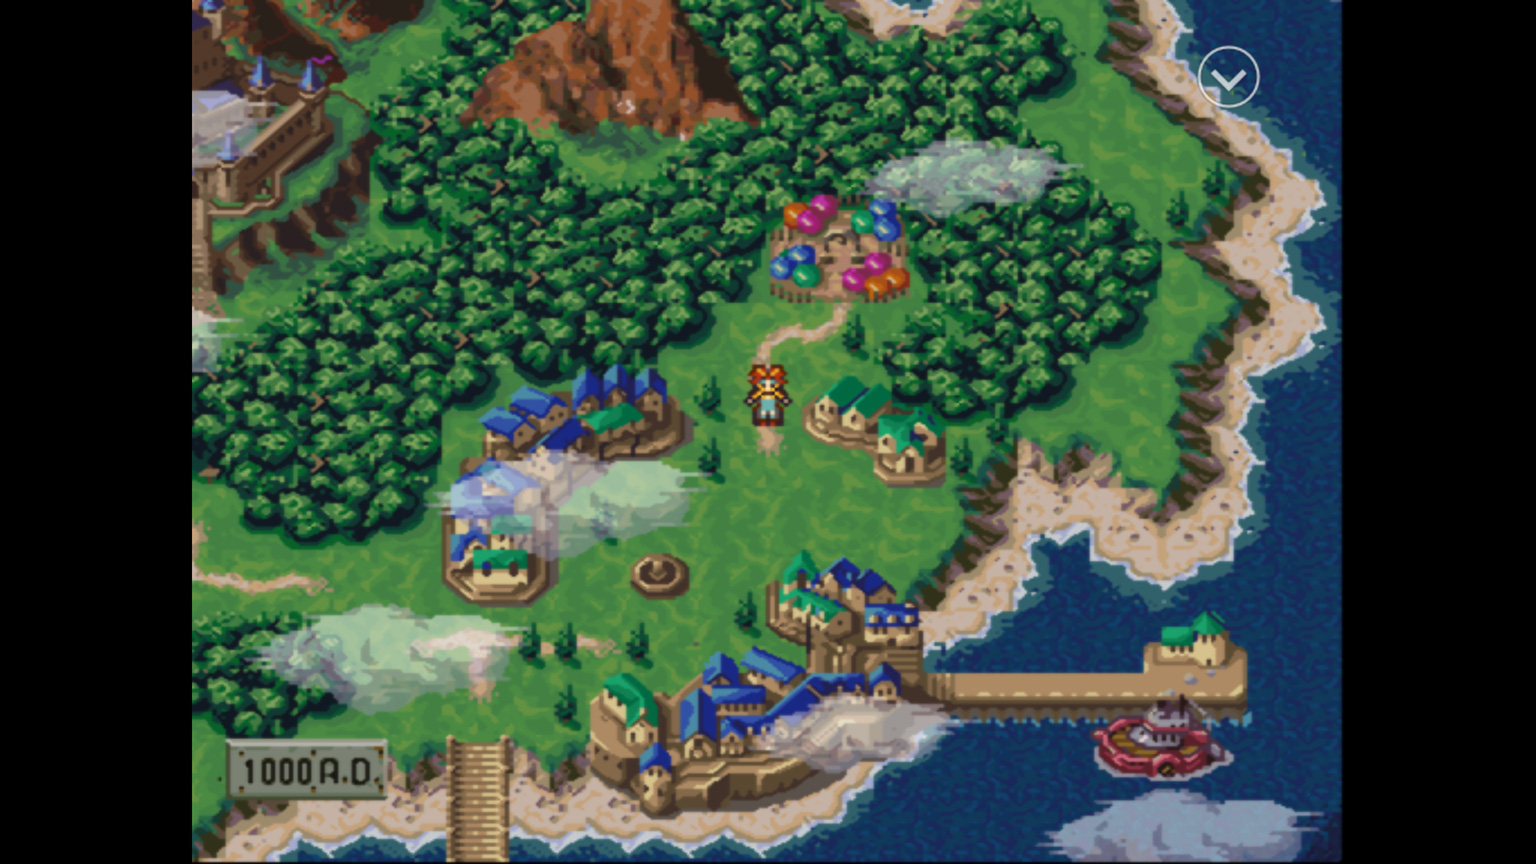
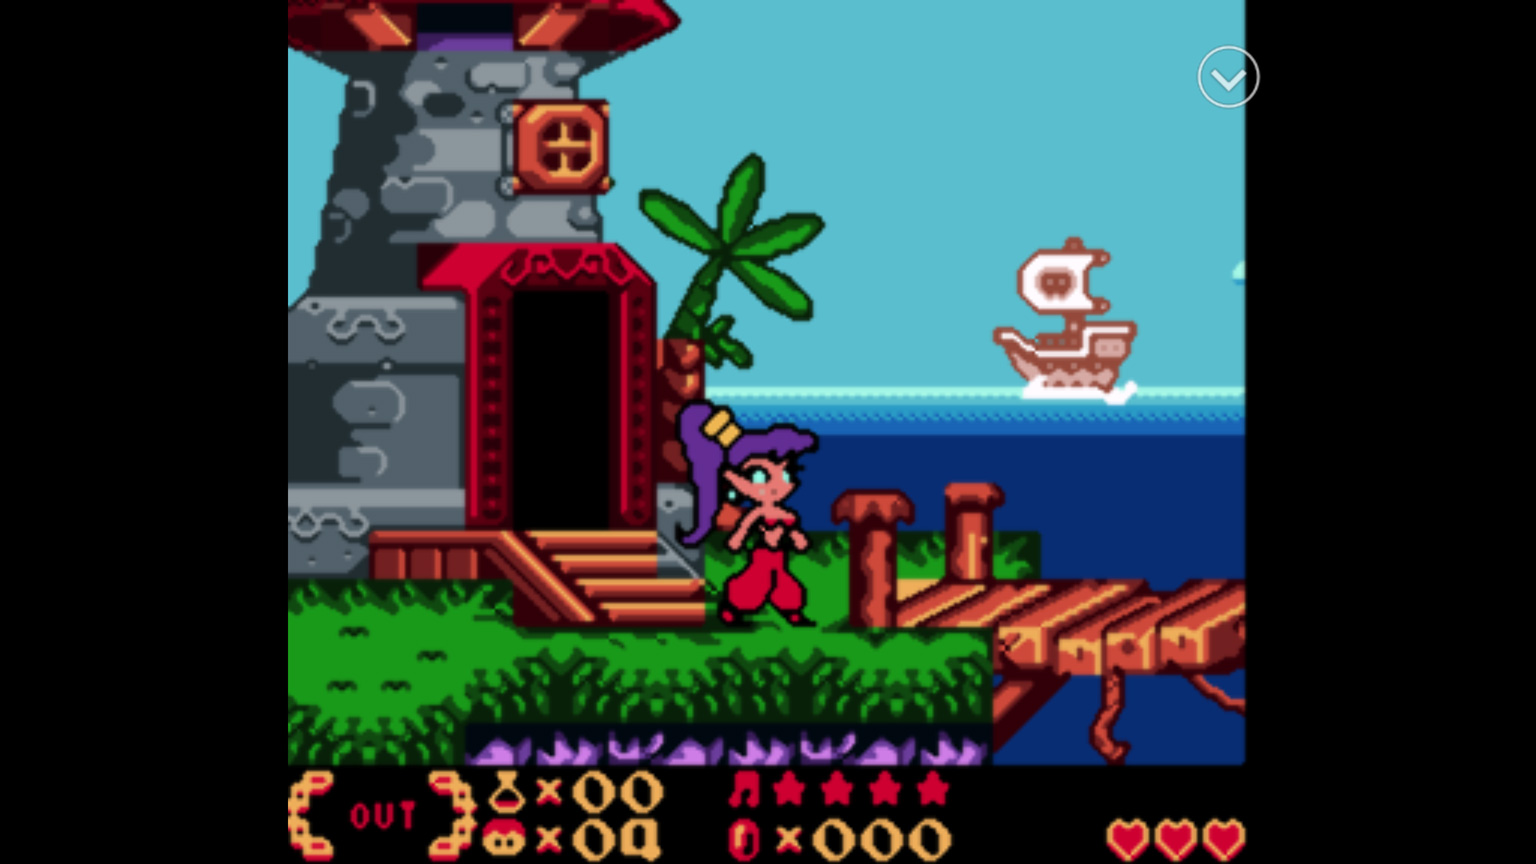
- hq4x: attempts to round pixels together without blurring. It's found in hqx > hq4x.glslp. If you feel that eagle (below) is too smooth/blurry, hq4x is a better choice. Here's a sample of it with Chrono Trigger (SNES) and Shantae (Game Boy Color):


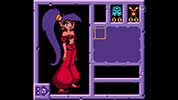
If your Android device is struggling a bit with the hq4x filter, try hq3x instead. Even further, hq2x would be ideal for really slow devices. - eagle: a classic shader that smears pixels together with a slight blur. It's found in eagle > super-eagle.glslp. If you feel that hq4x (above) is too sharp, eagle is a better choice. Here's a sample of it with Chrono Trigger (SNES) and Shantae (Game Boy Color):
You're previewing eagle with these large screenshots. Keep in mind it'll look sharper on the smaller screen of your smartphone.

Configuring a Bluetooth gamepad
Granted that your gamepad is paired with your Android device, RetroArch should auto-detect and pre-configure your gamepad. When a game is running, press a button on your gamepad and you should see a message pop-up on the lower-left saying that your gamepad is detected. If you want to change the button configuration, follow the directions below.
- Pair your gamepad with your Android device if you haven't already. I have directions for doing so in my Android Video Game Emulators tutorial.
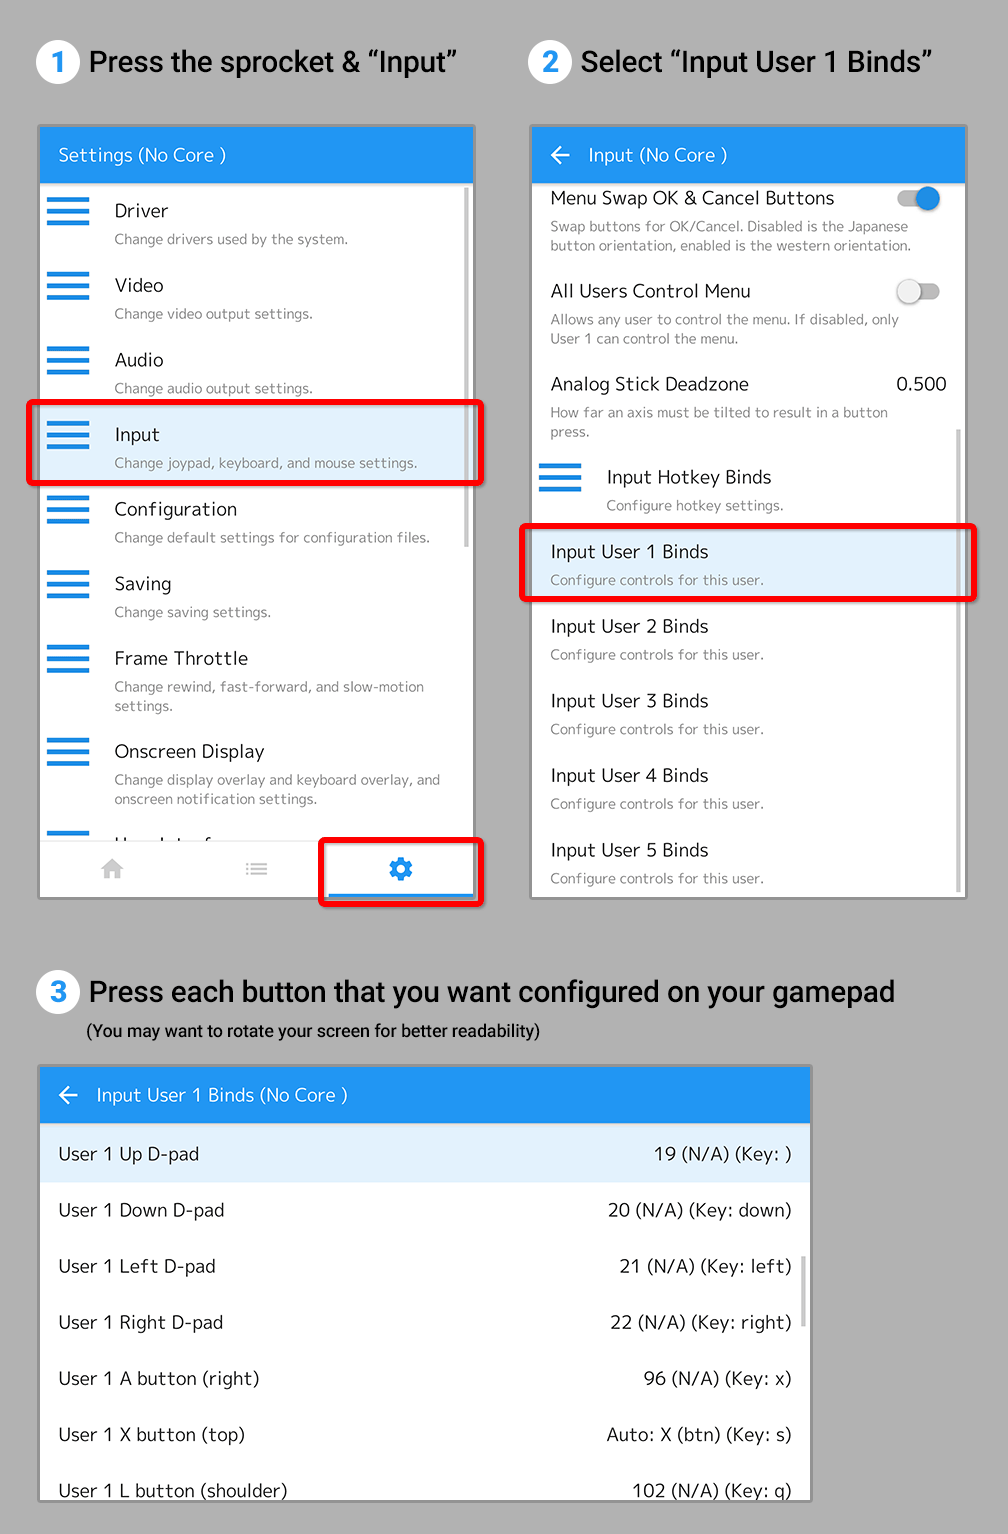
- Press the sprocket and select Input.
- Scroll down and select Input User 1 Binds.
- Scroll down and proceed to configure every button on your gamepad. Select the button you want to configure. When RetroArch prompts you for the new button, select the button on your gamepad you want it set to. This screen is easier to read if you rotate your smartphone.
Lastly, when a game is running, press the ![]() icon to hide the screen overlay.
icon to hide the screen overlay.
Save states
Save states is a feature that saves the exact spot you are in any game. You can recall your save state at any time. RetroArch allows you to save any amount of different saved states that you want.
When you reach a point in a game that you want to save a state, press ![]() for the quick menu and look for these options:
for the quick menu and look for these options:
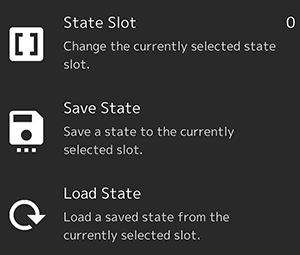
- Save State - Selecting Save State will save the exact spot that you are currently at in your game.
- Load State - Selecting Load State will load your saved state.
- State Slot - This allows you to select different slots so that you can have multiple save states. By default, this is set to slot 0. If you select it, it will increment to slot 1. If you keep selecting it, it will continue to increment (infinitely). There's no way to increment backward. However, if you press and hold it, it will reset back to slot 0.
Are you confused with how the slots work? I'll elaborate. Let's say the Save Slot is set to slot 0. You save a state at the beginning of level 5 in Super Mario Bros. Then you change the save slot to slot 1. Then you save a state at the beginning of level 7. Your save at level 5 is still preserved in slot 0, and you can access it when you change the save slot back to slot 0.
Capturing screenshots
During gameplay, press ![]() for the quick menu then scroll down to select Take Screenshot, which is this button:
for the quick menu then scroll down to select Take Screenshot, which is this button:
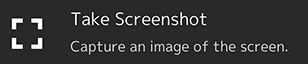
The screenshot will be captured with the shader; it won't be hard pixels like how most emulators capture screenshots. RetroArch will dump the screenshot as a PNG in its “screenshots” folder. This folder will immediately become visible in the Google Photos app along with your screenshot.
Using cheats
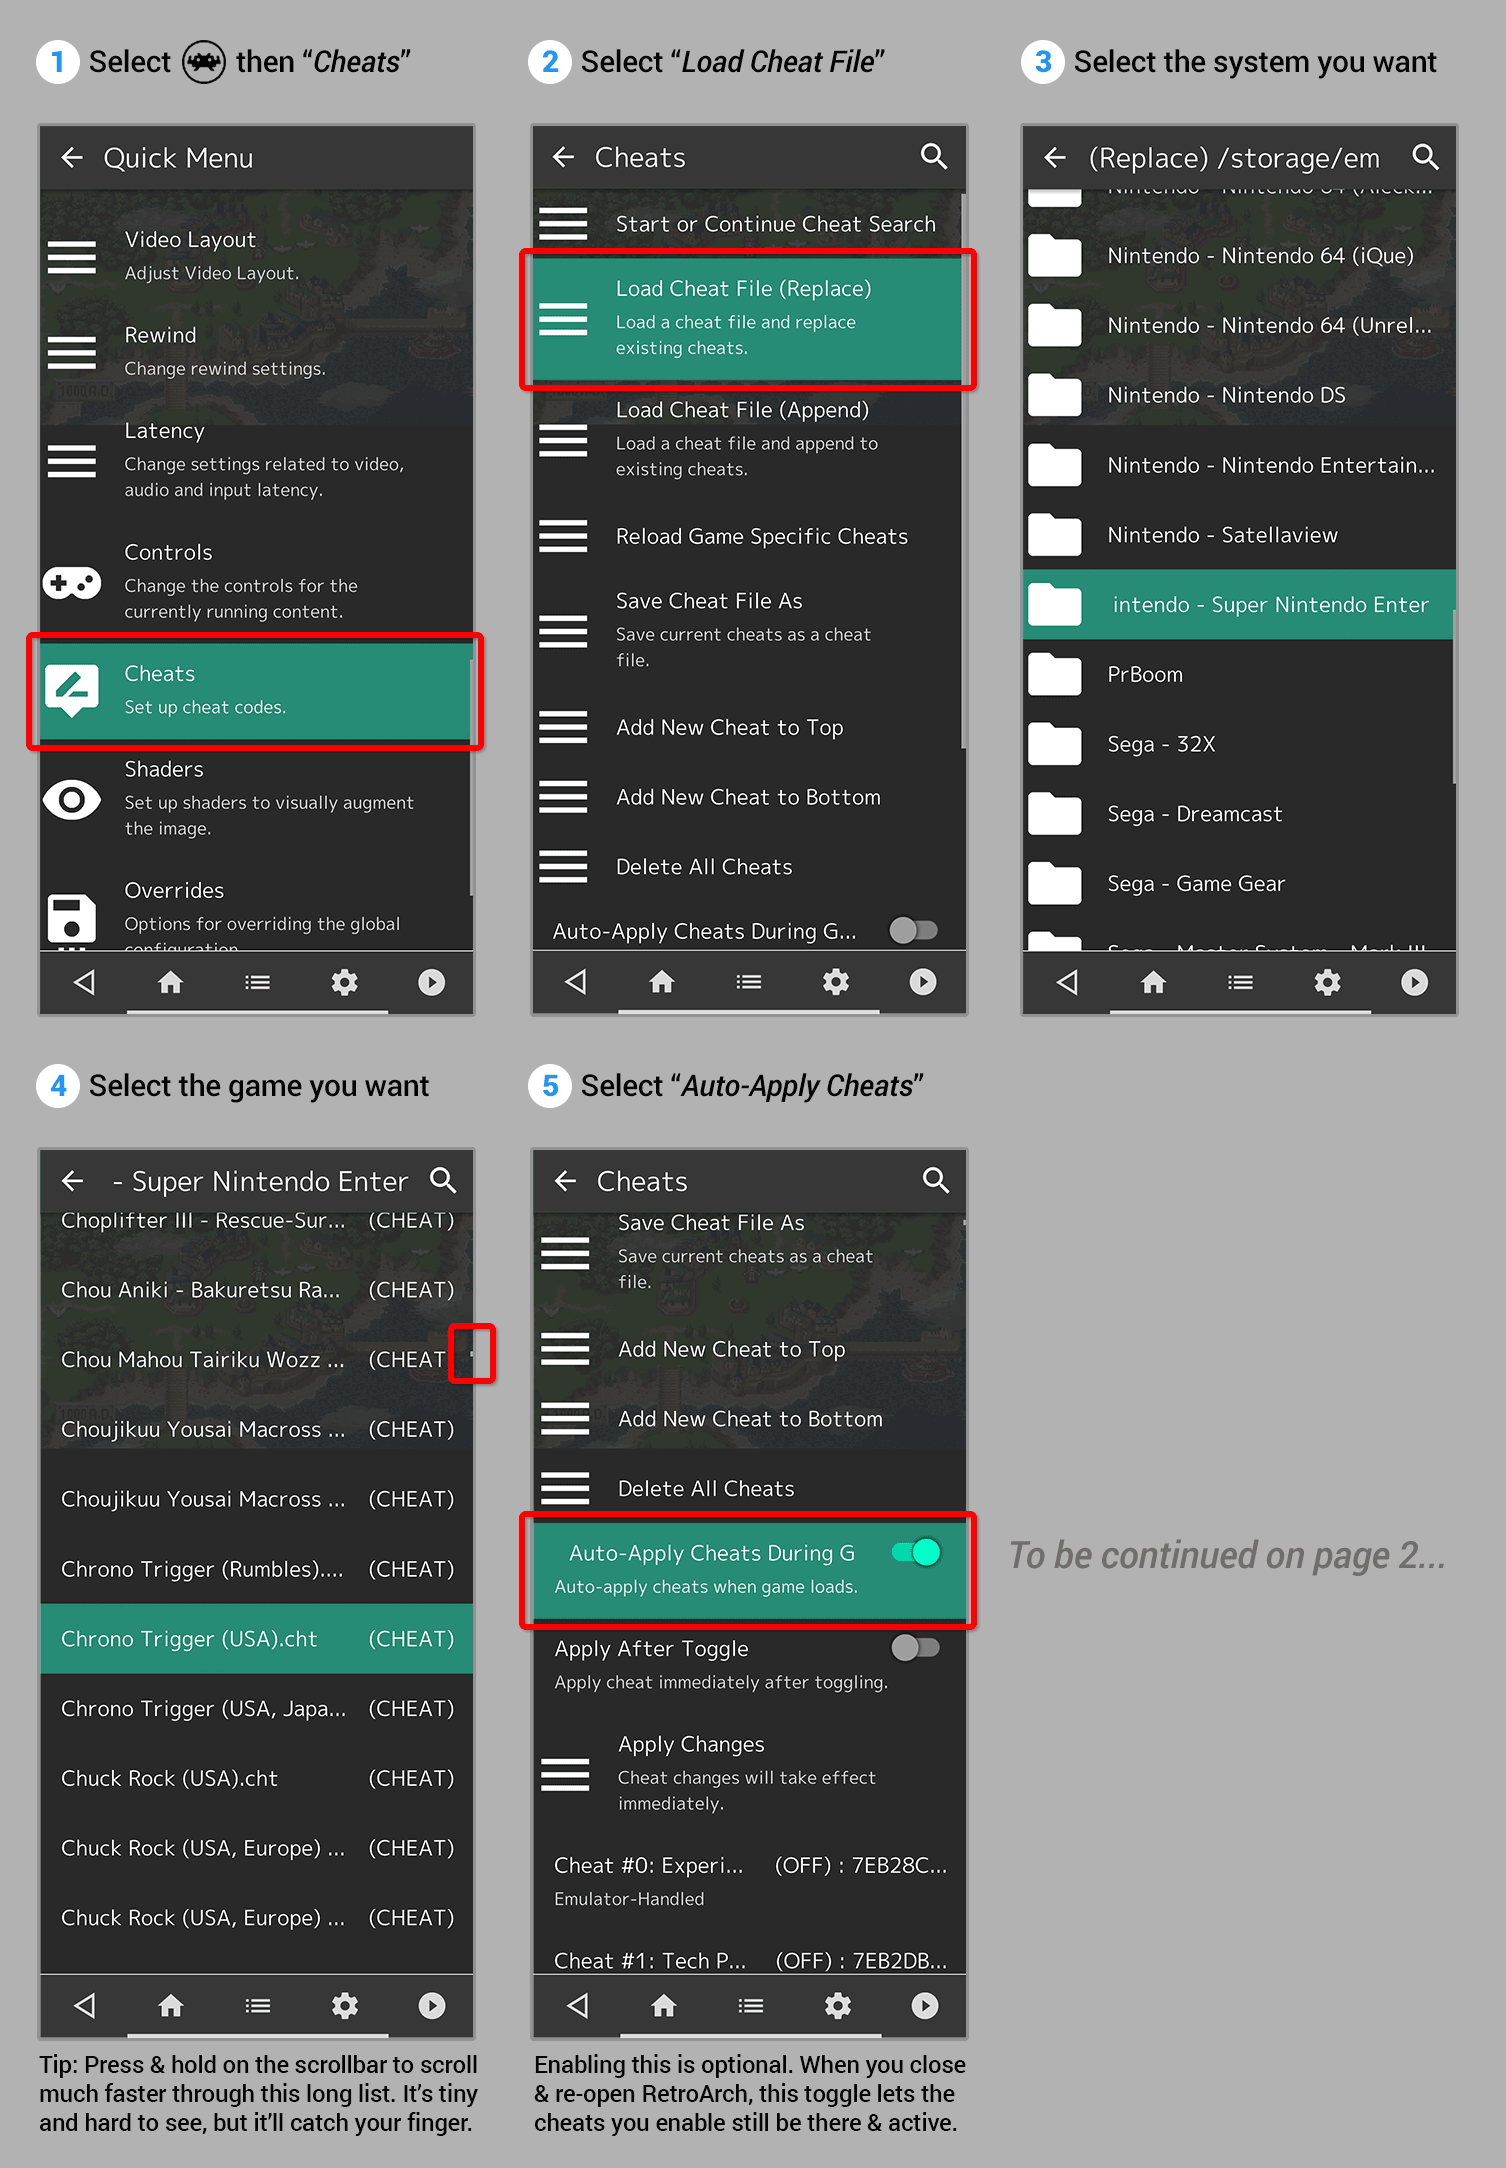
RetroArch has a massive collection of cheats available! Here's how to use them.
- Make sure you have the cheat files downloaded. Go to the Online Updater and select Update Cheats - as shown here .
-
Press
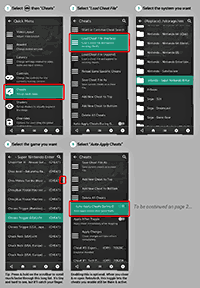 for the quick menu then Cheats > Load Cheat File (Replace).
 - You'll arrive at the cheats list. Select the video game system for your game and select your game.
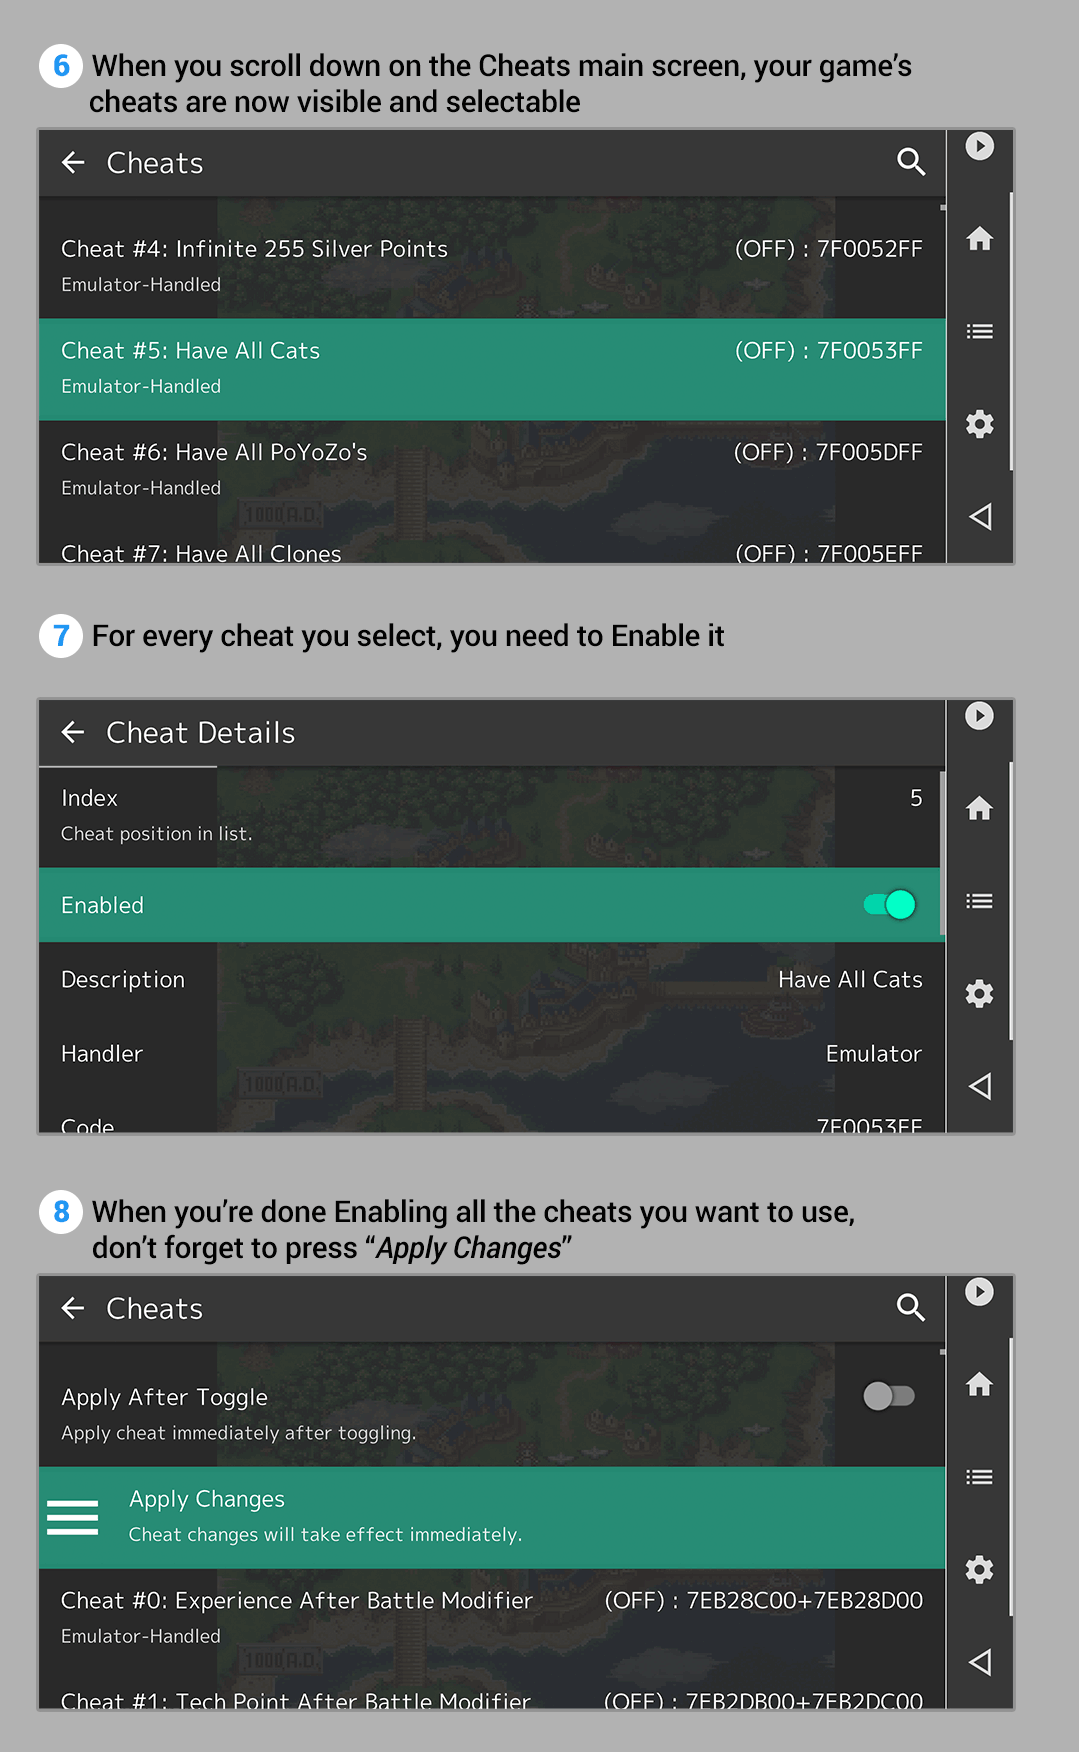
- RetroArch will take you back to the Cheats main screen. When you scroll down, the cheats for your game are now populated on this screen. Before you scroll all the way down, I recommend enabling Auto-Apply Cheats as you pass by it. That'll keep your cheats active after you close RetroAarch and re-open the game at a later time.
-
When you select a cheat you want to use, you need to select Enable.
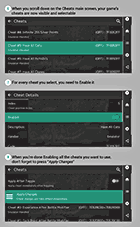
- When you're done enabling all the cheats you want to use, scroll up a little and press Apply Changes. Resume your game and enjoy the cheats :)
There's one caveat with using RetroArch's pre-downloaded cheats. They're hit or miss and may not work. These cheats are largely untested. You may have to add your own cheats. Read below to learn how.
Adding your own cheats
Adding your own cheats is a slightly involved process. You can't do it through RetroArch's GUI. You need to create a text file and add the cheats using RetroArch's format. There are several ways you can do this. I think my directions (below) covers the easiest and fastest way. My directions are assuming you've already followed the directions above and downloaded cheat files.
- Using a file manager app on your Android device, go to RetroArch folder then cheats. Grab a CHT file (doesn't matter which one) and share it to your preferred cloud. I recommend Dropbox or Google Drive.
- Download the CHT file to your PC. Open it in WordPad (not Notepad).
- The file will look something like this:
The format should be self-explanatory. At the top you put the number of cheats. Each cheat needs to be numbered in order, starting at 0. Most of RetroArch's codes are ProAction Replay. For the sake of these directions, I'm going to add some Game Genie codes. After editing the CHT file in WordPad, my finished CHT file looks like this:cheats = 2
cheat0_desc = "Unlimited Energy"
cheat0_code = "FF00F7:0003"
cheat0_enable = false
cheat1_desc = "Unlimited Lives"
cheat1_code = "FF00F8:0003"
cheat1_enable = false
Save the file. You should (but don't have to) change its filename to be consistent. For example, if the filename has “(Action Replay)”, change it to “(Game Genie)” if you added Game Genie codes.cheats = 3
cheat0_desc = "Infinite lives"
cheat0_code = "AX3A-AA2N"
cheat0_enable = false
cheat1_desc = "Invincible line 1"
cheat1_code = "98FA-298D"
cheat1_enable = false
cheat2_desc = "Invincible line 2"
cheat2_code = "AF75-7BC1"
cheat2_enable = false - Transfer the CHT file back to your Android device. Using a file manager app, move it to RetroArch > cheats. You can place the CHT file wherever you want in the cheats folder. It's probably best to place it in the root so that you don't have to browse through hundreds of files to find your custom CHT file.
- Following the directions in using cheats, use RetroArch to select your CHT file and turn on your cheats. And don't forget to apply them.
The Dig front-end
 Screenshots of Dig
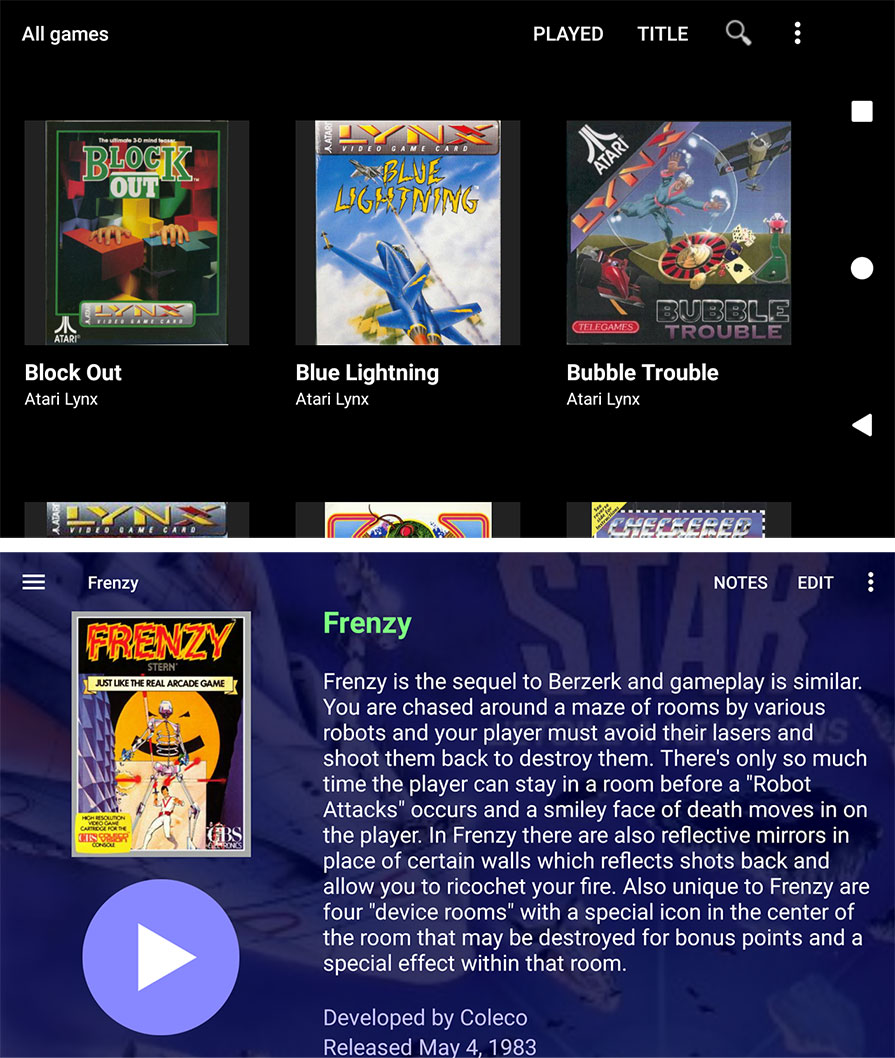
I talked about Dig in my Android emulators tutorial, and it's worth mentioning again here. The Dig emulator front-end is a really handy app! Let's say you already set up all of your emulators and ROMs on your Android device. It might be a bit tedious having to fuss through a collection of emulators and look for the ROM you want to play every single time. Dig optimizes your emulation experience by consolidating all of your games and emulators into a single, fun graphical interface!
Upon opening Dig for the first time, what it does is scan your Android device to collect the emulators you currently have installed and builds a database with all of your ROMs. Then Dig presents you with a graphical interface showing the box art for each one of your ROMs. Selecting a game takes you to a helpful profile with information about it. Pressing 'Play' immediately loads the game in your installed emulator. It's awesome!
Dig is especially helpful with RetroArch since it lacks an intuitive interface. Dig is also valuable for Chromebooks since RetroArch's interface isn't Chromebook friendly.
Q: Help! My game(s) failed to open!
You're going to encounter this sometimes. Games might fail to open or maybe they just give you an empty black screen. Here's some general troubleshooting you can try:
- If you're trying to play a CD-based game, make sure you have the BIOS setup properly.
- If the video game system you're using has more than one core, try running your game with those other cores. Check out the Online Updater.
- If you're good on the two bullets above, that could mean your ROM or ISO is being rejected by RetroArch. It's either corrupt or RetroArch just doesn't like it. Try downloading your game from another website.
Q: Help! Saving isn't working!
Some people are reporting that in-game saving isn't working or save states aren't working. I haven't been able to reproduce these saving issues on my phone, so I'm not sure if this is a RetroArch issue or an issue with your Android device. I don't have a definite fix to offer you, but I can give you some suggestions that may lead you in the right direction for a potential fix.
This issue is separated into two scenarios:
If internal saving isn't working
In 8-bit/16-bit games, internal saving is when you save at a save point in an RPG. And in the PS1/N64 generation, many games offer internal saving. Here's what you can try to (hopefully) resolve internal saving issues:
Troubleshooting Attempt #1: Rule out if this is a game-specific issue. Try different games and see if you're having internal saving problems with them.
Troubleshooting Attempt #2: Rule out if this is a core-specific issue. If the video game system in question has more than one core available, try its other cores to see if the internal saving issue persists.
Troubleshooting Workaround: You can forgo internal saving and just use save states.
If save states aren't working
I discuss how to use save states in this guide. Save states allow you to save at any point in any game. Here's what you can try to (hopefully) resolve issues with save states:
Troubleshooting Attempt #1: Rule out if this is a game-specific issue. Try different games and see if you're having issues with save states.
Troubleshooting Attempt #2: Rule out if this is a core-specific issue. If the video game system in question has more than one core available, try its other cores to see if the save state issue persists.
Troubleshooting Attempt #3: Rule out if this is a permissions issue. Using a file manager (such as Astro File Manager), navigate to RetroArch's “states” folder (not be confused with the “saves” folder) and ensure it has read/write permissions.
Troubleshooting Attempt #4: Are you using a micro SD card on your Android device? If you are, try using the internal memory instead.
Q: Help! Save states crash games!
You may encounter that loading a save state causes a game to be broken or crash. Here's what you can try to resolve or workaround this:
Troubleshooting Attempt #1: Rule out if this is a game-specific issue. Try different games and see if you're having crash issues with loading save states.
Troubleshooting Attempt #2: Rule out if this is a core-specific issue. If the video game system in question has more than one core available, try its other cores to see if the save state crashing persists.
Troubleshooting Tip: If this is a CD-based game (an ISO), avoid saving around animated cutscenes. This is a global issue with any emulator, not just RetroArch, to cause saving issues when you save right before or during a cutscene.
Troubleshooting Workaround: If the game offers in-game saving, try using that instead.
Finding ROMs
In my links page, I have some good links to sites where you can download ROMs and ISOs for classic video game systems.
Finding games for PS2/PS3/PSP/GameCube/Wii and beyond is trickier due to how large games are. These games are typically not available in ROM sites readily found on Google. However, Archive.org is a superb site where you can find these games for download. Navigating that site isn't easy. It's easier to search Google with such phrases as “archive.org playstation 2”. I offer some more help with that in this image .
Another way you can try to find large/newer games is through Reddit. The best way to find them is by searching Google with such phrases as “reddit download playstation 2”.